For merchants who wish to enable their customers to make secure payments from a Salesforce Experience Cloud Site (formerly known as a Salesforce Community), we’ve developed the Take Payment Lightning Web Component. This self-service payment option allows your customers to track upcoming payments, make a payment, save their card or bank account information, and reuse existing card or bank account information.
Add the Take Payment component to your Salesforce Experience Cloud site to start accepting payments from your Experience Cloud users with minimal effort and time.
This page provides step-by-step instructions for implementing Chargent’s Take Payment component for your authenticated Experience Cloud users, with a focus on ease of setup and maintenance. This involves placing the component directly on an Experience Cloud Detail Page. For additional use cases, see the following guides:
Take Payments in Experience Cloud Using Flow: If you want to take payments from an Experience Cloud page that is not a Detail Page, or add additional customization and automation to your payment process with Salesforce Flow.
Before implementing the Take Payment component, you must first assign the appropriate licenses and permissions. Consideration should be given to internal users, such as your Salesforce Administrator(s) and users who will access Chargent records, as well as external Experience Cloud users who will utilize the Take Payment component to make payments.
In a production or developer org, all Chargent users, whether internal or external, must be assigned Chargent licenses. This includes your Experience Cloud users.
Merchants with numerous community users are encouraged to sign up for Chargent’s usage-based pricing model, in which case Chargent licenses are not required (contact sales for more information).
Licenses are not required in scratch or sandbox Salesforce orgs.
If you plan to add the Take Payment component to a Detail Page other than the Chargent Order Detail Page, ensure the object for the page includes the following fields:
A lookup field to the Chargent Order object
A currency field to reflect the payment amount
You do not need to create the fields above when the Take Payment component is added to the Chargent Order Detail Page. Learn more about creating custom fields by visiting Create a Custom Field.
Activate Payment Methods
One of the key features of the Take Payment component is that it enables your customers to store and reuse their payment details. This option is only available if you have enabled the Payment Methods feature, which may already be activated in your org. Payment Methods is automatically activated for all new customers. For more information, see Setting Up Payment Methods.
As mentioned earlier in this guide, these instructions represent the most common implementation of the Take Payment component. This involves placing the component directly on your Experience Cloud Detail Page. This method is designed for simplicity and is exclusively for authenticated Experience Cloud users. Please refer to the alternative use cases outlined in Determine Your Use Case.
Add the Take Payment Component to Your Experience Cloud Detail Page
First, add the Take Payment component to the Experience Cloud Detail Page of your choice. To get started, visit the Experience Builder and add the component to the desired Detail Page.
Click the gear icon and select Setup.
Using Quick Find, search for and select “All Sites”.
Find your Experience Cloud site in the list and click Builder.
Click the dropdown in the top left (initially set to “Home”)
Click the right-facing arrow next to your preferred object to display the available pages.
If a page is not present for the object you wish to use, click + New Page.
Click Object Pages.
Select your preferred object from the list.
Click Create.
Click the page labeled [Object Name] Detail.
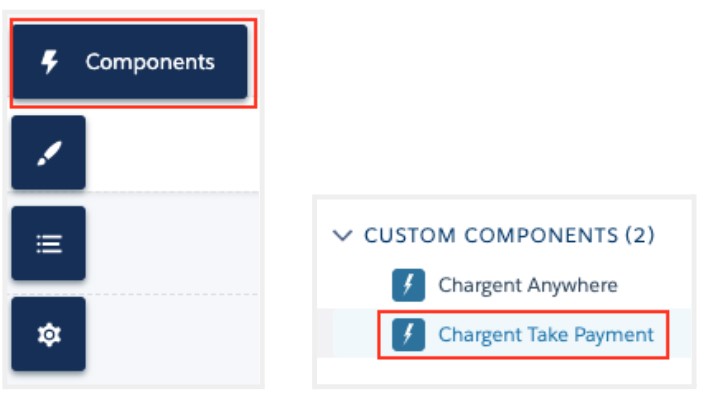
Click the Components Icon and scroll down to the “Custom Components” section.
Drag the “Chargent Take Payment” component onto your Detail Page.
Tips: The following tips can help you understand a few common issues that may occur when adding the Take Payment component to your Experience Cloud Detail Page:
We do not recommend adding the component to smaller, narrow sections, such as headers and footers.
Upon dragging the component to a Communities page, you may see an error stating that “We couldn’t load that component.” This will resolve once you have properly configured the component via the steps below.
Configure the Take Payment Component
Now that the Take Payment component has been added to your Experience Cloud Detail Page, you will need to configure it before it can be used.
In the Experience Builder, visit the page where you’ve added the Take Payment component.
Click the component to display the configuration panel to the right.
Refer to the descriptions for each configuration option listed below.
Important: There are two use cases to consider when configuring the Take Payment component directly in the Experience Builder:
The component was added to the Chargent Order Detail Page.
The component was added to any other object’s Detail Page.
We’ve added appropriate field values for both use cases below. For field values applicable when using Take Payment in a flow, see Take Payment in Experience Cloud Using Flow.
Payment Form Title*
Enter the title for the component. This is displayed in the payform header.
Include Email Address Field
Check the checkbox to display the Email field on the payform and capture the payee’s email address.
Include Country Field
Check the checkbox to display the Country field on the payform and capture the payee’s billing country.
Gateway ID*
The gateway record ID. Found by visiting the gateway record and copying the 18-character value from your web browser’s URL.
If an invalid value is input, you will receive an error: “Error: Invalid id”
Charge Amount Field API Name*
Enter the API name of a currency field that represents the amount to be paid.
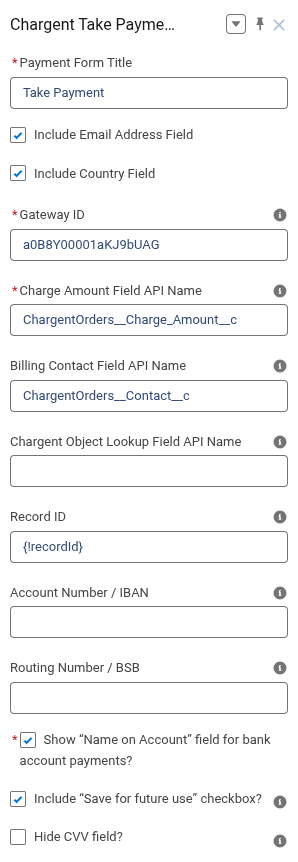
If the component is placed on the Chargent Order Detail Page, the API name is ChargentOrders__Charge_Amount__c.
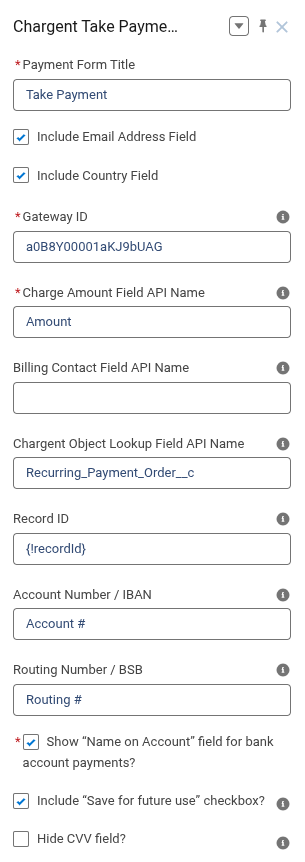
If the component is placed on any other object’s Detail Page, you must either create a custom currency field or use an existing one. To find the API name of the field, visit Setup > Object Manager > [Your Object] > Fields & Relationships. Find your currency field and copy the value in the “Field Name” column.
If an invalid value is input, you will receive an error: “Error: Please enter a valid currency field into the ‘Charge Amount Field API Name’ field.”
Billing Contact Field API Name
Enter the API name for the contact lookup field of the payee. If provided, the billing address fields will be auto-populated by default, allowing the payee to change them if necessary. If left blank, the payee will be prompted to enter the data manually.
If the component is placed on the Chargent Order Detail Page, the API name is ChargentOrders__Contact__c.
If the component is placed on any other object’s Detail Page, you must either create a custom Contact lookup field or use an existing one. To find the API name of the field, visit Setup > Object Manager > [Your Object] > Fields & Relationships. Find your currency field and copy the value in the “Field Name” column.
Chargent Object Lookup Field API Name
Enter the API name of the Chargent Order lookup field.
If the component is placed on the Chargent Order Detail Page, the API name should be left blank. In this case, Take Payment transactions created from a Chargent Order record will be related to that record.
If the component is placed on any other object’s Detail Page, you must either create a custom Chargent Order lookup field or use an existing one. To find the API name of the field, visit Setup > Object Manager > [Your Object] > Fields & Relationships. Find your Chargent Order lookup field and copy the value in the “Field Name” column. Take Payment transactions created from this object will create a new Chargent Order record.
Record ID
References the ID of the Detail Page’s record. It is automatically populated with {!recordId} and should not be changed when configuring the Take Payment component directly in the Experience Builder.
Account Number/IBAN
Enter the label for the Bank Account Number. If left blank, the value will be “Account Number”.
Routing Number/BSB
Enter the label for the Bank Routing Number. If left blank, the value will be “Routing Number”.
Show “Name on Account” field for bank account payments?
Check the checkbox to display the Name on Account field on the payform and capture the payee’s name for bank account payments.
Include “Save for future use” checkbox?
Check the checkbox to allow authenticated users to associate payment method details with their user, enabling Chargent to display them to the payee on future purchases.
Check this checkbox to hide the CVV field on the payform, in which case the CVV will not be captured for credit card payments.
* indicates a required field
Click Preview to review your work.
Click Publish to make this change available to community members.
Configuration Examples
We’ve provided two examples below showing various ways the Take Payment component might be configured. Note the difference between the values entered when the component is placed on the Chargent Order Detail Page versus the Opportunity Detail Page (representative of any custom or standard Salesforce object).
Configuration on the Chargent Order Detail Page
Configuration on the Opportunity Detail Page
Additional Configuration Options
The Take Payment component’s behavior also adheres to the rules and restrictions outlined in your gateway’s configuration, including the payment methods permitted, card types accepted, and CVV requirements. For more information, see Gateway Setup Wizard.
After you’ve set up the Take Payment component, Experience Cloud users can log in and submit payments.
If the user does not own any Chargent Payment Method records, they will be directed to the payment screen where they can input their payment information. See Create a New Payment Method.
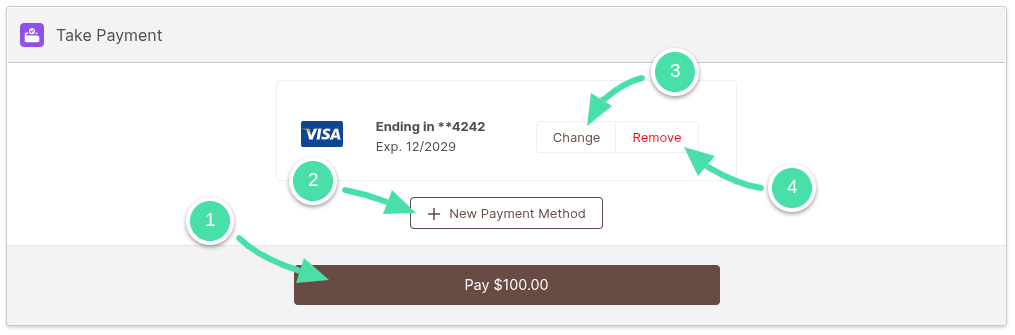
If the user owns one or more Chargent Payment Method records, they will have four options:
Note: The Take Payment component is compatible with credit card surcharging. If you’ve enabled surcharging for your gateway record, the steps below will differ slightly. To learn more, visit Surcharging With Take Payment in Your Salesforce Community.
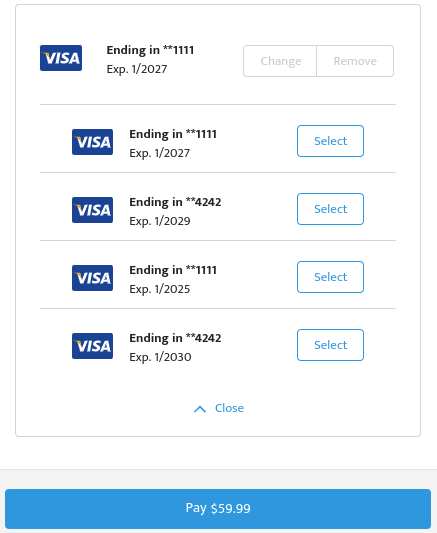
Use the Preselected Payment Method
If the user owns one or more Chargent Payment Method records, the last Payment Method used will be preselected for use in the Take Payment component. The Pay button will reflect the amount to be paid, determined by the Charge Amount Field API Name set in the Take Payment Configuration.
Click the Pay button to use the preselected Payment Method and make a payment quickly.
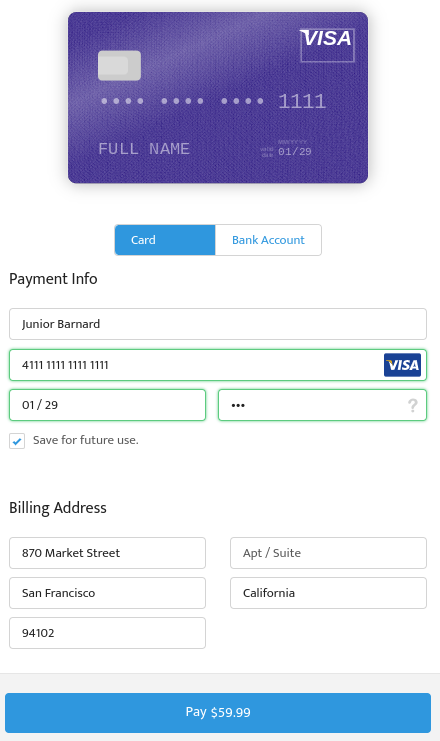
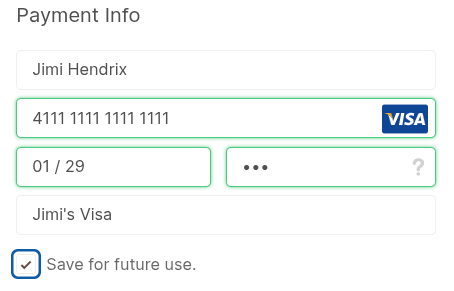
Create a New Payment Method
When an Experience Cloud user attempts to make their first payment, they will not yet have any saved Payment Methods and must enter their payment information.
Alternatively, if your authenticated Experience Cloud user owns existing Payment Methods records but wants to use a new one, they can create a new one by clicking + New Payment Method. Chargent then displays a prompt to enter billing information.
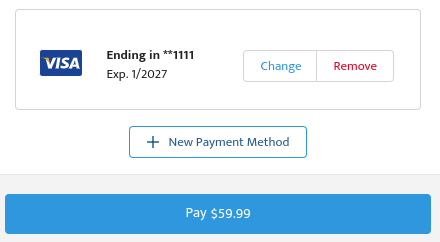
Change the Payment Method
If an Experience Cloud user owns more than one Payment Method record, they can select a different Payment Method by following these steps:
Click Change to choose a different Payment Method.
Click Select to choose a Payment Method.
Click Pay to complete the payment.
The Pay button will reflect the amount to be paid, determined by the Charge Amount Field API Name set in the Take Payment Configuration.
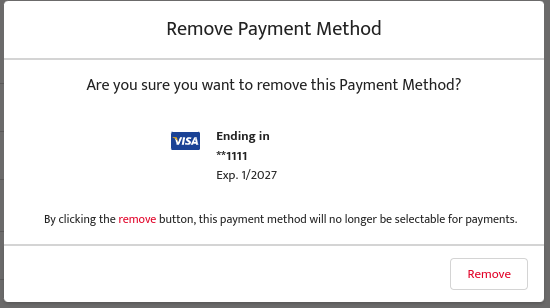
Remove a Payment Method
A payment method is only visible to your authenticated community user when they own the record in Salesforce. When an Experience Cloud user clicks Remove, the payment method is not deleted; however, it is no longer owned by the community user and is no longer visible to them in the Take Payment component.
Note: Chargent Payment Method records can only be deleted by internal users with ‘Chargent Admin User’ permissions. This protects your payment audit trail by preserving a historical record of payment methods. For more information about Chargent’s permissions, visit Assigning Chargent Permissions.
Understanding the Save for future use Checkbox
This checkbox is only available after Payment Methods is set up in your org. When customers enter new payment details using the Take Payment component, a payment method is created. If an authenticated community user selects the Save for future use checkbox, that user becomes the owner of the payment method, making that payment method available to that user for future payments.
The ownership of the payment method record determines whether or not the authenticated community user will see the payment method in the Take Payment component.
Change Payment Method Ownership
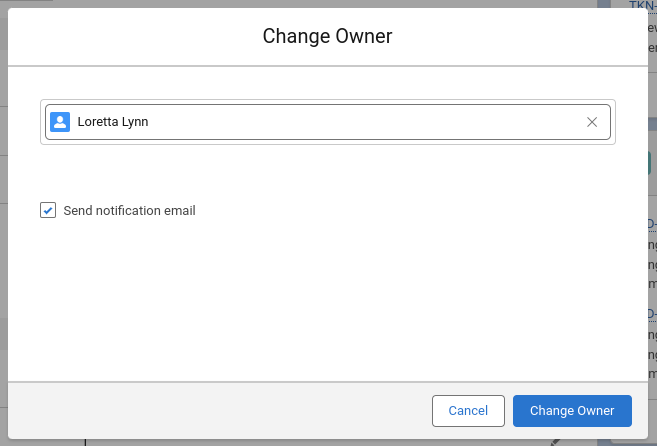
If a community user accidentally removes a payment method, or if you want to expose an existing Payment Method to a community user for use in the Take Payment component, an internal Chargent user can navigate to the payment method record and change the record owner to the desired community user.
Navigate to the Chargent Payment Method record.
Under System Information, click the person icon to the right of Owner.
Select the down arrow and click Customer Portal Users.
Test Your Component: Now that your Take Payment Flow is up and running, we recommend testing it by logging in as an Experience Cloud user and creating test transactions. For more information about testing in general, see Testing Chargent.
For Developers: Learn about how the Payment Completion Event allows you to identify when a payment attempt has been completed using the Take Payment component.
 and select Setup.
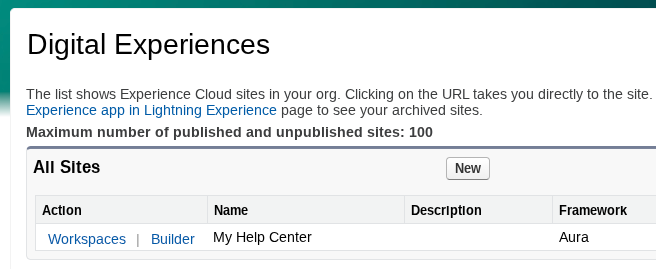


 to the right of Owner.