Chargent’s Payment Request feature allows you to create your payment site pages in one of two ways:
- Use the Payment Request default page layout (recommended)
- Use custom Developer Pages (for additional customization)
Developer Pages enable the use of existing or new Visualforce Pages in place of the out-of-the-box Payment Request default page layout. This allows you to incorporate custom code or functionality into your Payment Requests. This page outlines the steps for creating and using Developer Pages for Payment Request.
Developer Pages is a pro-code solution recommended only for experienced Salesforce developers. If you need assistance with developer code or advanced Chargent customization, please see Does Chargent support custom code?
Before You Begin #
This page assumes familiarity with the information in the following links:
Follow the instructions in Setting Up Payment Request to create your Payment Request Site and Payment Request Template.
If you are updating from a Chargent version below v5.84 and have pre-existing Payment Request Developer Pages, see How do I update legacy Payment Request Developer Pages?
Example Developer Page Code #
For a quick starting point, see the code below. Note that this code includes only our chagentPaymentRequest component and nothing else. You can place this component in any section, table, or other area, and it will expand to fill the available space. You can customize this code to include your branding, layout, tracking pixels, and other elements.
| <apex:page showHeader=”false” standardStylesheets=”true” id=”PaymentRequest” cache=”false”> <apex:includeLightning /> <apex:slds /> <script type=”text/javascript”> $Lightning.use(“ChargentBase:ChargentTakePaymentApp”, function () { $Lightning.createComponent( “ChargentBase:chargentPaymentRequest”, { ‘formName’: ‘Pay Request’, ‘showCountryField’: true, ‘showEmailField’: true, ‘req’: ‘{!$CurrentPage.parameters.req}’ }, “container”, function (cmp) { } ); }); </script> <div id=”container”></div> </apex:page> |
Configure the Payform #
The component you place on your page has several parameters that are used to render it properly.
| Parameter | Type | Required | Description |
| req | String | YES | Must be set to: ‘{!$CurrentPage.parameters.req}’ DO NOT set to anything else. |
| formName | String | NO | The header that will be displayed with the payment request form. |
| hideEmailField | Boolean | NO | Defaults to false. Set to true if you do not wish to display the email address field on the payment form. |
| hideCountryField | Boolean | NO | Defaults to false. Set to true if you do not wish to display the country field on the payment form. |
| failPage | String | NO | If using custom pages, set this to the name of the Visualforce page you wish to display to the user for a failed transaction. |
| successPage | String | NO | If using custom pages, set this to the name of the Visualforce page you wish to display to the user for a successful transaction. |
| cancelPage | String | NO | If using custom pages, set this to the name of the Visualforce page you wish to display to the user if they click cancel on the payment request page. |
Set Custom Result Pages #
If you want to include custom success, cancel, or fail pages, as noted in the configuration parameters above, you can include them by following these steps. Assume you have created custom Visualforce pages named:
- Fail_Page
- Success_Page
- Cancel_Page
Specify these pages in the component as follows:
| <script type=”text/javascript”> $Lightning.use(“ChargentBase:ChargentTakePaymentApp”, function () { $Lightning.createComponent( “ChargentBase:chargentPaymentRequest”, { ‘formName’: ‘Pay Request Form’, ‘req’: ‘{!$CurrentPage.parameters.req}’, ‘failPage’: ‘Fail_Page’, ‘successPage’ : ‘Success_Page’, ‘cancelPage’ : ‘Cancel_Page’ }, “container”, function (cmp) {} ); }); </script> <div id=”container”></div> |
Update Your Payment Request Site #
Follow these steps to update your Payment Request Site’s Visualforce page:
- Navigate to Setup > Sites & Domains > Sites.
- Click Edit next to the Site that your Payment Request configuration is using.
- Click the Search icon next to the “Activate Site Home Page” field.
- Select the Visualforce page you customized for the Payment Request.
- Click Save.
NOTE: These steps describe the most direct implementation of using the custom page you’ve created: adding it as the Active Site Homepage. However, when using custom pages, the payment request link will navigate the user to the Active Site Home Page for the specified site. Where you add your custom page to your site depends on your specific implementation requirements. The two options are:
- Active Site Homepage: Placing your custom page here means that anyone who accesses the site URL will be presented with your custom Payment Request page.
- Available Visualforce Pages: Placing your custom page here will require that your active site homepage is coded to serve up the correct page. This is useful if you are using your site for multiple purposes or want to present another page prior to the Payment Request.
Configure the Payment Request Template #
Now that you’ve edited your Site to point to your custom Visualforce page, it’s time to toggle the “Developer” setting to Enabled in the Payment Request Setup Wizard.
Payment Request functionality is enabled when a Payment Request Template is configured. The Payment Request Template includes an option to toggle the ability to switch between the default page layout and your custom Visualforce pages.
Enable your custom Visualforce pages by following these steps:
- Click the App Launcher icon
 at the top-left of your screen
 - Search for and select the Chargent app.
- Click the Chargent Settings tab.
- Click the Payment Request subtab.
- Either create a new Payment Request template or select an existing template from the left sidebar.
- Visit Configure Payment Request Templates for configuration instructions.
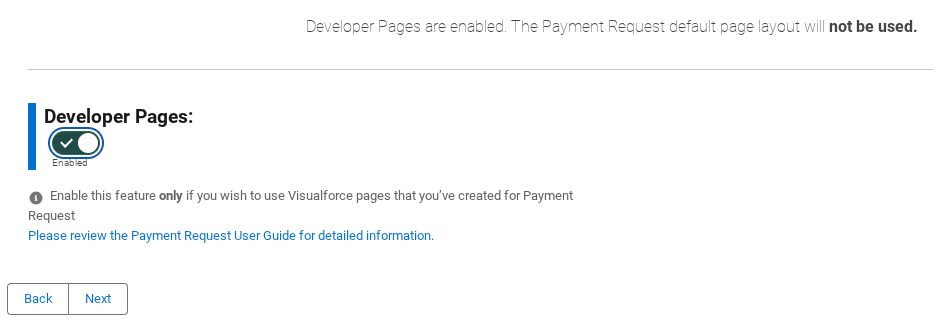
- On the screen containing Step 5, enable the toggle labeled Developer Pages.
- Complete the remaining steps and click Save.
Your custom pages are now ready for testing. Create a new Payment Request record and follow the Payment Link to view and test your custom page.
Adyen Payment Gateway Requirement #
Adyen customers using SCA and Payment Request Developer Pages must add the following parameters for the redirect to the Payment Request form to function correctly.
| ‘cres’: ‘{\!JSENCODE($CurrentPage.parameters.cres)}’, ‘MD’: ‘{\!JSENCODE($[CurrentPage.parameters.MD|http://CurrentPage.parameters.MD])}’, ‘PaRes’: ‘{\!JSENCODE($CurrentPage.parameters.PaRes)}’ |
Note: The <div> with the id of “container” is where the platform will render the component. The script block can be placed anywhere on the page but typically is placed near this div.
See Also
Chargent for Developers
Setting Up Chargent Anywhere
Setting Up Payment Request

