Chargent Terminal is a separate app from our standard Chargent package, allowing you to process payments through Salesforce with a physical terminal. Both are sold individually and work separately from each other but can be integrated to work together. This guide provides step-by-step instructions to guide you through the installation and configuration process.
What is Chargent Terminal?
With Chargent Terminal, you can reduce your payment processing fees, take payments on the spot, and reduce the scope of your PCI compliance, all within Salesforce.
Chargent Terminal lets you take card-present (CP) transactions initiated from Salesforce. These transaction requests are sent to a physical point-of-sale (PoS) device, also known as a terminal, and processed securely by your payment processor. The purpose of a terminal is to verify that the transaction is being conducted with an authentic credit card presented by the card’s genuine owner. A record of all transactions is stored in Salesforce, allowing you to track all your payment data in one place.
Before You Begin #
Before you start implementing Chargent Terminal in your org, consider the following supported terminals and processors.
Supported Terminals
AppFrontier supports the GoDaddy Poynt Smart Terminal, Poynt 5, Newland N910, and Poynt Smart Terminal Flex, enabling seamless connection to Salesforce for POS and Salesforce integration. To learn more about Poynt’s terminals, check out GoDaddy Poynt Smart Terminals.

Supported Payment Processors
A payment processor is the entity responsible for moving money from the customer account to the merchant account. Your physical Poynt terminal communicates with your payment processor when you generate transactions in Chargent Terminal. New customers will work with Poynt to determine their processor.
For customers on our legacy terminal process (leasing terminals directly from AppFrontier), we are currently unable to obtain terminals for processors other than TSYS.
Installing & Configuring Chargent Terminal #
Installing Chargent Terminal
First, install the Chargent Terminal package into your Production or Sandbox Org. Installation is easy using the Package Installation Manager (PIM). We always recommend installing and testing Chargent Terminal in a Sandbox org before installing in Production.
- Visit the Package Installation Manager (PIM).
- Click either Login to Sandbox or Login to Production, depending on your environment.
- Click Allow to grant access and install Chargent Terminal.
- Click Terminal to install or update Chargent Terminal.
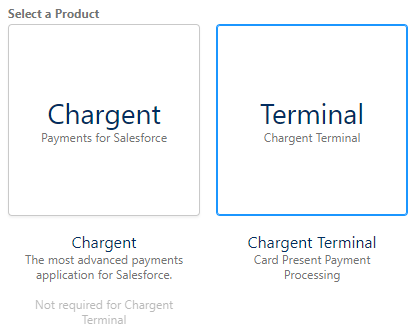
Note: The Chargent package is not required to use Chargent Terminal. If are interested in learning more about the Chargent package, see Chargent Payments for Salesforce.
It will take a few minutes to complete the installation. We recommend that you refrain from navigating away from the PIM webpage during installation. Some browsers include a memory mode that may interrupt your installation.
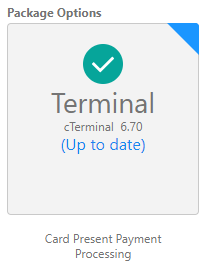
Once you have installed Chargent Terminal, you will see Terminal checked with a checkmark, indicating that the package has been installed and is up to date.
License Assignment
Now that you’ve installed Chargent Terminal, the next step is to assign licenses. Licenses only need to be assigned in Production. They don’t need to be assigned in your Salesforce Sandbox.
To assign licenses, follow these steps:
- Click on the Gear Icon
 and click Setup.
 - In Quick Find, search for and click Installed Packages.
- Click Manage Licenses to the left of Chargent Terminal, as shown below.

Note: You may be in a sandbox environment if you do not see a Manage Licenses link.
- Click Add Users and select the checkbox next to those requiring access to Chargent Terminal.
- Click Add.
Permission Sets
Chargent Terminal Permission Sets are assigned using the Chargent Terminal Setup Wizard (covered in the next section). There are three Permission Sets related to Chargent Terminal.
- Terminal Admin – Assign to all users who will be administering Chargent Terminal. Includes the ability to assign permissions and administrate the Chargent Terminal app in Salesforce.
- Terminal User – Assign to all other users who will be interacting with Chargent Terminal. Includes access to reset the terminal connection and visibility to the terminal history.
- Terminal Unlinked Payments – Assign to all users who will be interacting with Unlinked Payments. Includes the ability to view and assign Chargent Terminal Unlinked Payments. For more information, see the Unlinked Payments section of this guide.
Chargent Terminal Setup Wizard
Once Chargent Terminal is installed in your Salesforce Org and you have assigned licenses, you must configure your Salesforce Org to connect with your terminal.
- Click the AppLauncher
 and select the Chargent Terminal app
 - Click the Terminal Configuration tab
- Select Setup Wizard from the menu
- Follow the step-by-step wizard to configure your terminal(s) in Salesforce:
- Add Remote Site
- Add Permissions
- Terminal Admin
- Terminal User
- Terminal Unlinked Payments
- Business Authorization: Authenticate with Poynt HQ and select the Store(s) that will be associated with this Salesforce Org.
- Push Topic: This enables the Salesforce Streaming API to send details to the terminal.
- Click Finish
Assign a Default Terminal
If multiple terminals are used for different areas of your business, you can set the default terminal for the user you are currently logged in as.
- Click the AppLauncher and select the Chargent Terminal app
- Click the Terminal Configuration tab
- Select User Terminal from the menu.
- From the drop-down menu, select the correct terminal as the default.
- Click Save Default Choice
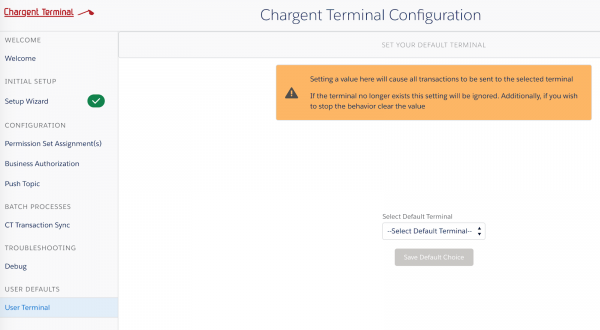
All transactions sent from this Salesforce user will now be sent to the terminal you set as the default.
Add the Chargent Terminal Component
Chargent Terminal was written to work with your existing lightning pages on any object in Salesforce!
- Click the gear icon on an object record page of your choice, click Edit Page
- From the left side, under Custom – Managed, drag Chargent Terminal onto the Page.
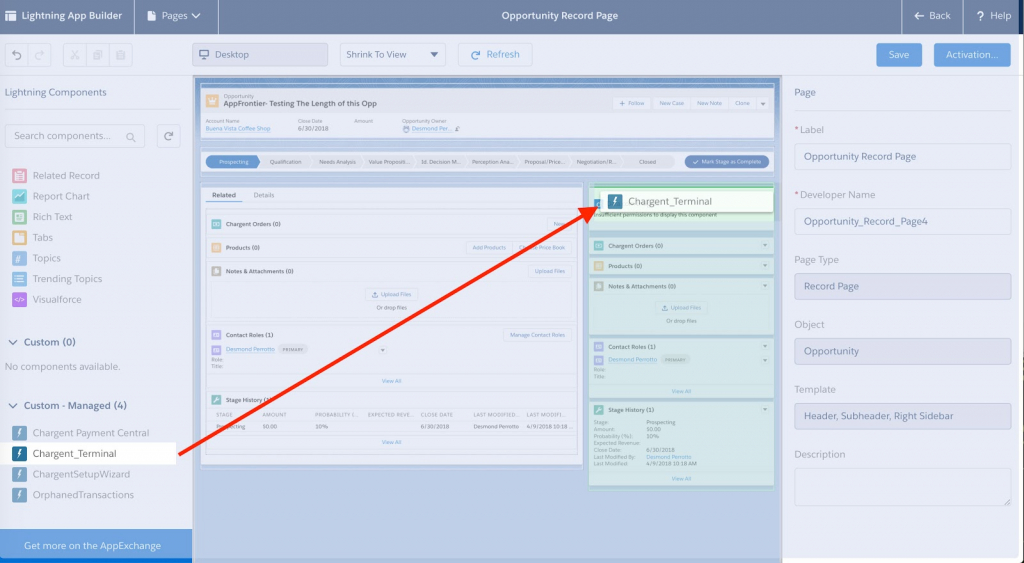
- Click Save
- Activate the page (if prompted)
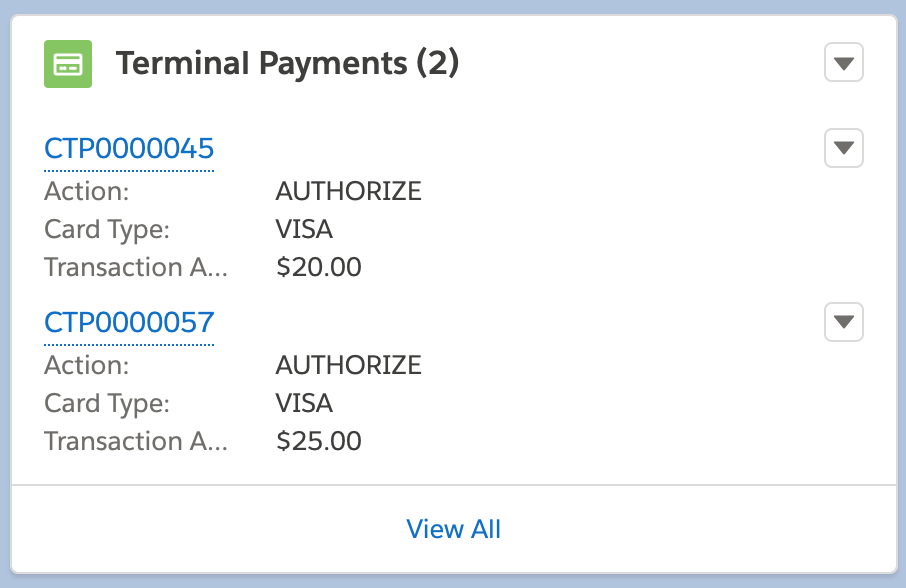
Using the Terminal Payments Object #
There is an object that comes with the installation of Chargent Terminal called ‘Terminal Payments’. All transactions processed in your Poynt HQ account, including those from the terminal, are represented in Salesforce as a Terminal Payment record.
Terminal Payment Actions
The app will only show actions that are valid for the specific Terminal Payment record. When there are no actions displayed, this means that there are no actions allowed on the Terminal Payment record.
From the Terminal Payment record, users may:
- Void the Transaction – Available when the charge is still in an ‘Authorize’ status and removes the charge from the customer’s credit card.
- Capture the Transaction – Used when you want to Capture the amount immediately or capture an amount different than what was originally authorized (an example would be tips or concession fees).
- Refund the Transaction – Refunds are used for charges that have already been captured. Refunding the charge adds the funds back to the customer’s credit card. You can refund the full amount or a portion of the transaction.
Processing Payments with Chargent Terminal #
From the Chargent Terminal Lightning Component, you can charge the balance due or a lower amount.
- Enter the amount you want to charge and click Charge with Terminal. This will send the transaction to the Terminal for the transaction to be completed.

- The customer will be prompted to do the following:
- Tap a card/phone or insert a card to be charged
- Add their signature on the screen
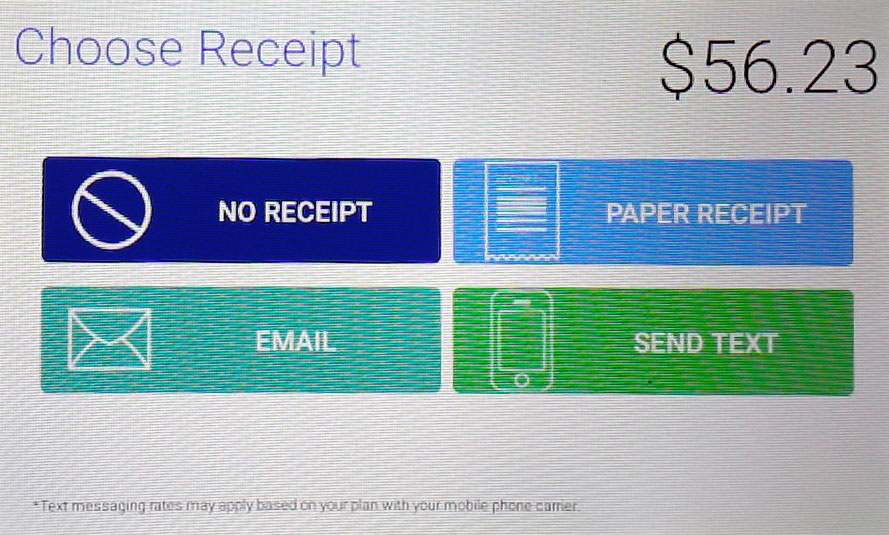
- Select a method of receipt
The available methods of receipt include:
- Send Text – They will enter their mobile phone number and receive a text message with a link to their receipt.
- Email – They will enter their email address and receive an email containing their receipt.
- Paper Receipt – Prints the receipt from the terminal.
- No Receipt – No receipt is sent or printed.
The terminal will return to the main customer screen once the receipt is sent or printed.
Note: Chargent Terminal is compatible with modern forms of payment, both card and mobile phone, including Apple Pay and Google Pay on compatible mobile devices.
Unlinked Payments #
Chargent Terminal Unlinked Payments originate from transactions made directly on the terminal, not from within Salesforce.
While we recommend that Chargent Terminal payments are initiated from Salesforce, there may be times when you need to process a charge directly from the terminal. Once synced to Salesforce, this will generate a Chargent Terminal Unlinked Payment record, including the credit card details and the charge information. The Unlinked Payment must then be associated with the correct Salesforce record.
You can follow the instructions below to sync your Unlinked Payments in Salesforce and associate them with the proper Salesforce record.
Unlinked Payments Permissions
Before working with Unlinked Payments, you must assign the ‘Terminal Unlinked Payments Permission Set’.
Note: Users with the Terminal Admin permission also require the Terminal Unlinked Payments permission to access Chargent Terminal Unlinked Payments.
To Add Permissions:
- Go to the App Launcher and select the Chargent Terminal app
- Click the Terminal Configuration tab
- Select Permission Set Assignment(s)
- Select Unlinked Payments
- Select the Available Users who should have permission
- Click Assign
CT Transaction Sync
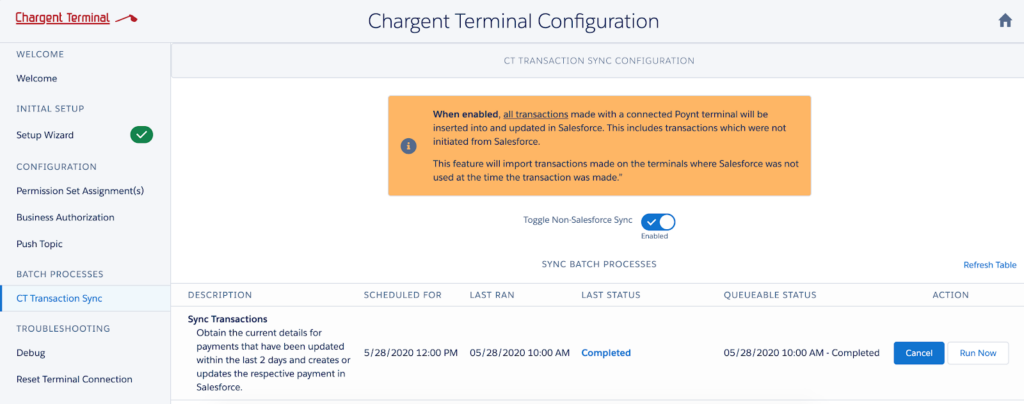
To transfer your Unlinked Payments into Salesforce, you must run the CT Transaction Sync. Chargent Terminal Unlinked Payments can only be created if the sync is enabled. CT Transaction Sync can be scheduled or run on demand.
- Click the AppLauncher and select the Chargent Terminal app
- Click the Terminal Configuration tab
- On the left select CT Transaction Sync
- Choose Schedule to Schedule the batch to run daily or Choose Run Now to do an immediate Sync.
- Schedule: This will create a new Schedule Batch that will run daily. The time the batch will run depends on when you click the Schedule button. The time will be set for the next even hour on the hour, so if you press Schedule at 10:23, it will schedule it for 12:00. If you press Schedule at 11:45, it will also schedule it for 12:00. Also note that this batch will run every 2 hours syncing any transactions initiated from the terminal within the past two days.
- Run Now: Run Now will automatically run the Apex batch that syncs the Chargent Terminal Unlinked Payment but does not schedule a regular batch to run.
View Chargent Terminal Unlinked Payments
After syncing your terminal transactions to Salesforce, you can query and view the Unlinked Payments that have not yet been associated with a record.
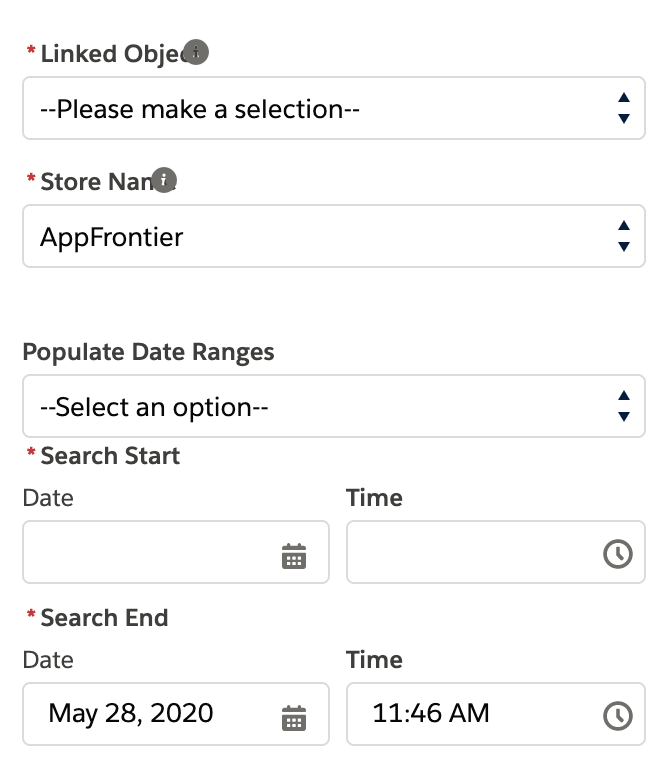
- Click the App Launcher and select Chargent Terminal Unlinked Payments
- Linked Object: Select the object the Chargent Terminal App is used on
- Store Name: Select the store you’d like to search
- Populate Date Ranges: Select the time frame you want to search
- Click Query
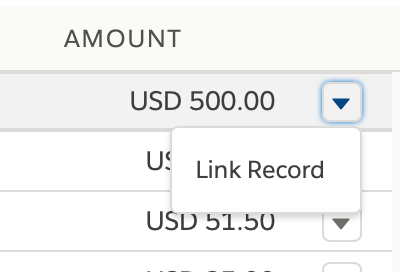
Link a Chargent Terminal Unlinked Payment
After populating your Unlinked Payments, you can associate them to a record using the dropdown arrow to the right of the Transaction and select Link Record. Select the record and click Save.
Search for and select the record you want to link the transaction to and click Save.
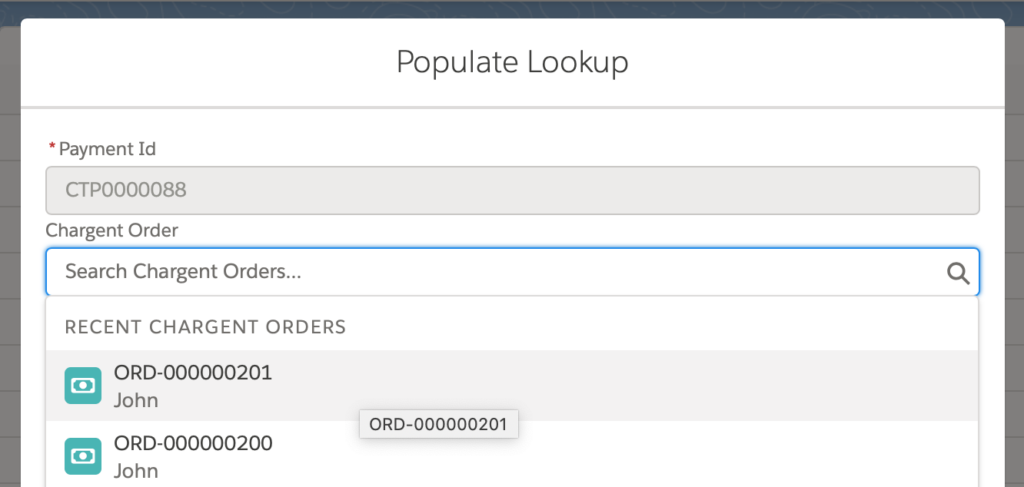
A success message will appear, confirming that you have successfully connected an Unlinked Chargent Terminal Transaction to the correct Salesforce record.
Device Group Implementation #
Some customers have multiple Terminals in different locations and must group a subset of all terminals. This could be due to employees who log in to Salesforce from multiple stores and need to process payments based on each location. They don’t necessarily want to go through all terminals but only those within the stores they travel to.
Using Device Group Implementation, developers can create an API Class (cterminal.DeviceGroup), allowing you to define a list of terminals based on the cterminal.DeviceGroup class.
Once you have defined the list of terminals to the cterminal.DeviceGroup you can apply it in Salesforce under the Chargent Terminal Configuration.
- Click the App Launcher and select the Chargent Terminal app
- Click the Terminal Configuration tab
- Select Device Group Implementation
- Enter the API Name for the class implementing cterminal.DeviceGroup
- Click Save
Note: Device Group Implementation is not a commonly used feature. You will require a Salesforce Developer to implement this feature. Chargent support is unable to assist with custom development.
See Also
Payment Gateways vs. Payment Processors
Chargent Terminal: What are Unlinked Payments?
Grouping Chargent Terminal Visibility

