Connecting payment gateways to Salesforce Commerce for B2B, Salesforce Commerce for B2C, and the Order Management System is difficult for many businesses. We make connecting to payment gateways simple.
Your primary business is getting your goods into the hands of your consumers and the businesses that trust you with their business. Our business is making payments easy for your business.
Supported Gateways
Currently, Chargent for Commerce Cloud supports the following gateways:
- Adyen
- Braintree
- Cybersource
- Stripe
- PayTrace
New gateways are added based on customer demand. Please contact our sales team today to discuss your preferred gateway.
For more information, check out Chargent for Commerce Cloud on the AppExchange.
Prerequisites #
- Your Commerce Cloud implementation must be ready to accept payments from your desired process.
- Tokenization is not always set by default in Lightning B2B.
- If you are not able to tokenize, review and complete these steps: Fully functional Commerce Org Setup for ISVs
- Your Commerce Cloud checkout flows should be set up with Flows that make the tokenize, authorize, capture, and refund calls as specified in the Commerce Cloud trailheads (B2B Lightning, B2C Commerce), help files (B2B Lightning, B2C Commerce) and other documentation.
- The Chargent support team is not responsible for nor able to troubleshoot or answer any questions about your checkout flows. This is not something that our team knows. We know payments, but we don’t know commerce implementation.
- Tokenization is not always set by default in Lightning B2B.
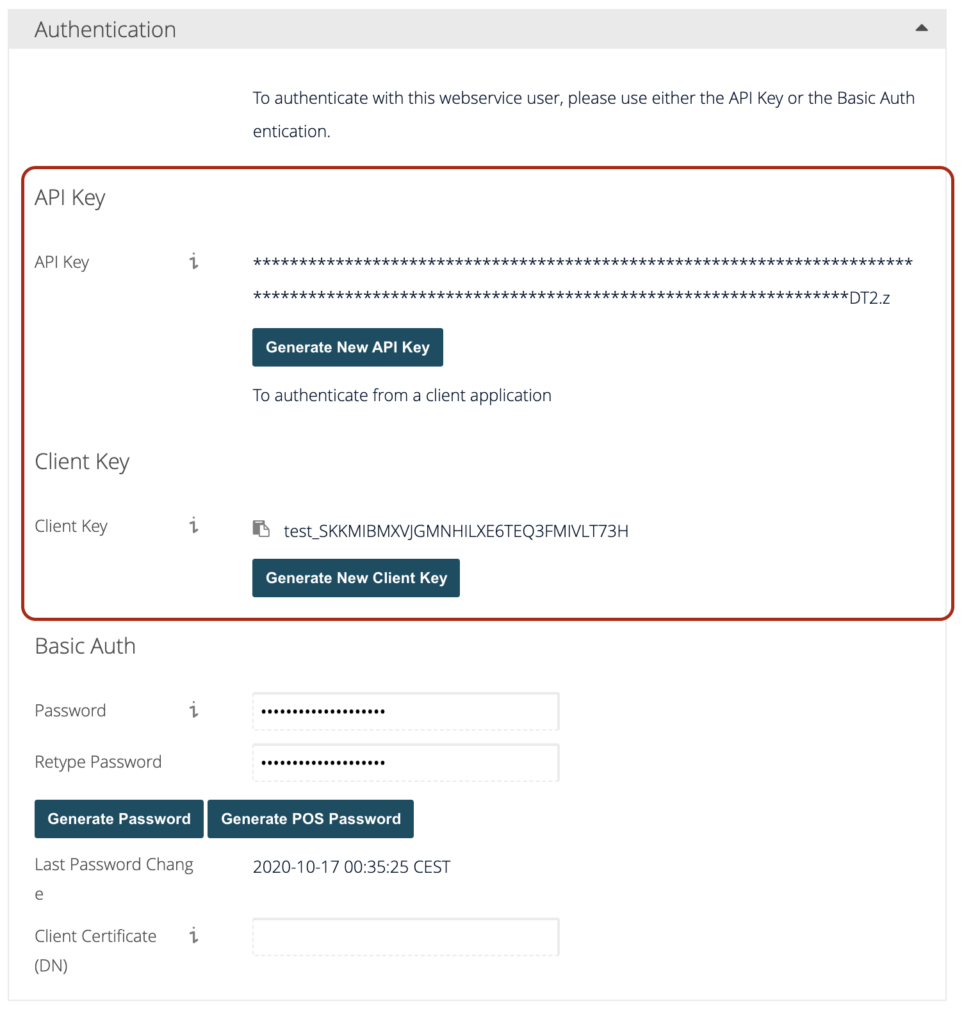
- Obtain authentication credentials for your gateway.
- You can leverage our documentation and support team for assistance in finding your credentials; however, only your gateway provider can provide the credentials for you.
Note: The Chargent support team is here to help you. While we are experts on the Commerce Payments API, digital payments and payment gateways, we are not Commerce Cloud implementation experts.
Installation and Configuration #
Chargent for Commerce Cloud requires the following 4 packages:
- Chargent Base Package
- Chargent Orders
- Chargent Anywhere
- Chargent for Commerce Cloud
Step 1: Install Core Chargent Packages
The Chargent Package Installation Manager (PIM) will install Chargent Base, Orders, and Anywhere into your Salesforce organization. For installation instructions, visit Installing and Updating Chargent.
Step 2: Install Chargent for Commerce Cloud
Chargent for Commerce Cloud version 0.10.4
- Choose Install for Admins Only
Installation URL
Step 3: Add Payment Gateway Credentials to Salesforce
Find your gateway’s subheading below for instructions on finding and implementing your credentials. We recommend testing your transactions in a sandbox before implementing Chargent for Commerce Cloud in a production environment.
Cybersource Certificate Requirement
Cybersource is changing the way it connects to Salesforce, requiring customers to upload a certificate obtained from Cybersource to their Salesforce org. Cybersource plans to enforce this requirement for test gateway accounts on September 1, 2025, and in production gateway accounts on September 15, 2025. These dates are subject to change by Cybersource. We recommend that all Cybersource customers start preparing for this transition as soon as possible.
Visit Chargent for Commerce Cloud: Cybersource Certificate Requirement for instructions on uploading your certificate to Salesforce and updating your Named Credential.
Cybersource Certificate functionality for Commerce Cloud customers is available in Chargent version 7.97 or later. To find out what version you’re on, check out What version of Chargent am I on?
PayTrace Test Credentials
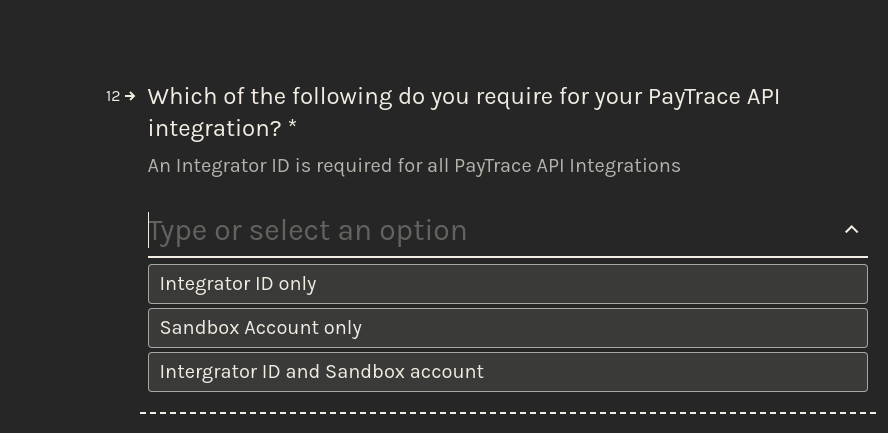
To get test credentials from PayTrace, follow these steps. To avoid any confusion, please review our instructions below entirely before completing PayTrace’s questionnaire form.
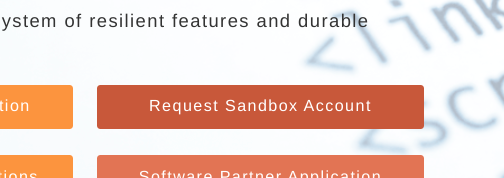
- Visit PayTrace’s Developer Site and click Request Sandbox Account
- Begin the form, using the answers below when relevant
- On question 12, choose “Sandbox Account Only”
- On Question 13, when asked “Do you need check processing enabled to perform ACH/Check Processing acceptance testing?”, select “No”
- Currently, Chargent for Commerce Cloud, nor Commerce Cloud supports ACH/Check processing on the cloud
- On Question 14, when asked “Are you integrating PayTrace’s Recurring Payment functionality?”, select “No”
- PayTrace Recurring Payments allows developers to add functionality that can create and manage payments that are on a recurring schedule. This is not currently available in Chargent for Commerce Cloud
- On Question 15, when asked “Are you integrating PayTrace’s EMV card reader to accept credit cards in a retail environment with your application?”, select “No”
- On Question 16, when asked “Do you need a PCI-compliant payment user interface (UI) to accept sensitive payment information on your e-commerce website?”, select “No”
- Check your inbox for the notice that your account was created. It could take up to a business day to receive.
- Click the link in the email received from PayTrace support
- Set your password
- Choose a memorable Validation image. You will be asked for this at least sometimes when logging in
PayTrace Live Credentials
The team at PayTrace will ensure you have correct login credentials for your production system.
Adyen Test Credentials
If you haven’t already signed up for an Adyen test account you can sign up on their website.
Once signed up for a test account you will receive an email with your login to the Customer Area including:
- Account
- User name
- Link to set your Password
The email will also include a link to login to your account.
Note: You will need to request enablement of the API PCI feature. For test accounts Adyen should have no problem enabling it; however for live accounts, they will require proof of PCI Compliance before activating it.
To Request access to the API PCI feature, login to your Adyen account and submit a ticket.
You must obtain the following information from your Adyen account to set up Adyen in Salesforce.
- Merchant account name
- API Key
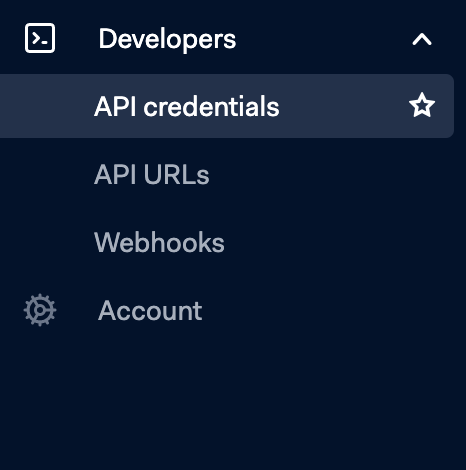
Once in the Adyen merchant portal, you can find the API key by clicking on the Developers tab on the left then selecting API Credentials. Here you will see the API Key. To access these keys you will need to click on the Username.
- Under Authentication, you will see the API Key. You might need to generate a new API Key.
- If you are refreshing your API Key, expire the old key and click the Save button at the bottom.
Adyen Live Credentials
The team at Adyen will ensure you have the correct login credentials for your production system.
Braintree Test Credentials
- Go to https://www.braintreepayments.com/sandbox & complete the signup form
- After receiving an email, click Complete Sandbox Signup
- Complete the registration
- On the first page, you will receive your keys

- Keep track of the Merchant ID, Public Key, and Private Key that you see on the first page
Braintree Live Credentials
The team at Braintree will ensure you have the correct login credentials for your production system.
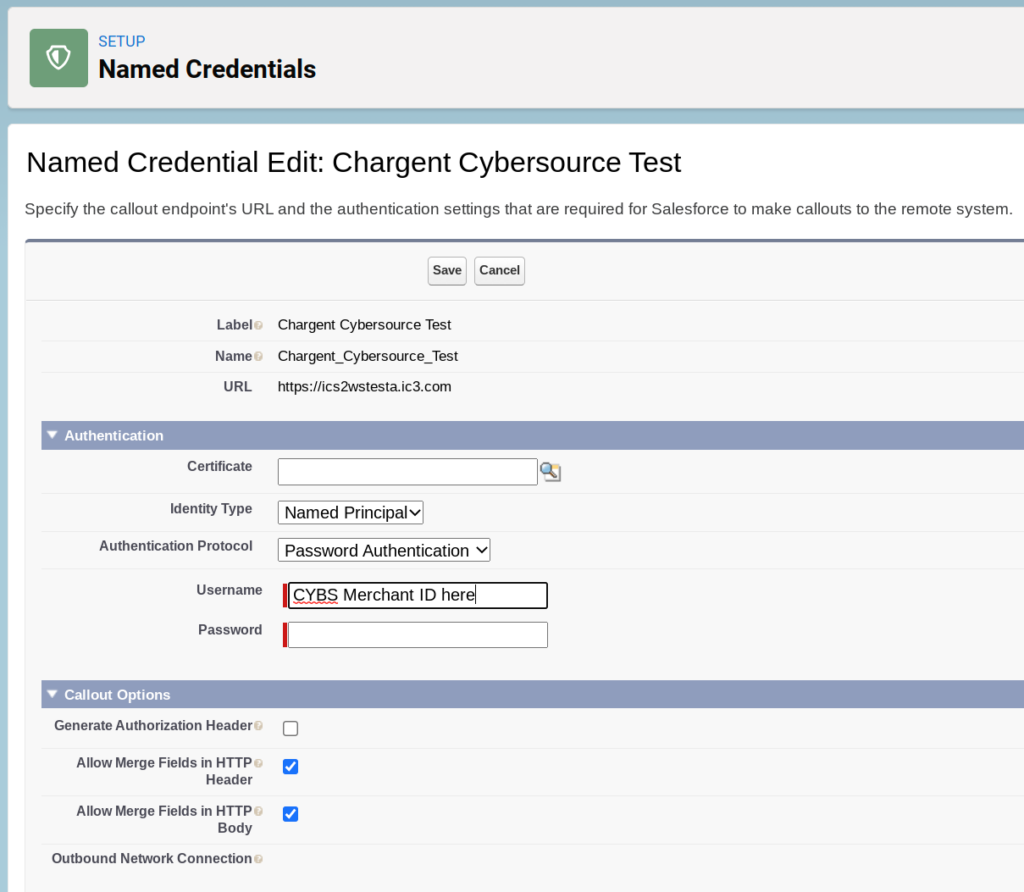
Step 4: Configure Named Credentials
To keep things simple for you, we have created Named Credentials and added them to our package. All you will need to do is edit the Name Credential provided and update it with your Username and Password.
Here are step-by-step instructions to accomplish this task:
- Click the gear icon
 and select Setup
 - In the Quick Find, search for and select Named Credentials
- Locate the named credentials for your gateway and environment
- Click Edit
- In the Username field, input the following value depending on your gateway:
- Cybersource: Merchant ID (sometimes called your Organization ID)
- PayTrace: username
- Adyen: username
- Braintree: Public Key
- In the Password field, input the following value depending on your gateway:
- Cybersource: See Chargent for Commerce Cloud: Cybersource Certificate Requirement
- PayTrace: password
- Adyen: API Key
- Braintree: Private Key
- Click Save
Named Credentials for Production (Adyen Only)
- Click the gear icon and select Setup
- In the Quick Find, search for and select Named Credentials
- Click New Named Credential
- Select True for ‘Allow Merge Fields in HTTP Header’
- Select True for ‘Allow Merge Fields in HTTP Body’
- For URL, use the Checkout endpoint details found in Adyen’s documentation

Set Up the Merchant ID Custom Setting (Braintree Only)
- Click the gear icon and select Setup
- In the Quick Find, search for and select Custom Settings
- Click the Manage link for Braintree Merchant Id
- Click New
- Paste your Braintree Merchant ID
- Click Save
Step 5: Set Up Payments for Commerce Cloud
Now that pieces are in place, you can connect them using a combination of the developer workbench and administration tools to start taking payments in your store.
Create a Payment Gateway Provider
PaymentGatewayProvider is an object that stores details about the payment gateway that Salesforce communicates with when processing a transaction. Said another way, it defines the connection to a payment gateway Apex adapter. You can use Workbench to create payment gateway provider records.
- Log in to Workbench from your commerce org
- From the Data tab, select Insert
- For Object Type, choose PaymentGatewayProvider
- Select Single Record and then click Next
- Fill in the fields using your Payment Gateway Adapter information
Example:
| ApexAdapterId | <ID of Payment Gateway Adapter Apex | See image and instructions below> |
| DeveloperName | MyPaymentGatewayProvider |
| IdempotencySupported | Yes |
| Language | en_US |
| MasterLabel | MyPaymentGatewayProvider |

To find the ApexAdapterId, navigate to Setup | Develop | Apex Classes, find the Apex Class for your gateway listed below, and copy the class’s ID (starts with 01p).
- Adyen: chargent.AdyenClient
- Cybersource: chargent.CybersourceClient
- PayTrace: chargent.PayTraceClient
- Stripe: chargent.StripeClient
- Braintree: chargent.BraintreeClient
Create a Payment Gateway Record
The PaymentGateway object stores information that Salesforce uses to communicate with the payment gateway.
- From the Commerce App, in the object finder, enter Payment Gateway and select Payment Gateway
- Click New
- Choose and enter a name
- For Payment Gateway Provider, enter the ID of the payment gateway provider you created in Step 3
- For Merchant Credentials, enter the named credential you created in Step 1
- For Status, select Active
- Save your work
Connect Your Payment Gateway to Your Checkout using the Store Integrated Service
- From the Commerce App navigation menu, select Stores.
- Select the appropriate store.
- Under Manage Your Store, select Administration.
- Select Store Integrations.
- On the Card Payment Gateway tile, select Link Integration.
- Choose the payment gateway you created during this setup.
- Now, test your work!
Step 6: Set Up a Webhook Notification (Adyen Only)
Currently this only applies to Adyen. If you are not using Adyen, skip to the next step!
The Adyen gateway uses an Asynchronous Payment Gateway Adapter in Salesforce.
- Follow the steps in Setup Async Gateway Adapter in Salesforce
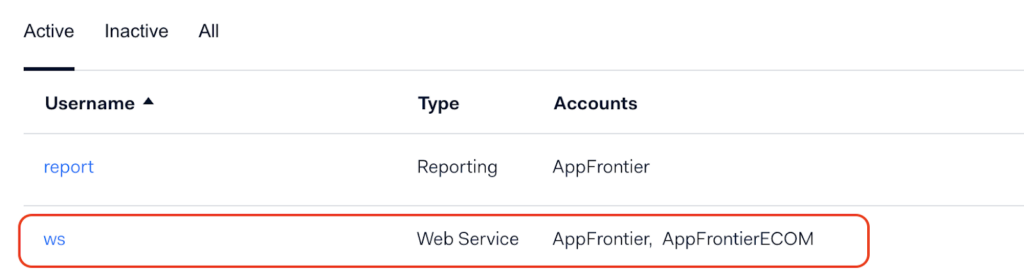
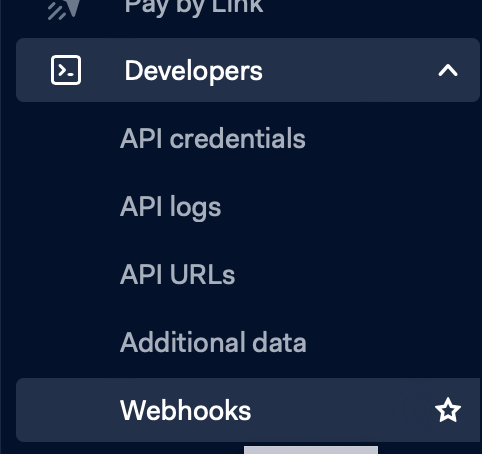
- At step “6 c” go to your Adyen merchant cabinet and click Developers | Webhooks
- Set Standard Notification
Step 7: Run Tests!
Now that you have completed your setup of Chargent for Commerce Cloud, you should run a transaction from start to finish.
See Lightning B2B Commerce Developer Guide for more information.

