Salesforce Billing is a Salesforce add-on that allows you to create and automate invoices, payments, and revenue using key records and information from Salesforce CPQ.
Chargent for Salesforce Billing allows you to connect to your Gateway to accept payments and apply them to the balance of an open Invoice or an Account. You can use the Payment Virtual Terminal on Invoices, the Payment Scheduler, or any other Salesforce Billing feature where a payment can be taken.

Using Your Gateway of Choice #
With Chargent for Salesforce Billing, your gateway can be used according to the documentation for Payment Gateway usage provided by Salesforce Billing. See Salesforce’s documentation for processing payments.
You can use the Payment Virtual Terminal on Invoices, the Payment Scheduler, or any other Salesforce Billing feature where a payment can be taken.
Payment Methods Supported #
- Cards (Credit/Debit/Prepaid/Procurement) – Chargent Gateways Connector will support all cards supported by your payment gateway and payment processor.
- Tokenization – Tokenization can be used for card and bank drafts (ACH/eCheck/EFT/Direct Debit).
- Bank Account Tokenization – When creating a new bank payment method (direct debit/EFT/ACH) via the “New Payment Method” button in Salesforce Billing, the payment method will not immediately be tokenized. Only once a payment is made using that payment method will Chargent perform the tokenization, if enabled.
Note: Tokenization is not supported for every gateway. See our gateway-specific documentation for more information.
Requirements #
In order to use Chargent for Salesforce Billing, ensure the following prerequisites are met:
- Salesforce CPQ (version 222.2 or later) must be installed.
- Salesforce Billing (Summer ’19 220.7 or later) must be installed.
- Consumption Schedule must be enabled.
- Install the Chargent and Chargent for Salesforce Billing packages (See Installation).
Installation #
Install a full version of Chargent for Salesforce Billing in your Salesforce Production or Sandbox org for 30 days! The package includes all payment gateway integrations.
Note: Salesforce Billing Package Version Winter ’20 222.2 or later must be installed before installing Chargent’s packages.
Install the packages in the following order:
- Install Chargent using the Package Installation Manager (PIM)
- See our Release Notes for more information
- Install Chargent for Salesforce Billing v6.41 (Latest Release: 1/15/22)
Setting up your Salesforce Org #
Add Gateway Type
In order to add Chargent gateways to your Salesforce Billing setup, you will first need to create a new Gateway Type in the Global Value set. To do this simply:
- Navigate to Salesforce Setup
- In the search box, type “Picklist Value Sets”
- Click on “Picklist Value Sets”
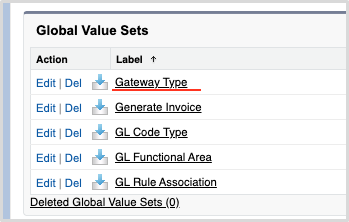
- Find the “Gateway Type” value set
- Click On the “Gateway Type” label
- Click “New” under values
- Type “Chargent Gateway” in the text box – exclude the quotes
- Check the box that reads “Add the new picklist values to all Record Types that use this Global Value Set.”
- Click the [Save] button
Permission Set Assignment
Assign the “Chargent Gateway Admin” permission set to users who will set up and / or edit the Gateway records. Typically, it is advised to only provide this permission to Admin users.
- Navigate to Salesforce Setup
- In the search box, type “Permission Sets”
- Click on “Permission Sets”
- Click on “Chargent Gateway Admin”
- Click the [Manage Assignments] button near the top of the screen
- Click the [Add Assignments] button
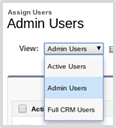
Note: If you wish to limit the users list to admins only, click on “Admin Users” from the “View” picklist.
- Check the box next to the users who require access, then click the [Assign] button.
Add Chargent Gateway to Custom Setting
- Navigate to Salesforce Setup
- In the search box type “Custom Settings”
- Click “Custom Settings”
- Next to Payment Gateway Config click “Manage”

- Click the [New] button
- Complete the Fields:
- Name
- Chargent Gateway
- Gateway Class Name
- ChrgntBllng.ChargentGatewayAPI
- Name
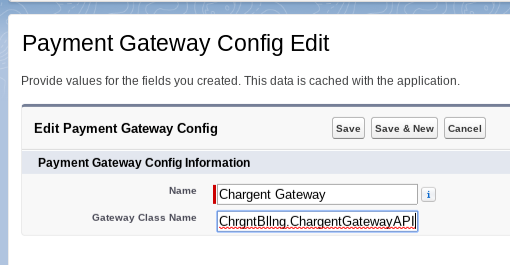
- Click the [Save] button
Update the Payment Gateway Page Layout
NOTE: Completing this step can be done in two ways; Adding the “Chargent Gateway” field to the default “Payment Gateway” page layout, or assigning the “Chargent Gateway Layout” to the needed profiles. We recommend the first option, adding the “Chargent Gateway” field to the default “Payment Gateway” page layout, as it’ll ensure that your “Payment Gateway” layout remains as up-to-date as possible in cases where Salesforce.com updates this Object.
To add the “Chargent Gateway” field to the Payment Gateway Layout, follow these steps:
- From the Salesforce Setup page, click the “Object Manager” tab
- Search for and select the “Payment Gateway” object
- Click on “Page Layouts” in the left-side menu
- Click “Payment Gateway Layout”
- From the “Fields” section of the palette, drag the “Chargent Gateway” field (ChrgntBllng__Chargent_Gateway__c) onto the Payment Gateway layout
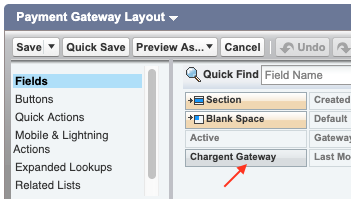
- Click the [Save] button
If you wish instead to assign the Chargent Gateway Layout to the appropriate profiles, follow these steps:
- From the Salesforce Setup page, click on the “Object Manager” tab
- Search for and select the “Payment Gateway” object
- Click on “Page Layouts” in the left-side menu
- Click the [Page Layout Assignment] button
- Click the [Edit Assignments] button
- Select the appropriate profiles (those you wish to use for this feature). Hold the CTRL button while clicking to choose multiple profiles
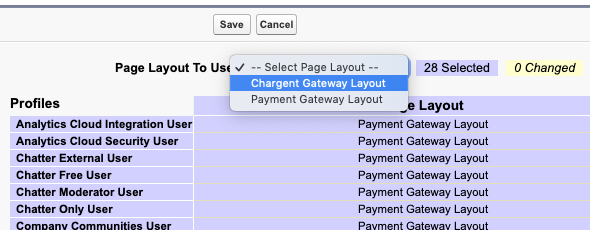
- From the “Page Layout to Use” picklist, choose “Chargent Gateway Layout”
- Click the [Save] button
Setting up your Chargent Gateway Record #
- Click the App Launcher icon
 at the top-left of the screen
 - Search for and click on “Chargent Settings”
- Click the “Chargent Setup Wizard” tab
- Choose your payment gateway from the picklist
- Enter your payment gateway credentials, then click the [Sign In] button
- Choose whether to enable Tokenization. (Recommended)
- Select the Currency Types you plan to accept, then click the [Continue] button
- Select the Payment Methods you plan to accept, then click the [Continue] button
For detailed instructions and considerations, see Gateway Setup Wizard.
Setting up your Salesforce Billing Payment Gateway #
- Click the App Launcher icon at the top-left of the screen
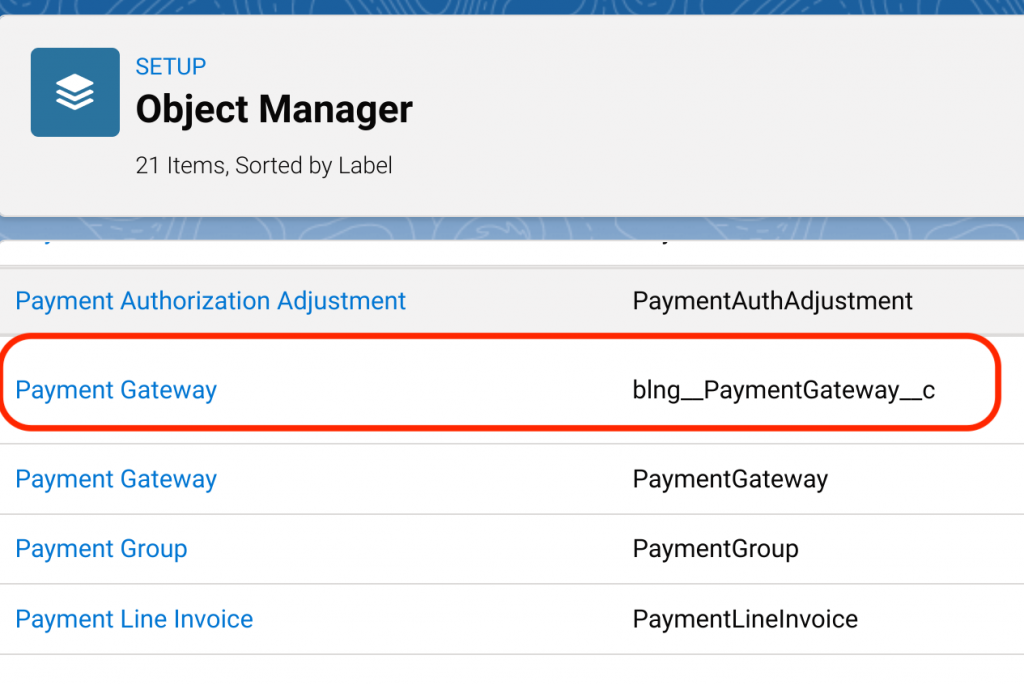
- Search for “Payment Gateways,” then click on “Payment Gateways”
Note: There will be two different Payment Gateway objects. You want to select the one that is installed with the Billing Connector package.
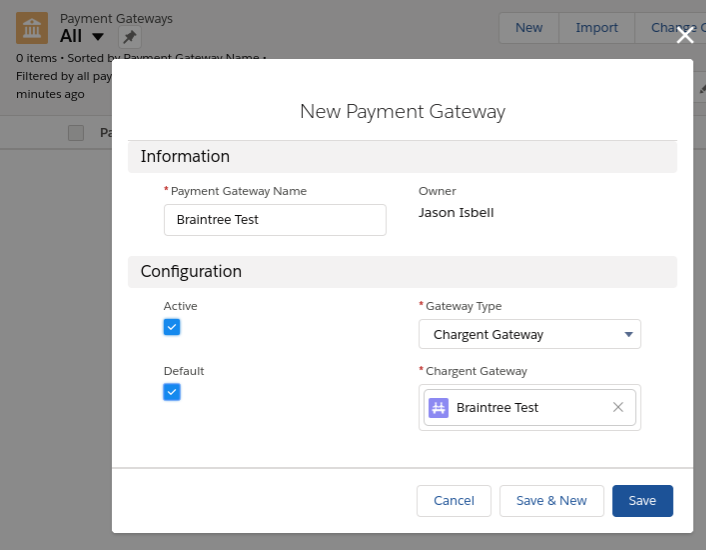
- Click the [New] button
- Complete the following fields:
- Payment Gateway Name
- Check the Active box
- Check the Default (Based on your requirements)
- Gateway Type should be Chargent Gateway (See organization setup above if not present)
- Chargent Gateway – Lookup to the Chargent Gateway record you created in the previous step
- Click the [Save] button
Before Processing a Payment #
In Salesforce Billing, a few steps need to happen before you can process a payment using the Chargent for Salesforce Billing component.
- Create a new Opportunity
- Create a Quote from the Opportunity
- Create a new Order from the Quote
- Check the Bill Now checkbox to create an Invoice record (if you want to apply payment towards Invoices).
Processing Payments using Chargent for Salesforce Billing #
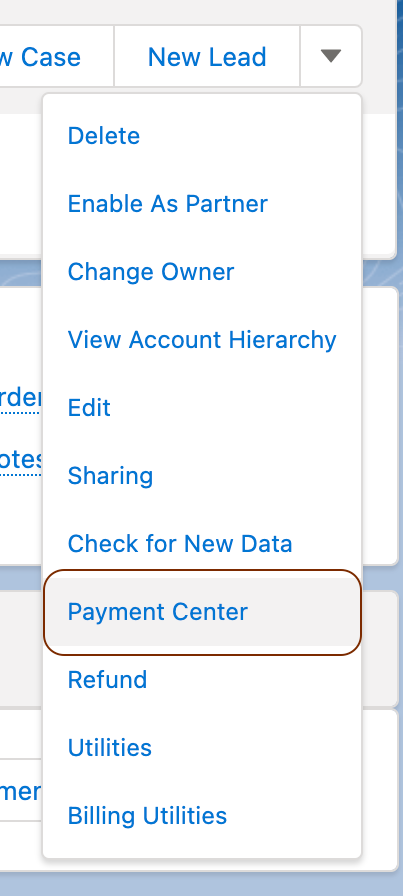
Processing Payments Using the Payment Center
From an Account Record click the [Payment Center] button.
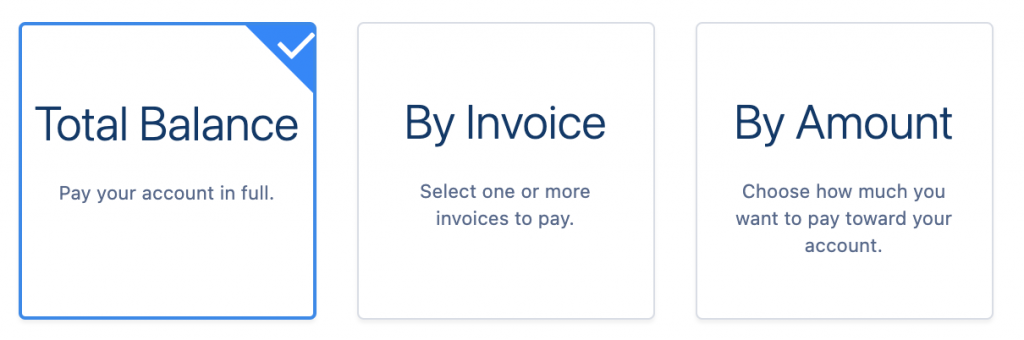
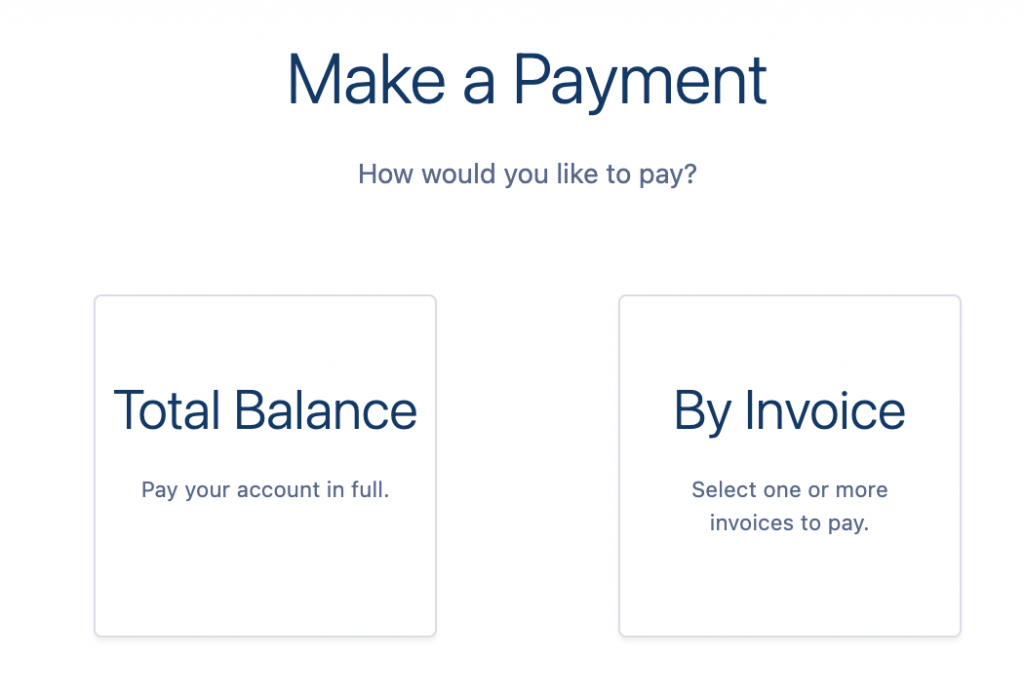
You will have 3 options
- Total Balance – Pay the complete balance due for a specific Account
- By Invoice (Recommended) – Choose an Invoice you want to apply a payment towards. This includes partial payments as well.
- By Amount – Select a specific amount to apply payment towards a specific Account.
Total Balance
Selecting Total Balance and pressing the [Next] button, it will bring you directly to any stored credit cards or ACH bank information on file. You can then use the existing payment information to process the remaining balance of the Account.

Clicking the [Pay Now] button will allow you to process the full balance.
By Invoice (Recommended)
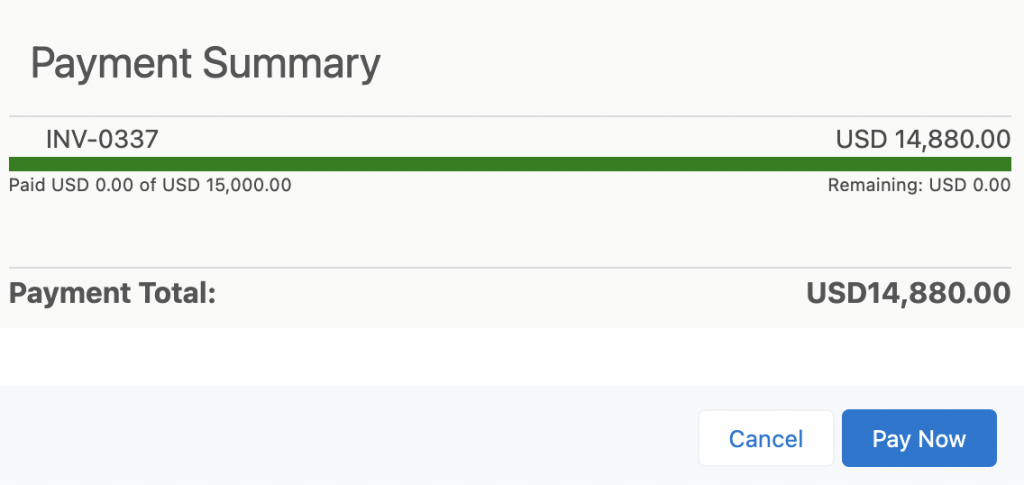
Selecting ‘By Invoice’ will allow you to choose to pay in Full or add a Partial Payment towards an open Invoice. Select the [ + ] next to the Invoice and either the [Full] or [Partial] option. Click the [Next] button to go to your stored Payment Methods.
Note: If you choose [Partial] you will need first to edit the amount by clicking the pencil icon prior hitting [Next] and moving to the stored Payment Methods.


Select the Payment Method and click the [Pay Now] button to complete the transaction.

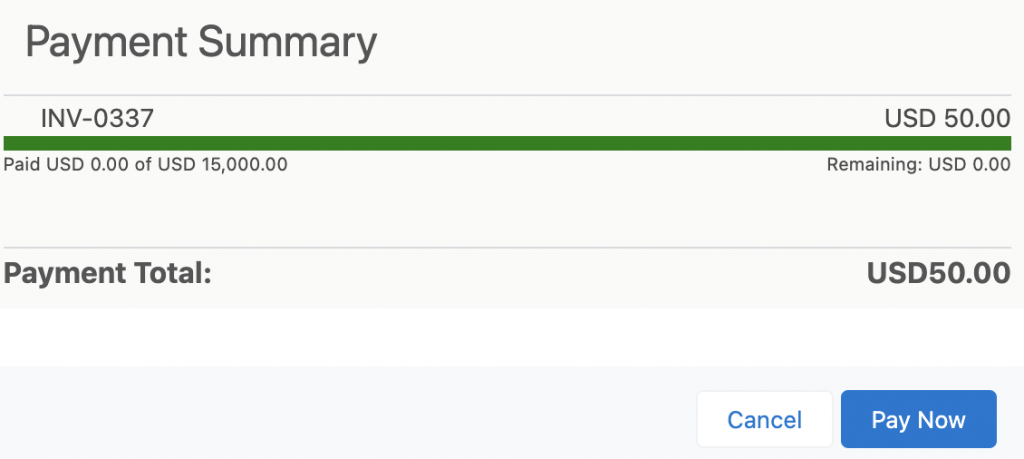
The Invoice will update
- Invoice Status is changed from Draft to Posted
- Invoice Payment Status is changed from Unpaid to Paid
By Amount
Selecting ‘By Amount’ it will allow you to enter an amount that will be applied to the Account’s balance.
Enter the specific amount and click [Next] to go to the Payment Method Page.
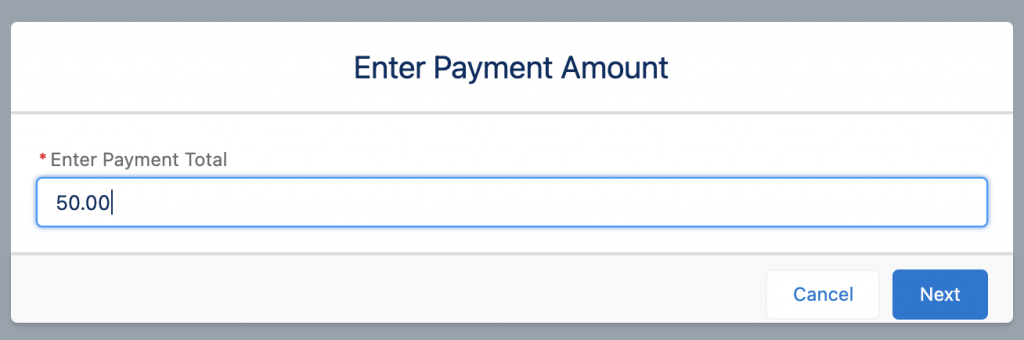
Select the Payment Method and click the [Pay Now] button to complete the transaction.
If the transaction is successful, you will see the pop-up window showing Success. You will also have the option to Return to the Account or Review the Payment details. A Payment Transaction Record will be created logging the payment in your Salesforce Org.

Processing Payments using Payment Virtual Terminal on the Invoice
Adding the Payment Virtual Terminal button to any of the Salesforce objects makes it even easier to process Payments anywhere in Salesforce Billing.
Similar to processing payments from the Payment Center, when you click the Payment Virtual Terminal button you will see the following payment options.
- Total Balance
- By Invoice
Total Balance
Selecting Total Balance and pressing the [Next] button, it will bring you directly to any stored credit cards or ACH bank information on file. You can then use the existing payment information to process the remaining balance of the Account.
Clicking the [Pay Now] button will allow you to process the full balance.
By Invoice (Recommended)
Selecting ‘By Invoice’ will allow you to choose to pay in Full or add a Partial Payment towards an open Invoice. Select the [ + ] next to the Invoice and either the [Full] or [Partial] option. Click the [Next] button to go to your stored Payment Methods.
Note: If you choose [Partial] you will need first to edit the amount by clicking the pencil icon prior hitting [Next] and moving to the stored Payment Methods.
Select the Payment Method and click the [Pay Now] button to complete the transaction.
The Invoice will update
- Invoice Status is changed from Draft to Posted
- Invoice Payment Status is changed from Unpaid to Paid
Payment Transaction
Entering and Saving New Payment Methods

Salesforce Mapping
Keep in mind, Salesforce sends the data to your Payment Gateway. Chargent does not control what fields are sent. You should check with Salesforce for accuracy. Here are some of the fields that will be mapped from your gateway to the Salesforce Payment Transaction record. Gateway field names are dependent on the gateway used.
| Your Gateway’s Fields | Salesforce Payment Transaction Fields | ||
|---|---|---|---|
| Card Details | Card Type | < | Card Type |
| Card Holder | < | First Name / Last Name | |
| Card Number | < | Card Number | |
| Expiry Date | < | Expiration Month / Expiration Year | |
| Shopper Detail | Reference | < | Account Record ID |
| Token | < | Payment Gateway Token | |
| Billing Address | < | Billing Address 1, Billing Address 2, Billing City, Billing State, Billing Zip Code |

