Chargent’s Payment Console feature allows you to process one-time payments and recurring payments directly from the Chargent Anywhere component, which can be configured on just about any object in Salesforce, standard or custom. This makes it a convenient interface for call center agents, customer service, billing, or sales teams since it is able to initiate payments, receive tokens back from the payment gateway, and create transaction records in Salesforce.
Transactions and tokens are created with the Payment Console feature without ever saving or storing cardholder account number information in Salesforce. If the Payment Methods feature is enabled, you can select from saved cards or bank accounts without viewing or exposing sensitive payment information. This helps you reduce the scope of your PCI compliance while making it easier for your staff and customers to make payments.
Setting Up Payment Console #
Activating Payment Console
When you set up your first payment gateway using the Gateway Setup Wizard, Chargent prompts you to enable the Payment Console feature. When you select Yes, an email requesting an activation key is sent to Chargent’s support team, who will review your request and send your key as soon as possible. Once you receive the activation key, copy it to your clipboard and enter it into Salesforce.
For more information about Activating the Payment Console, see Feature Activation.
Configuring Payment Console
Now that you’ve activated the Payment Console, you can find a few additional configuration options on your Gateway record and in the Chargent Anywhere component’s configuration. You can also add additional functionality to the Payment Console by activating Payment Methods.
Gateway Settings
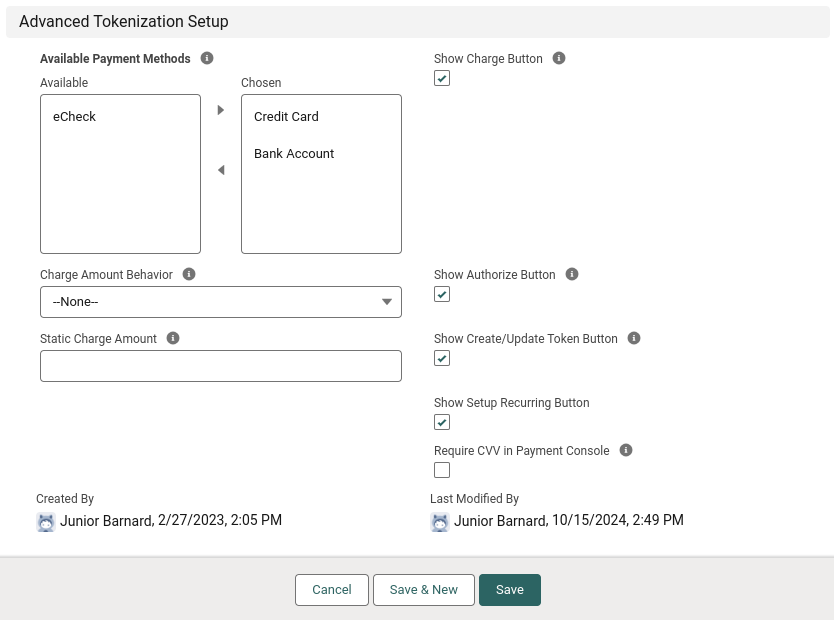
When setting up your initial gateway, you will configure various settings related to the Payment Console, including the buttons you want to display and the types of credit cards and bank accounts you accept. These settings are modifiable, and you can always visit your Gateway record to update them.
To modify these settings:
- Click the App Launcher icon
 and select Gateways.
 - Click the name of the Gateway record you want to update.
- Click Edit.
- Click Advanced Settings.
The following fields control the behavior of the Payment Console:
- Available Payment Methods: This option allows you to determine which payment method tabs will be available when using the Payment Console. Choose Credit Cards and/or Bank Account (ACH, eCheck, Direct Debit).
- Show or Hide the following Payment Console buttons:
- Show Charge Button: Provides the option to process a credit card or bank account transaction.
- Show Authorize Button: Provides the option to authorize a transaction. Learn more by visiting Understanding Authorizations.
- Show Create/Update Token Button: Provides the option to generate a token without charging the customer. Learn more by visiting Understanding Tokenization.
- Show Setup Recurring Button: Allows users to set up a recurring payment schedule using the Payment Console. For more information, see Setting Up Recurring Billing.
- Require CVV in Payment Console: This setting requires the CVV / CVV2 security code when using the Payment Console. This is the 3-digit code on the back of the credit card. It will be three digits for Visa and MasterCard or four for American Express.
Every gateway offers a different set of features and capabilities. For more information regarding your Payment Gateway settings, please check out the documentation specific to your gateway.
Chargent Anywhere Settings
The remaining settings related to the Payment Console are located in the Chargent Anywhere component’s configuration.
To access the various configuration options, follow these steps:
- Navigate to a record with Chargent Anywhere.
- Click the gear icon and select Edit Page
- Select the Chargent Anywhere Lightning Component.
- If you haven’t added Chargent Anywhere to your Lightning Page, drag the component to your page from the left sidebar under Custom – Managed.
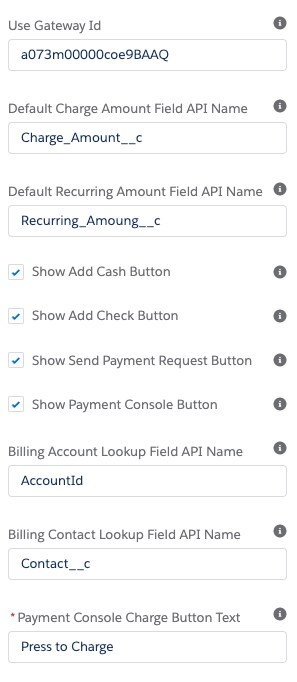
For more details about the Chargent Anywhere component configuration fields, visit Customizing Chargent Anywhere.
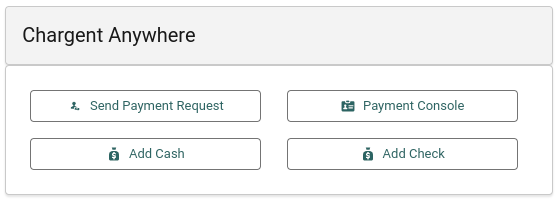
Using The Payment Console #
The Payment Console button appears in the Chargent Anywhere component, which you can add to any object in Salesforce. See the instructions below to learn how to create a transaction using the Payment Console.
Processing One-Time Payments Using the Payment Console
The following example provides instructions on processing a one-time payment using the Payment Console. For instructions on setting up and processing recurring payments using the Payment Console, see Setting Up Recurring Billing.
Note: The Payment Console is compatible with credit card surcharging. If you’ve enabled surcharging for your gateway record, the steps below will differ slightly. Please see Surcharging With Payment Console.
- Visit a record where Chargent Anywhere has been added.
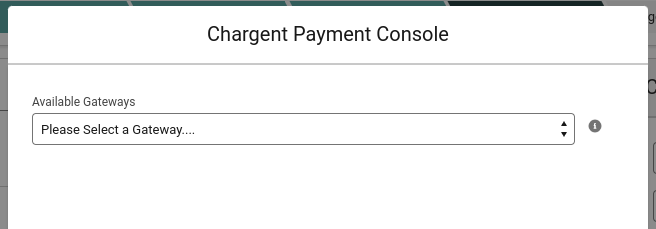
- Click Payment Console.
- If you have more than one gateway configured, choose the gateway you’d like to use for the transaction.
- If you’ve only configured one gateway, the gateway will automatically be chosen, and the step will be skipped.
- Enter the customer’s billing name and address as they appear on the credit card or bank account.
- If you’ve configured Chargent Anywhere to automatically populate the Billing Name and Address fields, this step will be skipped.
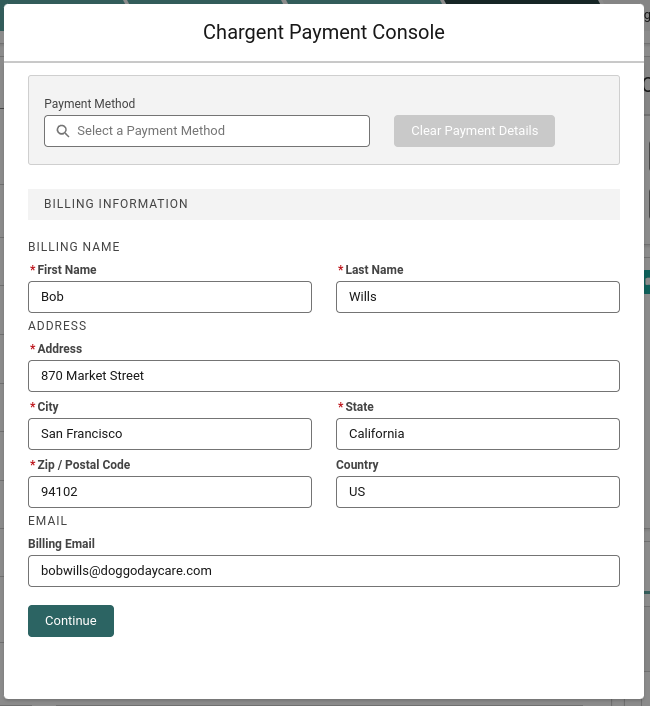
Note: If Payment Methods is activated in your org, users can select an existing Payment Method record. For more information, see Payment Methods for Payment Console.
- Click Continue.
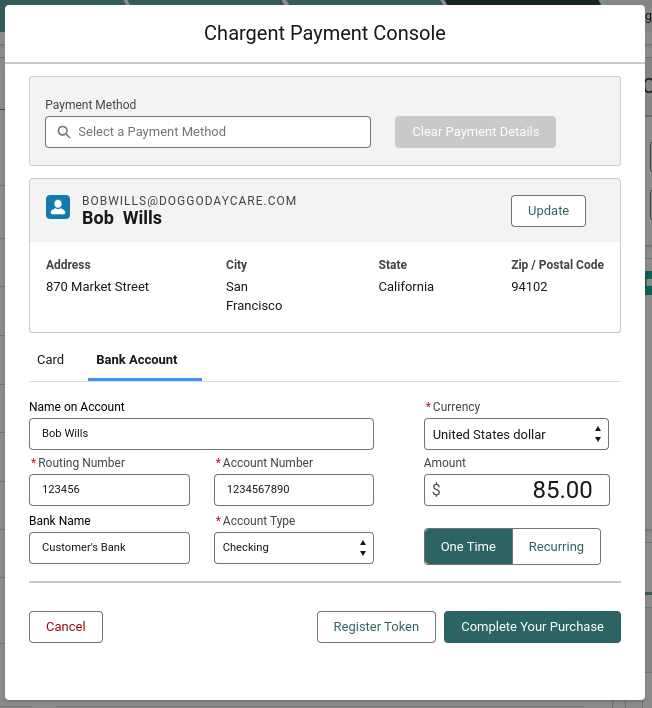
- Select the Card or Bank Account tab depending on the customer’s payment method type.
- Optionally, click Update to change billing information and Continue to return to payment details.
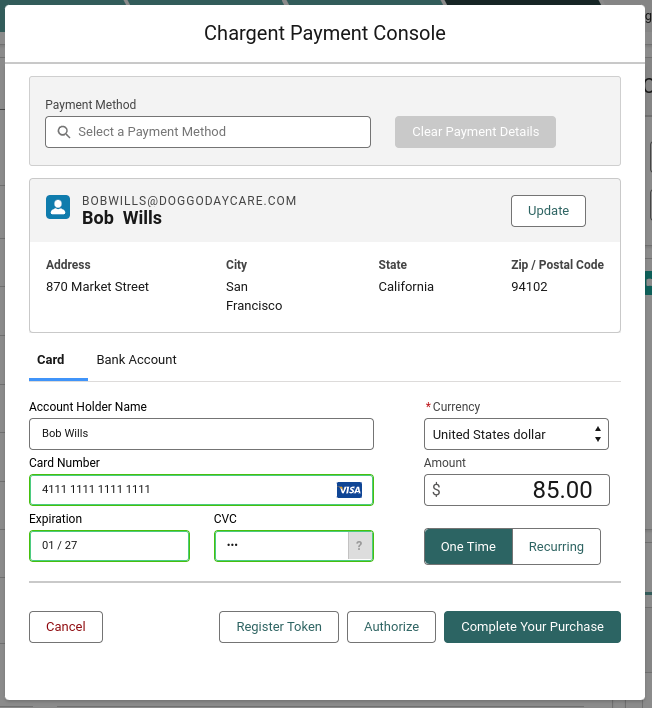
- For one-time payments, select One Time.
- For instructions on processing recurring payments using the Payment Console, see Setting Up Recurring Billing.
- The Amount field can be automatically populated if set up via the Chargent Anywhere component configuration.
- Click the Charge button to automatically create a Chargent Order record and send a callout to your gateway. As a note, the Charge button text can be customized.
- Optionally, click Register Token to generate a token without charging the customer. Learn more by visiting Understanding Tokenization.
- If processing a credit card transaction, you can click Authorize to authorize a transaction. Learn more by visiting Understanding Authorizations.
Note: You can also use the Payment Console to create an authorization. For more information about authorizations, see Understanding Authorizations.
If the transaction is successful, a green approval window will appear, and a transaction record will be created. If the transaction is unsuccessful, a red message displays, showing a decline or error, and a transaction record is created with the decline reason. If the transaction fails and no transaction record is created, see Understanding Unresolved Transactions.

See Also
Chargent Anywhere
Setting Up Payment Methods
Understanding Payments

