Since Chargent is 100% native to Salesforce, all of Salesforce’s reporting features are at your disposal. You can easily modify an installed Chargent report and click Save As to change the name and create a new report. This allows you to keep a copy of the original report in case you need it and use the copy to modify it. For example, you may want to add filters or groupings. If the report was originally called “Awesome Report April,” you could change it to “Awesome Report April – AMEX” and add a filter to exclude any records not for AMEX.
To learn more about the reports included when Chargent is installed in your Salesforce org, see Installed Chargent Reports.
Cloning an Existing Report #
You should always clone your existing report prior to making any changes to avoid any accidental modifications to the original report. To clone an existing report, follow these steps:
- In Salesforce, click the AppLauncher
 and search for Reports.
 - To find Chargent’s reports, click All Folders in the sidebar. All Chargent report folder names begin with “Chargent”

- Click the report you want to clone.
- Click Edit on the report.
- Click the down arrow to the right of Save and choose Save As. Clicking Save will overwrite the original report with any changes you may have made.
- Give your report a new name based on your planned modifications. For example, if you plan to customize the “All Transaction by Month” report to only include credit card transactions, name it “All Credit Card Transactions by Month.”
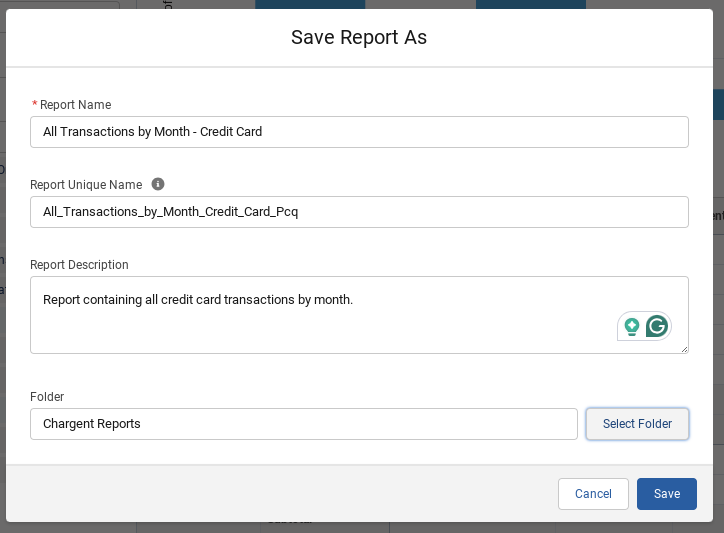
- Click Save.
Customizing an Existing Report #
Once you’ve cloned a report, you can modify several of its properties. To make changes to the report, click Edit on the top right when viewing the report.

Adding or Modifying a Chart
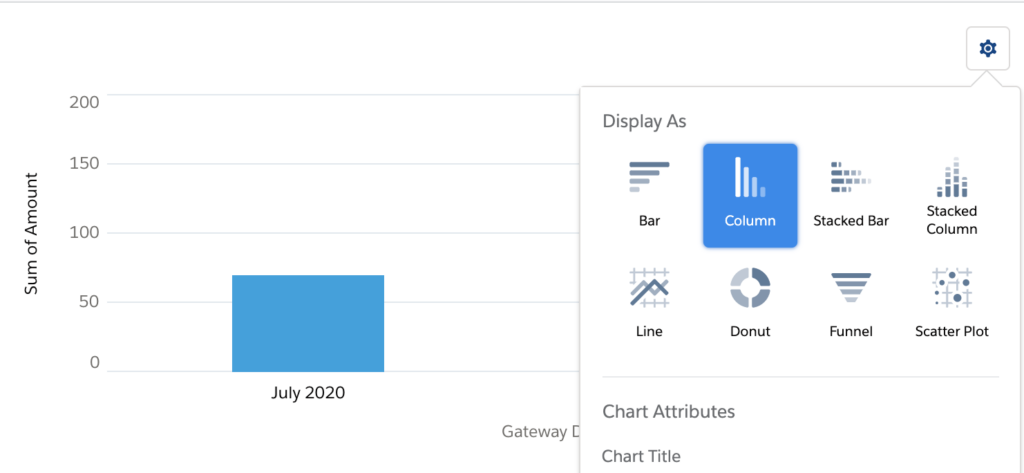
At the top of the report, you can add or modify the chart displayed. Click Toggle Chart ![]() to add a chart. Click the Gear icon
to add a chart. Click the Gear icon ![]() to the right of the chart to change the chart’s properties. You may prefer to display a bar graph, for example. This is where you can also make additional configuration changes like adding a title for your chart. For more information, see Show Report Data Graphically.
to the right of the chart to change the chart’s properties. You may prefer to display a bar graph, for example. This is where you can also make additional configuration changes like adding a title for your chart. For more information, see Show Report Data Graphically.
Customizing Report Views
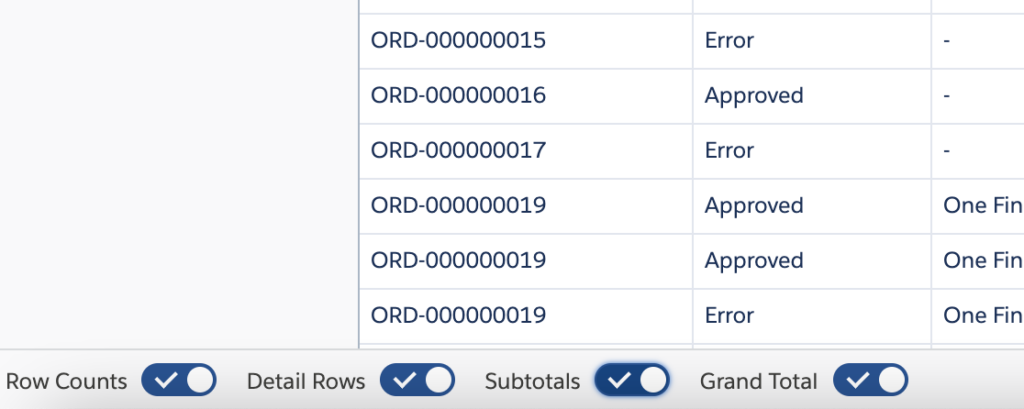
Below the graph, are the Chargent field values included. You can toggle these values at the bottom to adjust the report to your liking. See Customizing Report Views for more details on how these values function.
Customizing Fields
Customize your report by selecting the fields you want displayed in your report. For example, if you’ve decided to accept e-check in addition to credit card transactions, you can easily add bank account fields to your report.
- Click Edit at the top right of your report.
- Under “Columns” in the left sidebar, add, remove, or reposition the fields to build a report that is most useful for you. In this example, we want to see the bank account fields on the report so we can search for and add the Bank Account Name and Bank Account Last 4.

- Click Run at the top right of your report. Alternatively, click Save & Run to store these report changes for future use.
Grouping Rows by Field
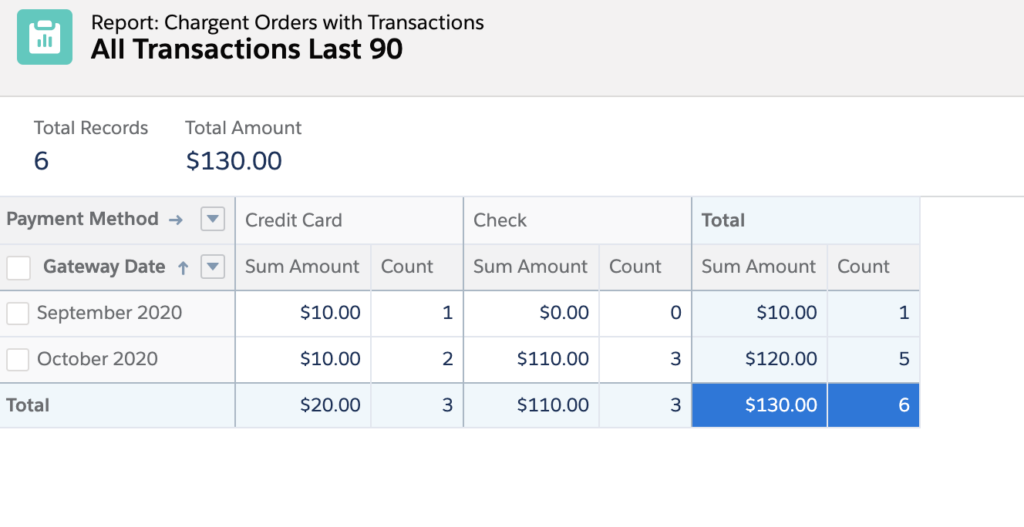
Report groupings allow you to display data together based on a common attribute for faster analysis. For example you might want to break out transactions on your “All Transactions Last 90” report by Payment Status so you can quickly view the completed ones separate from the rest. To do that, add a grouping based on Payment Status. Simply click the dropdown arrow and select “Group Rows by This Field” next to the Payment Status column heading. You will now have grouping based on the payment status within each gateway for each month. See Group and Categorize Your Data for more information.
Creating Report Filters
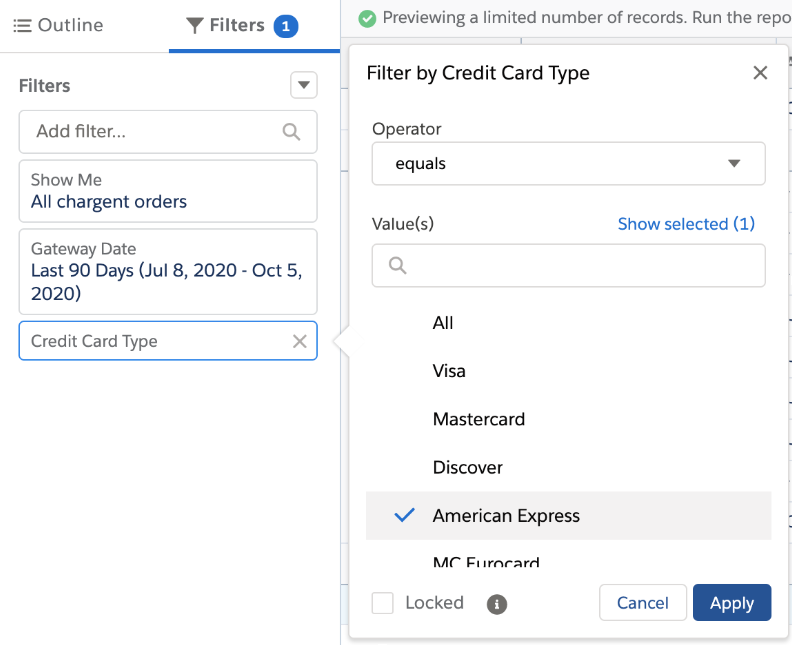
Report filters allow you to drill down into specific data by filtering specific types of transactions to be displayed on the report. Let’s say your CEO wants to see a report that only contains American Express transactions. You can use a filter to display only those records by filtering the report using the Credit Card Type equals “American Express.” For more information, see Filter Your Report.
Creating a New Report #
Every organization has unique reporting needs. You can use Salesforce’s tools to create reports that include any of Chargent’s objects. Let your imagination run wild! To become a Salesforce reporting expert, we recommend completing the Trailhead module Reports & Dashboards for Lightning Experience.
Creating a Custom Report Type
Chargent is installed with several custom report types for some Chargent objects. If you want to create reports on an object that does not have a custom report type, see Set Up a Custom Report Type.
See Also
Reports & Dashboards for Lightning Experience
Chargent Reporting
Installed Chargent Reports

