Managing payments can be a challenge without the right systems in place. In today’s world, businesses must have enough flexibility to accept a variety of different payment methods – whether in person, over the phone, or online.
If you’re using Salesforce to manage your customers, Chargent is the payment processing application that you need. As the top payment application on the Salesforce AppExchange, Chargent gives you total control over your payment processing.
Salesforce users often wonder how to set up a payment processor, and Chargent makes it easier than ever. In this post, you’re going to learn how to set up Chargent in ten minutes or less – giving your business the ability to take all types of payments, including one-time, recurring, debit/credit card, and bank payments.
Getting Started With Your Chargent Trial
To properly install the Chargent payment solution, there are a few prerequisites that must be in place. Ensure that you meet the following criteria before attempting to install the solution.
- My Domain is set up and deployed in your Salesforce Org.
- You have a Salesforce Site already set up.
- You have test credentials for your payment gateway on hand.
- You have installed the three Chargent packages from our Package Installation Manager.
As a best practice, we recommend installing Chargent in a Sandbox Org first. Salesforce Sandbox is a replica of your production organization and allows you to test and experiment with different configurations, new apps, and major system updates. By using a sandbox, you can test your Chargent installation and assure that everything is in place, without affecting your production environment.
What is a Successful Chargent Trial?
Every business is different. For one business, success may be defined by reducing the level of effort required when managing recurring billing or processing credit cards. Another business might consider victory as increasing collections for failed payments. As you begin your 30-day trial, you should identify what payment system success looks like for your particular organization.
Knowing what success should look like will help you evaluate Chargent and confirm whether it is right for your business. Consider the following questions.
1) What are your organization’s payment use cases?
Before installing a connection to your payment processor, identify all the ways that your business collects cash. Companies that take payments on the phone often require a different set of features from their payment processors than those who take payments in person or those who collect online payments. Chargent makes it easy to collect recurring payments, allowing you to control subscription fees through numerous gateways.
Also, consider the future goals of your organization. Is your goal simply to accept credit card payments or do you need to integrate with a specific payment gateway? Chargent allows you to access dozens of gateway options – so you can choose which type of merchant processor works best for your business and business model.
Ultimately, the payment solution you choose should check the boxes that meet the specific needs of your business. By identifying your organization’s success factors, you can better determine whether Chargent is the optimal payment solution for your current and future needs.
2) What is your testing plan?
It’s also important to identify which steps you need to take in order to properly test Chargent’s robust set of features.
If you’re planning on testing recurring charges, consider how you will set up the billing schedule. Do you plan on rerunning the charge on a daily or a weekly basis?
For one-time payments, consider what type of payment methods you want to offer to your customers. Will you acceptcredit and debit card payments only, or allow for bank account payments too?
Evaluate which individuals need to be involved in the testing process. Answer the following questions:
- Do multiple teammates need to test the solution to determine whether it solves the business’ payment challenges?
- Who is the ultimate decision-maker on which payment processor the organization will select – and what are their criteria for success?
Keep in mind that Chargent’s free 30-day trial is intended for the purpose of testing its functionality. Performing any development or implementation prior to signing up for Chargent is against the terms and conditions of our trial agreement. This is to ensure that once you do implement our product, you’ll be able to do so with the full backing of our amazing support team.
How To Maximize Payment Success With Chargent’s Trial
Chargent grants your business complete control over how and when you collect payments. Ready to get going with your trial? We’ll walk you through the entire process, and in a few minutes, you’ll have your trial set up and ready to go.
Assigning Chargent Licenses
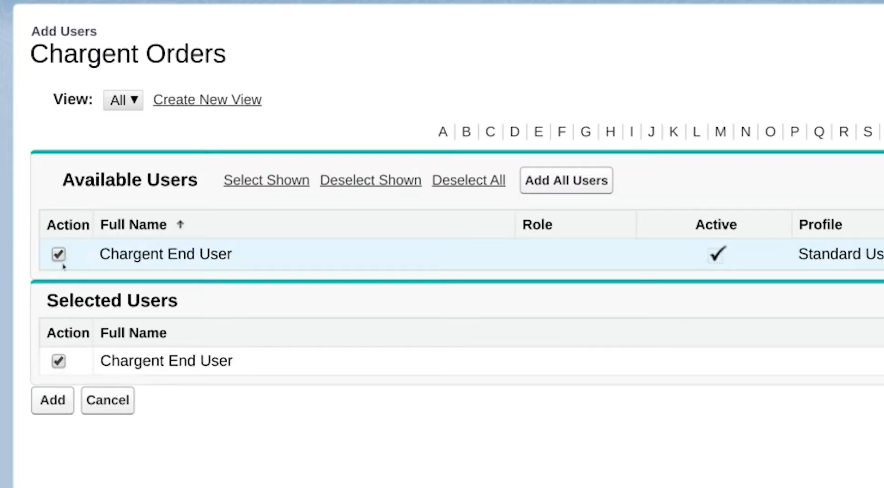
When installing Chargent in a Salesforce Sandbox, there is no need to assign licenses to your users. However, if you’re installing it into your Production organization, you will need to assign licenses to your users for both Chargent Orders and Chargent Anywhere.
To assign licenses, go to Setup and search for “Installed Packages.” Then choose Chargent Anywhere, and assign the users. Next, select Chargent Orders and repeat the same steps.
Now, your Chargent licenses are set up and you are ready to connect the app to your selected payment gateway.
Connecting Chargent To Your Payment Gateway
Chargent can be integrated with over thirty payment gateways. Our product and engineering teams have worked diligently to simplify the integration process and ensure that even the most novice user can successfully implement the solution. By using the Chargent Setup Wizard, all the hard work is already done for you.
To connect Chargent with your payment gateway, click the App Launcher (waffle) icon in the upper-left corner of the page. Type “Chargent” into the Quick Find box and click the Chargent Settings option.
Select the Chargent Setup Wizard sub-tab and it will walk you through the simple steps of finalizing the configuration of your gateway.
Setting Up Payment Request
With your gateway configured, you’re now ready to set up Chargent’s Payment Request. This feature allows you to send payment links directly to your customers in the most secure way possible.
This step is also simple and straightforward. Click the App Launcher (waffle) icon in the top-left of the page, type Chargent into the find box, and select the Chargent Settings tab.
Locate and select the Chargent Payment Request Setup Wizard sub-tab. Just like before, the wizard will walk you through each step of setting up and customizing Payment Request.
Adding Chargent Anywhere
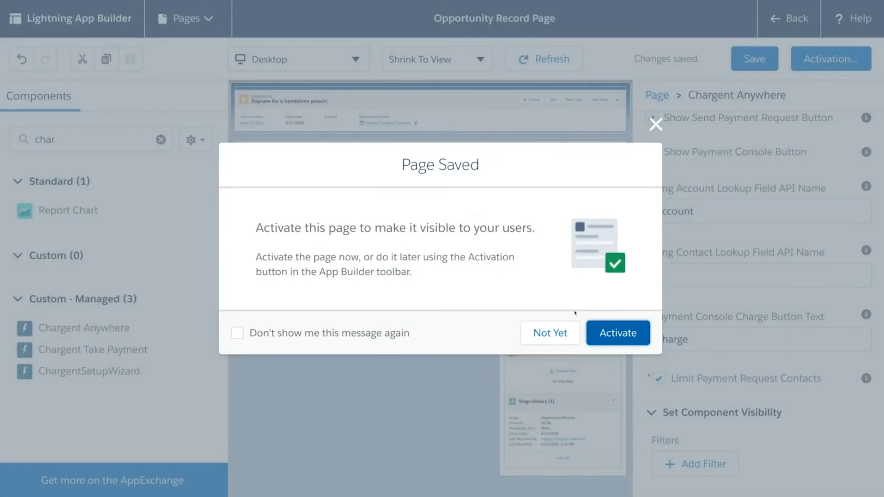
After finishing with Payment Request, you can begin setting up Chargent Anywhere. Flexible and highly useful, Chargent Anywhere is a Lightning component that enables you to collect payments from any page in your Salesforce organization. Proper installation is as simple as adding the component to your page layout and completing a few quick configurations. Follow these steps:
- Navigate to the Page Builder.
- Drag and drop Chargent Anywhere onto the page.
- Configure the component.
- Click Save.
In only a few minutes, you have assigned all Chargent licenses, connected it to your gateway, set up Payment Request, and added Chargent Anywhere. Now, we will run a quick test to make sure everything is installed and configured correctly.
Testing Chargent
Before running your first test, confirm that the following steps are completed:
- Create a new record on the object you configured in Chargent Anywhere.
- Populate the Billing Account, Billing Contact, and Charge Amount fields with sample data.
- Add your email address to the Contact Record so you will receive the email when testing the Payment Request feature.
Once these steps are completed, you’re ready to test Chargent by sending a Payment Request. This test will confirm that your Payment Requests look the way you want and that your gateway is configured properly.
- Click the Send Payment Request button in the Chargent Anywhere component.
- Choose your test contact, or manually enter your email address.
- Click Send Request.
- Check your email – you will receive a payment notification. Click the link in the email and it will direct you to a secure Payment Request page.
- Use a test card. These can be found in the Chargent document for your payment gateway. A common test number that works for just about all gateways is 4111-1111-1111-1111.
- Click Pay, and wait for a confirmation message to appear.
- Navigate back to your Salesforce Org and you will see a new Chargent Order and new transaction records for the payment you just collected. This payment data is now tokenized and ready for future use.
Succeeding With Your Chargent Trial
Now that your Chargent trial has been set up, you can run and configure further tests. As always, the Chargent Support Team is here to help if you have any questions or receive any errors during setup.
Our Product Team takes pride in building the features you need to succeed when collecting payments. As Salesforce’s most popular payment application, Chargent is used and loved by businesses around the world, and we’re certain that you’ll love it too. Just follow the steps presented in this article, and you’ll be ready to collect payments efficiently and maximize the success of your payment system.


