There’s no simpler way for your customers to make a payment in your Salesforce organization. In fact, Chargent’s Payment Request is our most popular feature. We want to help you make the most of this feature, so we’re sharing some of our top Payment Request tips and tricks.
How Payment Request Works
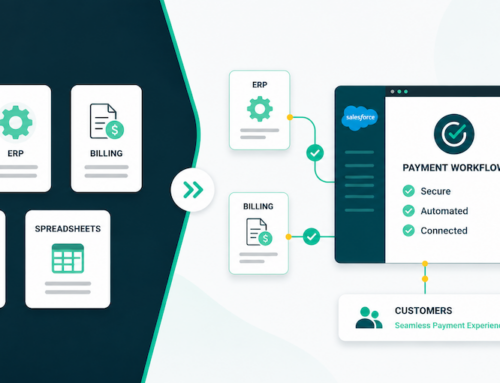
First, a refresher on what Payment Request does for your business:
Using our setup wizard, you can configure and customize Payment Request templates with just a handful of clicks. You choose which payment methods to accept, the messaging and copy your customers will be presented with, the layout of the page, button colors, logos – the possibilities are endless. And, if you need different templates for different customer groups or products, you can do that too by creating multiple templates.
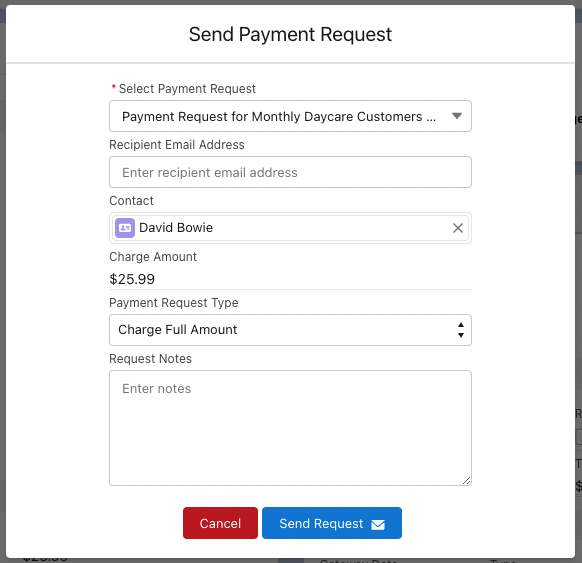
From there, sending a Payment Request is as easy as clicking a button and selecting the recipient.
They’ll receive the email instantly, which – you guessed it – can also be customized. That email includes a payment link that takes your customer to your secure, fully branded Payment Request page.
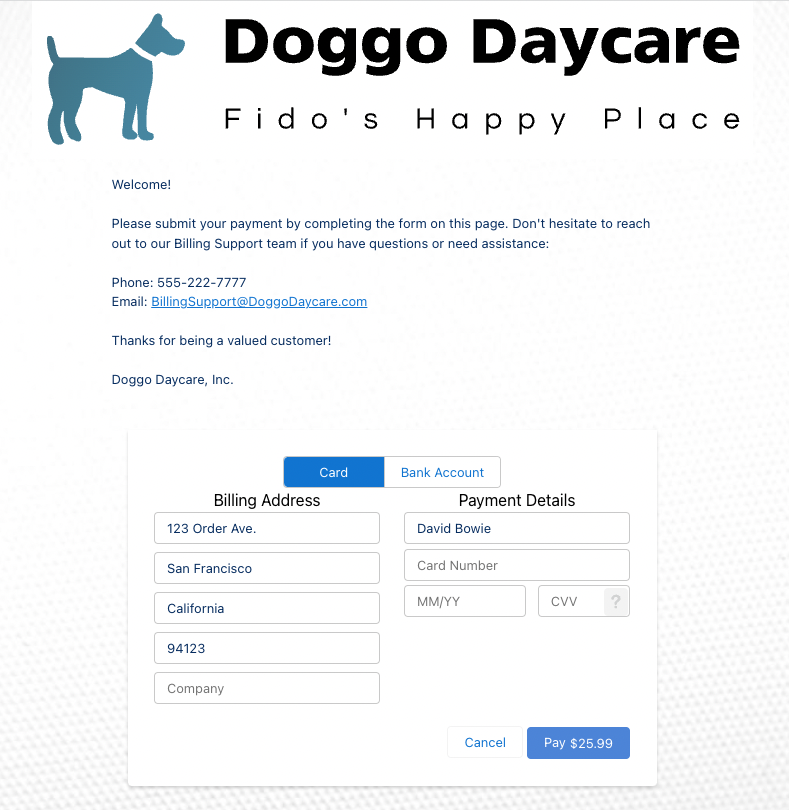
Your customer then enters their card or bank account information, and Chargent does the rest. The payment is collected and recorded in your Salesforce org immediately. Pretty easy, right?
Now that we’ve covered how Payment Request works, let’s talk tips & tricks.
Tip #1: Send a Payment Request from Just About Anywhere
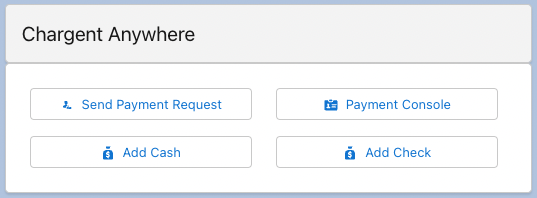
Every organization has unique business processes, and we made sure to consider this when designing Payment Requests. If you’re spending plenty of time in the Chargent app, then you’re likely already sending a Payment Request in the typical way: by clicking the [Send Payment Request] button in Chargent Anywhere or the action button found in the highlight panel of the Chargent Order record.
There are a couple more places from which you can send a Payment Request:
- Clicking the [New] button from any Payment Request related list
- Clicking the [New] button from the Payment Request tab and list view
![Screenshot of Payment Request: Click [New] button](https://appfrontier.com/wp-content/uploads/2022/10/CB113_03.png)
If you and your team are working from different apps and objects altogether, you can drop our Chargent Anywhere component onto any object of your choosing. That will enable you to send a Payment Request from the page that makes the most sense for your business and workflow.
Tip #2: Edit a Payment Request AFTER it’s Generated
Let’s say you’ve already sent a Payment Request, but realized that it needed a couple of edits after the fact.
There are fields on both the Payment Request and Chargent Order records that you can edit in order to update the Payment Request page that your customer will land on. Let’s go over them:
From the Chargent Order Record
Charge Amount
This is a really common scenario. If the amount due needs to change before your customer makes the payment, editing this field will do just that. Enter the new value, click save, and the Payment Request page will reflect that change right away.
From the Payment Request Record
Status
When a Payment Request is created but not yet paid, this field will likely show the “Created” value. If you change this value to “Canceled,” the payment link will be deactivated. This is useful if your customer has already made arrangements to pay, and you simply want to disable that Payment Request link.
Payment Request Transaction Type
You can edit this field to change the type of transaction that will be executed when your customer lands on the Payment Request page. Your options are: Charge Full Amount, Authorize Full Amount, or Authorize Minimum Amount
Payment Template
Editing this field will change the Payment Request template that’s used on the Payment Request page.
Tip #3 – Creating a Payment Request WITHOUT Sending It
There are plenty of use cases where it makes sense to create the Payment Request record, but NOT send it right away. For instance:
- You have automation that sends a Payment Request only when certain criteria are met
- Your customers prefer that you communicate with them via text message
- You’re embedding the payment link in a PDF or other document
To accommodate scenarios like these, we’ve made it easy to generate a Payment Request record without sending it. Let’s explore how.
Creating a one-off Payment Request record without sending it
You have a couple of options to achieve this.
Option 1: Switch over to Salesforce Classic, navigate to the Payment Request tab, and click the [New] button. From here, enter values into the handful of fields needed, then click the [Save] button.
![Screenshot of Payment Request: Recent payment requests, click [New] button](https://appfrontier.com/wp-content/uploads/2022/10/CB113_07.png)
Option 2: Navigate to Setup > Data Loader, then follow the instructions for your operating system. This process will involve entering the values needed into a CSV file, then uploading that file using the Data Loader
Automating the creation of Payment Request records for one template
If you want a Payment Request record created for each Chargent Order, and only need one template, this can be achieved right in our Payment Request Setup Wizard. Just look for the option that reads: “Create Payment Request Record for All Orders?”
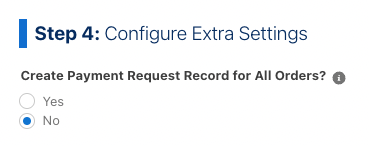
By choosing “yes” for this option, a Payment Request record will be created each time a Chargent Order record is created. Note that this option can only be selected for one Payment Request template at a time.
Tip #4: Automating the Creation of Payment Request Records using Multiple Templates
If you want to create a Payment Request record for every Chargent Order, but want to use a different template for different records, you can do that too. Let’s discuss a quick use case in order to put this into context.
Doggo Daycare uses a couple of different Payment Request templates; one for their monthly subscription customers, and one for events. They want to automate the creation of Payment Request records for both of these scenarios.
We have a few options here: Salesforce Flow, API, or Apex. These are all good options, but here we’re going to focus on Flow.
Why Salesforce Flow?
- It’s low code, so any Salesforce administrator should be able to get it up and running quickly
- It’s easy to maintain should future edits be needed
- It’s flexible. Salesforce is retiring Workflow Rules and Process Builder, and their replacement is Flow. As such, they’ve built it with a robust feature set. It handles automations that historically required code and professional developers, and will accommodate just about every use case
So let’s use Flow to achieve this. But first, we need to ensure that the “Create Payment Request Record for All Orders” option is disabled in the Payment Request Setup wizard for all templates. That option only works for one template at a time, and our Flow is going to handle this going forward.
Next, we’ll get started on our Flow by navigating to “Process Automation,” then “Flows” in Salesforce Setup. We’ll click the [New Flow] button and choose “Record-Triggered Flow.”
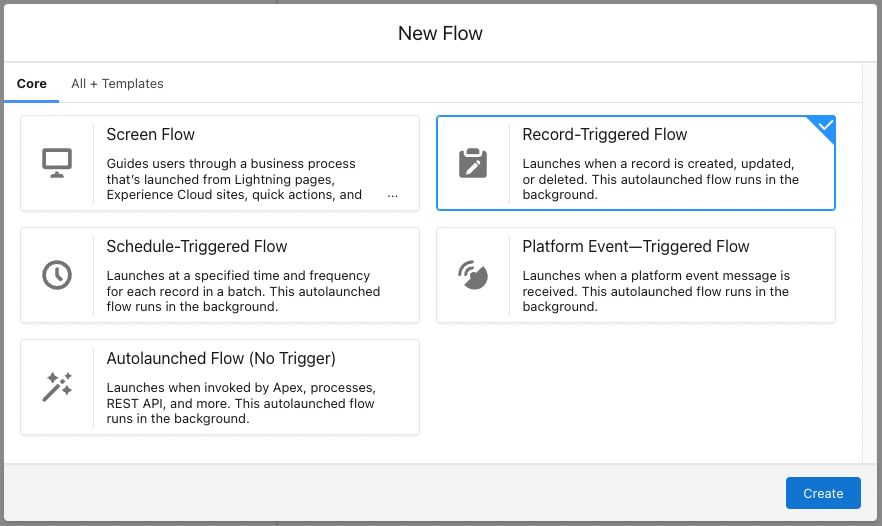
We’re picking this option because we want a Payment Request record created each time a Chargent Order record is created or edited to meet specific criteria.
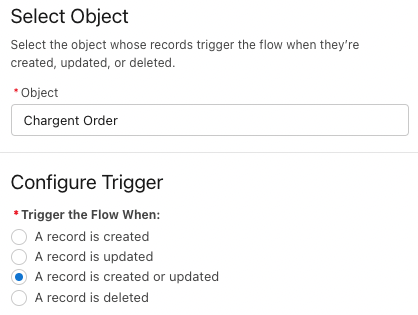
We’ll choose Chargent Order for the Object, and for the “Configure Trigger” option, we’ll select “A record is created or updated.”
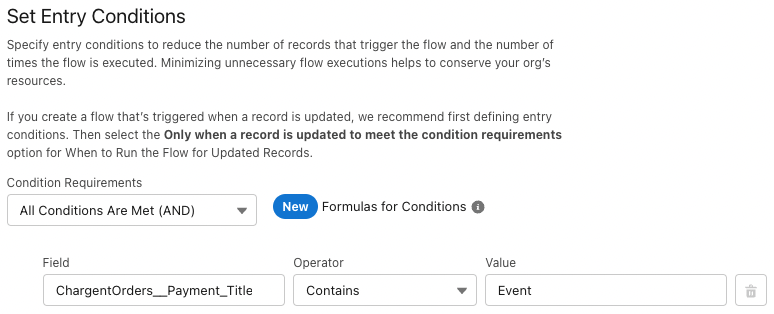
For the “Set Entry Conditions” section, we’re going to choose “All Conditions Are Met,” and we’ll add a single condition for this example. We’ll choose the “Payment Title” field on the Chargent Order object, the “Contains” Operator, and we’ll enter the word “Event” in the Value field. What this means is that if a Chargent Order record is created with or edited to include the word “Event” in that Payment Title field, this Flow will trigger.
We’re going to choose the “only when a record is updated to meet the condition requirements” option so that this only triggers on record edits where the condition WASN’T already met prior to the edit.

Finally, we’ll optimize this Flow for “Actions and Related Records” so that it only triggers after a record has been saved. Our Start for this Flow is complete.

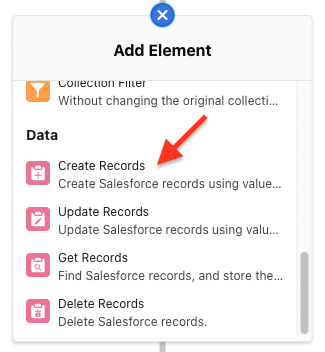
Next we’ll add an element by clicking the plus symbol. We scroll down to the Data section and choose “Create Records.”
We’ll give this event a label that represents what it will accomplish. For this example, we’ll enter “Create Event Payment Request Record.”
Then we’ll choose “One” from the “How Many Records to Create” option, and we’ll choose “Use separate resources, and literal values” so that we can specify exactly which field values to populate when creating our Payment Request record. For the Object, we’ll choose “Payment Request.”

From here we’ll define which values should be populated in the fields on the record we’re creating. To do that, we’ll choose the field on the left, then either choose or enter the values on the right, clicking the [Add Field] button each time we want to set more field values.
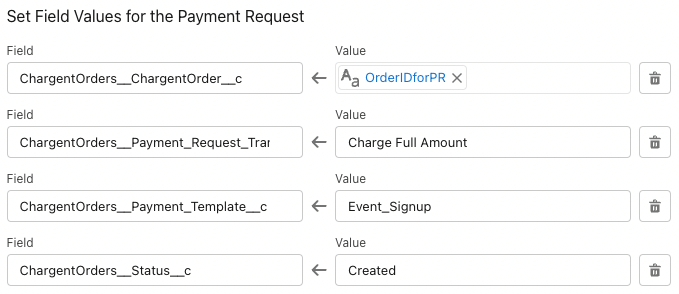
In this example, I’ve populated the “Chargent Order” field with a variable for the Chargent Order record that triggered this Flow. I’ve populated the “Payment Request Transaction Type” field with “Charge Full Amount.” For the “Status” field I’ve chosen “Created.”
Finally, for the “Payment Template” field on the Payment Request record, I’ve copied the template name I wish to use from an existing Payment Request record, and pasted it here. This is the piece that will define which Payment Request template will be used when the Payment Request page for this record is loaded.
From here, I click the [Done] button, then save and activate this Flow.
And that’s it! Our new Flow will trigger when a Chargent Order record is created or edited to include the word “event” in that Payment Title field. When it triggers, it will create a related Payment Request record using the template that we specified. If we want to achieve the same thing for another template, we’d simply add a Decision element after our Flow Start for that other option.
From here, we can send that Payment Request link, or embed it in an invoice. Whatever makes sense for our business.
Our Payment Request feature is flexible, and these are just a few tips on how you and your business can leverage that flexibility. To learn more, get in touch to discuss your specific use case.