Automated Collections Software Works for Your Business
When it comes to collections activity, every dollar, and every minute counts.
Chargent’s Automated Collections add-on is a powerful dunning tool that does the heavy lifting of collecting late and failed payments – right in Salesforce. You’ll realize immediate ROI, saving time and money by reducing manual work and:
- Automatically retrying payment collection for missed payments
- Communicating with your customers to inform them of the missed payments
- Providing your customers with Payment Request links they can use to update their card or bank account information and submit the payment themselves
… all on the schedule and cadence that makes sense for your business.
But if you’re just getting started on your accounts receivable automation journey, you may be wondering, “what should my first Automated Collections process look like?” That’s a common question! And we’re here to help.
Setting up Your First Automated Collections Process
Collections processes are not one-size-fits-all. Every organization is different, and what works for some customers may not work for others.
Don’t be afraid to jump in and get started! Here, we’ll starting with a boilerplate process that you can use as a template – and then fine-tune as you learn what’s most effective.
Meet Doggo Daycare
First, let’s establish a basic use case:
Our business, Doggo Daycare, allows customers to pay monthly for unlimited access to daycare and grooming. When those payments are declined, our Automated Collections process will kick in.
Now that we’ve covered our use case, let’s design our first Automated Collections process!
Stage 1
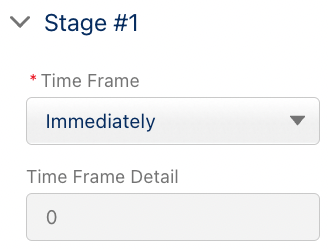
To get paid as quickly as possible, we need to make our customer aware of the failed payment. We’ll choose “Immediately” from the Time Frame picklist for this first stage.

Note: the “Immediately” Time Frame option does not allow for automatic payment collection retries. This is because most gateways would interpret an immediate retry of a payment that was just declined as a duplicate, and ignore it completely.
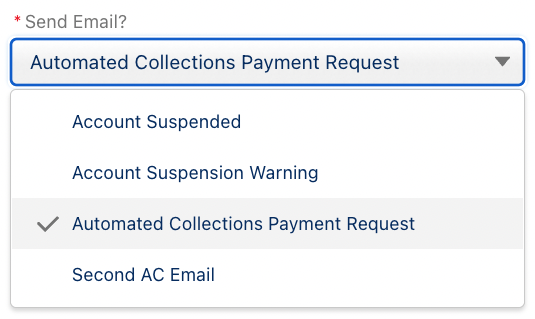
We’ll select our first email template from the “Send Email?” picklist.

This email will let our customer know that the payment failed, and provide them with a Payment Request link so that they can update their payment information and submit the payment themselves – securely on your Salesforce Site. We’ll also use the “Order Title” and “Order Descriptor” merge fields to ensure that our email clearly explains what the payment is for.
Email Subject: Attention: Your scheduled payment was declined
{!Recipient.FirstName},
Uh oh! Looks like your payment of [[amount due]] was declined on [[decline date]].
Please update your payment details and submit the payment again by clicking here: [[payment request link]].
{!ChargentOrders__ChargentOrder__c.ChargentOrders__Payment_Title__c}
{!ChargentOrders__ChargentOrder__c.ChargentOrders__Payment_Descriptor__c}
Thank you
{!Organization.Name}
Stage 2
For this stage, we want the Chargent app to retry the payment collection the next day. We won’t configure this stage to send an email because we’ve done that in our first stage.
We’ll choose “# Days After” from the Time Frame picklist, and enter “1” into the Time Frame Detail field. We’ll select “Yes” from the Retry Payment picklist, and “No Email” from the Send Email on Failed Retry picklist.
Stage 3
For this stage, we’re going to wait a few more days, then retry the payment collection. If that payment retry fails, we’ll send our second email with a more urgent tone.
We’ll choose “# Days After” from the Time Frame picklist, and enter “3” into the Time Frame Detail field. From the Send Email on Failed Retry picklist, we’ll choose our second, more urgent email template.
Email Subject: Attention: Your scheduled payment was declined. Response needed.
{!Recipient.FirstName},
We’ve recently contacted you about your missed payment. We have not been able to collect this payment using the card / bank account on file. Please contact our Billing Department at your earliest convenience for assistance:
[BILLING DEPT PHONE NUMBER] [BILLING DEPT EMAIL ADDRESS] [BILLING DEPT HOURS OF OPERATIONS]
Thank you.
{!Organization.Name}
Stage 4
So far, we’ve let our customer know about this missed payment, provided them with a Payment Request link, and tried to collect the payment two more times. If we haven’t yet been successful, it may be worth considering that the payment may have been declined due to insufficient funds. As such, let’s assume that our customer gets paid on a typical payday: the 1st, 15th, or 31st of the month.
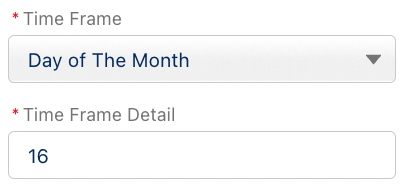
We’ll select “Day of The Month” from the Time Frame picklist, and enter “16” into the Time Frame Detail field.

We’ll select “Yes” from the Payment Retry picklist. For the email option – which is only sent if our automatic retry doesn’t successfully collect the payment – we’ll choose a more sternly worded email template that makes our customer aware of this past-due payment, and any actions required on their part.
Email Subject: Action Needed – Your payment is past due
{!Recipient.FirstName},
Your scheduled payment is now past due. Please contact our Billing Department to make payment arrangements in order to avoid suspension of your account / service.
[BILLING DEPT PHONE NUMBER][BILLING DEPT EMAIL ADDRESS][BILLING DEPT HOURS OF OPERATIONS]
???????Thank you.
{!Organization.Name}
From here, click the [Save] button to complete the configuration process.
Congratulations – your first Automated Collections process is now up and running! If you need to make edits, click into the Automated Collections process you just created on the left-side navigation to do so. If you need to disable it, you can do that by clicking the caret (downward facing arrow) next to your process, then clicking [Disable].
Your Automated Collections Process Is Live! What’s Next?
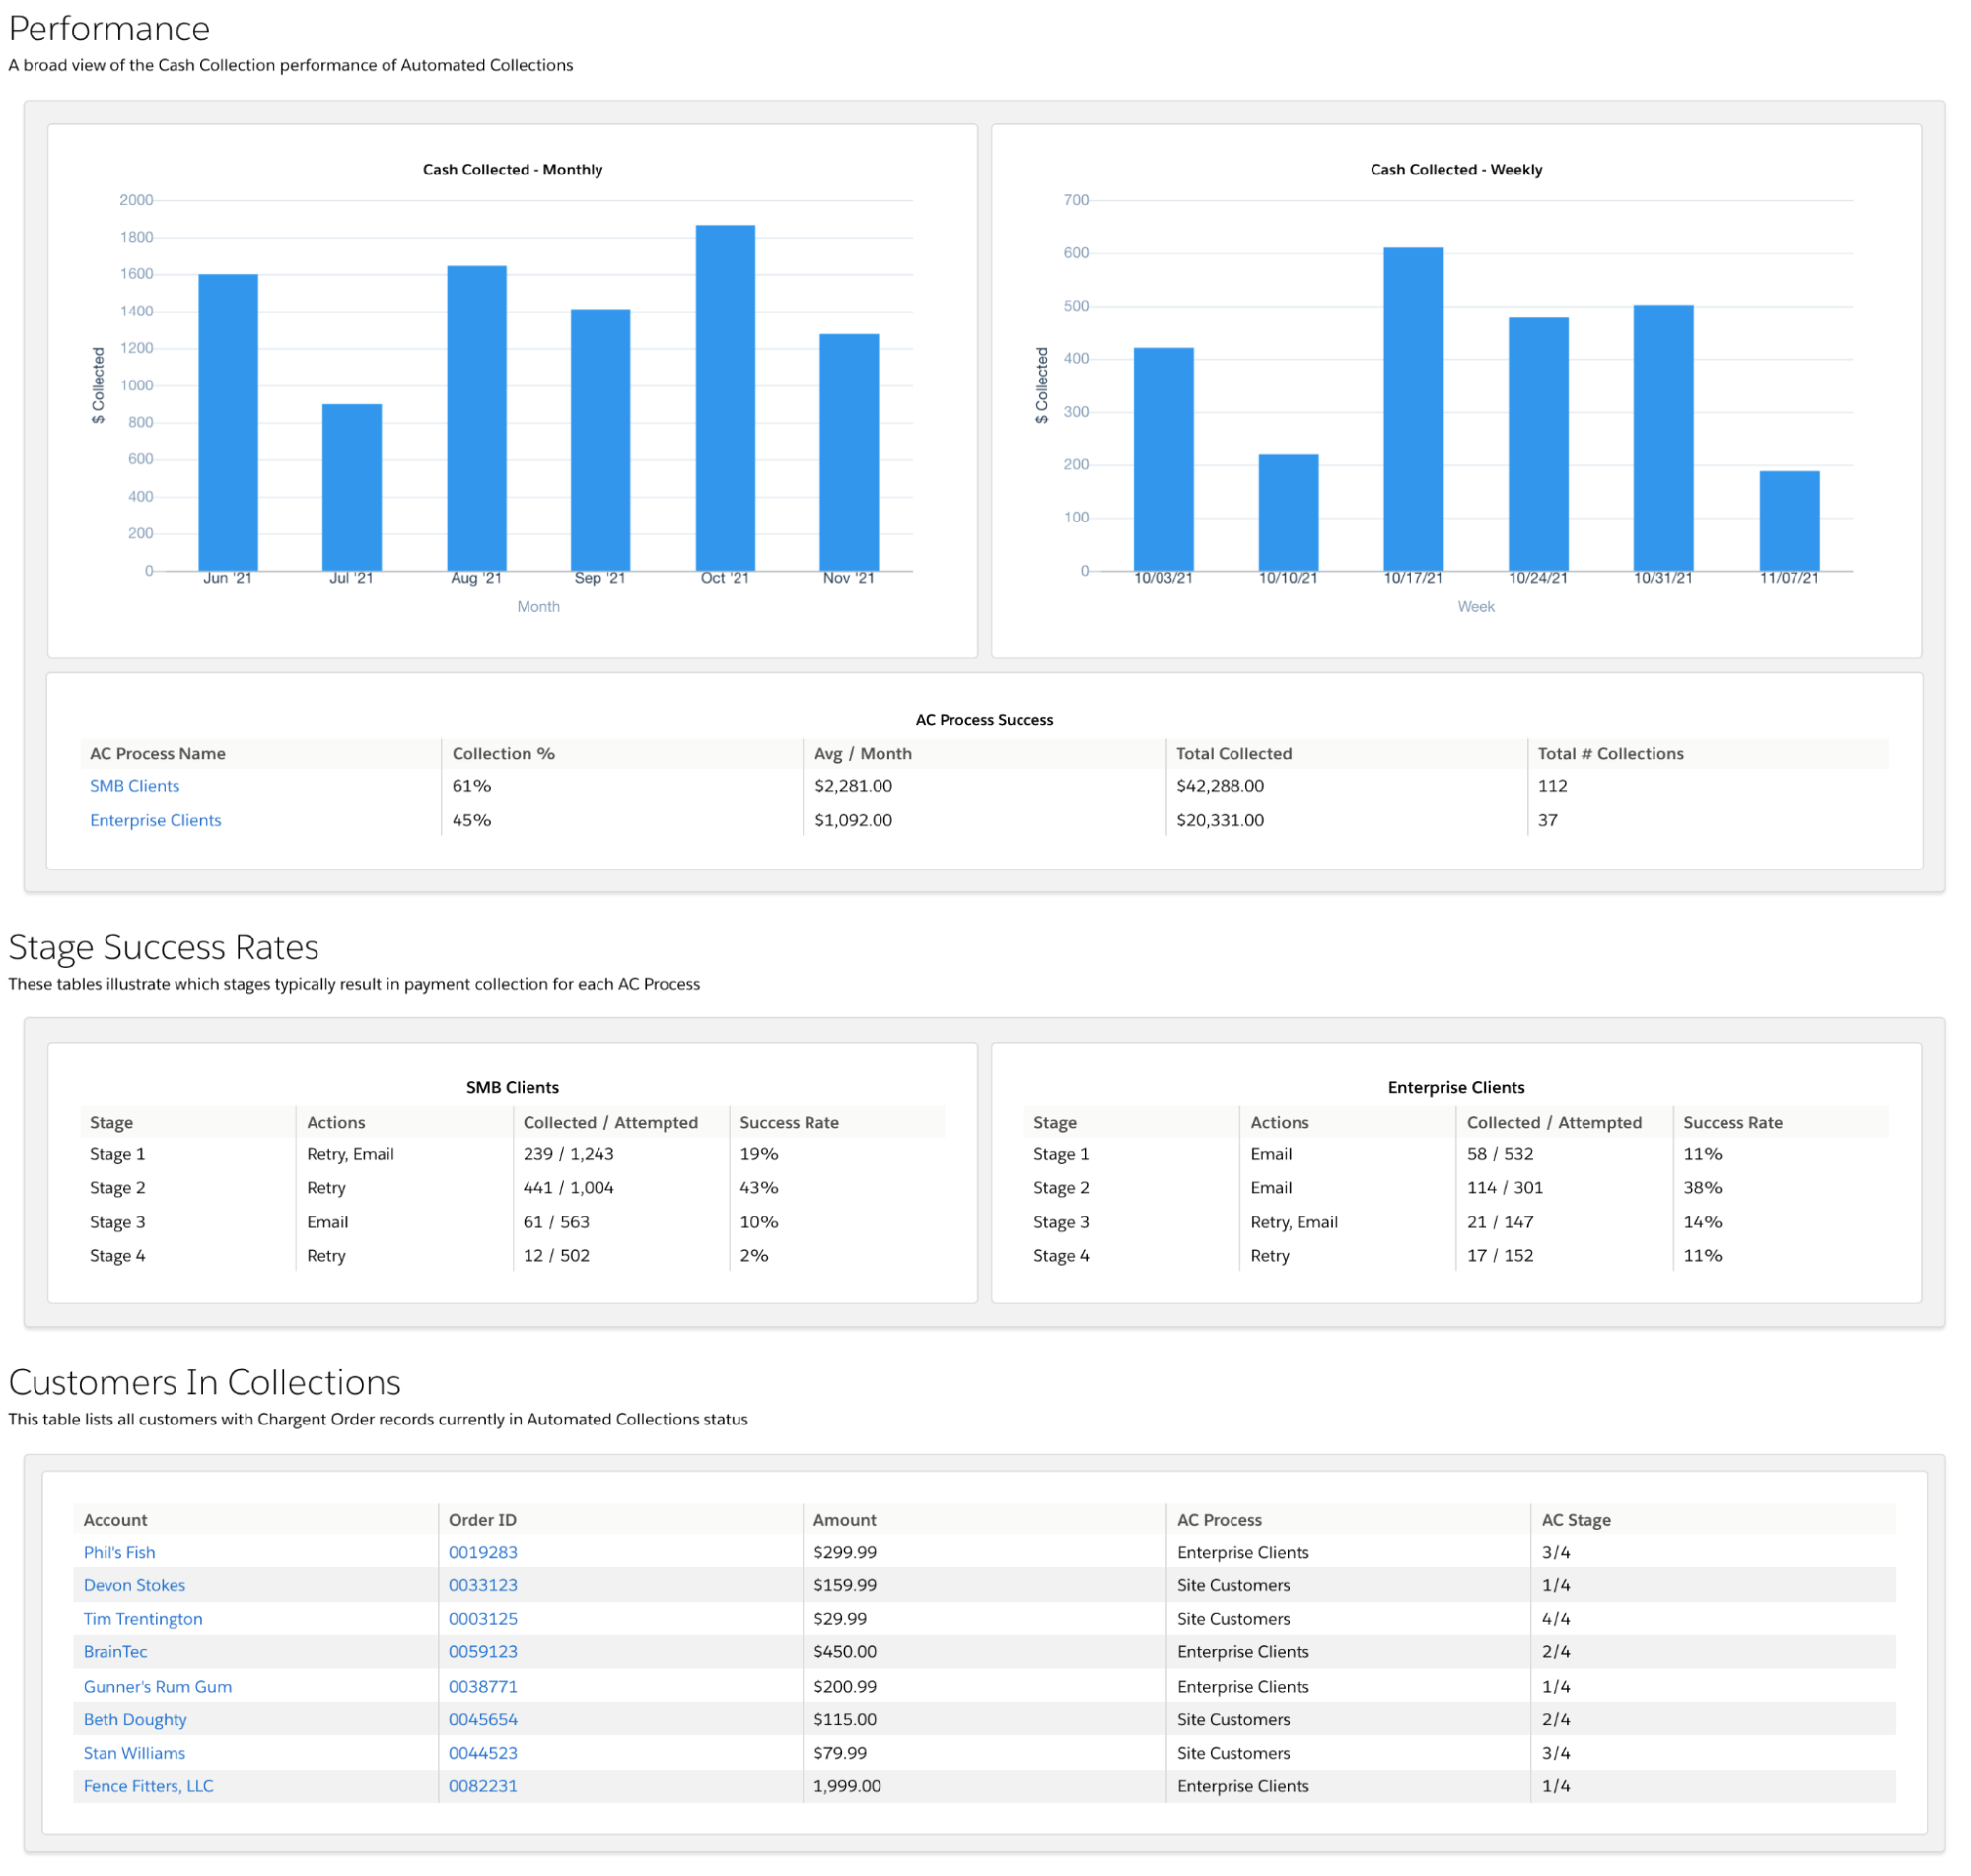
Once your Automated Collections process is up and running, you can monitor how it’s performing using the Automated Collections Dashboard, and refine your process as you see fit.

Got ideas for improvements? You can adjust this process, or create a new one and deploy it as part of an A/B test – just remember to switch the Criteria picklist to “Rule-based” and assign your Chargent Order records accordingly.
One thing to remember is that this Automated Collections process template is just a starting point as you embark on automating your accounts receivable processes with Chargent. Learn more about using data to improve your collections process in real time, or get in touch with our team to get started.


