Integrate CyberSource with Salesforce in minutes! In this video you will learn how you can connect Salesforce to your CyberSource account very quickly using the Chargent payment application.
View the 6-minute video:
Or Read the Transcript:
Presenter:
Micaiah Filkins, Co-Founder & President, AppFrontier LLC
In this video, we’re going to show you how to integrate CyberSource to Salesforce in just a couple of moments. Let’s go.
First off, install both the Chargent Base package, as well as the Chargent Orders package. And you can put both of them into your production organization.
Next, we’re going to configure Chargent. You’ve got some tips in the quick start guide, but that’s really why you’re on this video.
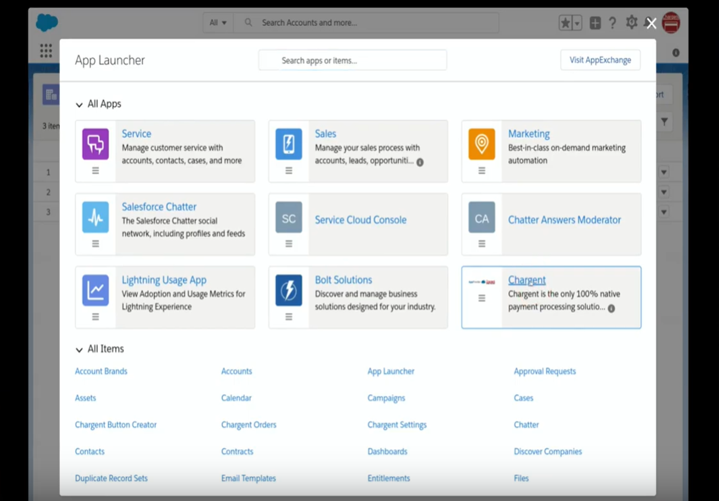
Okay. So, now here in Salesforce, we’re going to need to get under the Chargent Setup Wizard. To do that, I’m going to click on the waffle, which takes me to the App Launcher. And then, I’m going to click the Chargent option on the screen.
Once I’m in Chargent, I’m simply going to go to the “Gateways” tab, and click the “New” button. Since we’re setting up CyberSource, we know that we do have a Payment Gateway account, so I’ll click “Yes.” And now, we just need to find CyberSource and click “Continue.” Here, I’m going to put in our merchant ID, which is also likely your organization ID, and also your merchant password.
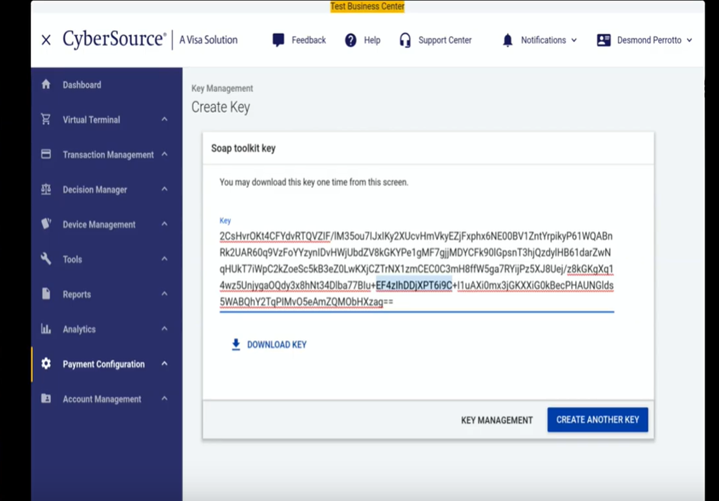
All right. Now, it’s time to get the transaction security key. And for that, we’re going to log into the business center. I’m going to click “Payment Configuration.” I’m going to click “Key Management,” and then “Generate Key.” In this case, I want to click “Transaction Processing,” and then “SOAP.” To get this key, I’m just going to click once on the key itself. I’m going to use CTRL+A to select all, and CTRL+C to copy. I’m going to pop back over to the Chargent Setup Wizard, and I’m going to use CTRL+V to paste into the security key field.
If you’d like some more help with any of that, just click this “View Gateway Documentation” link, and that’s going to take you to the companion page for this video where you can find even more details on how to make this work. I don’t think you’re going to need it, because you should just click “Sign In,” and here, we can see that our credentials have been successfully verified. I’m going to click “Continue.”
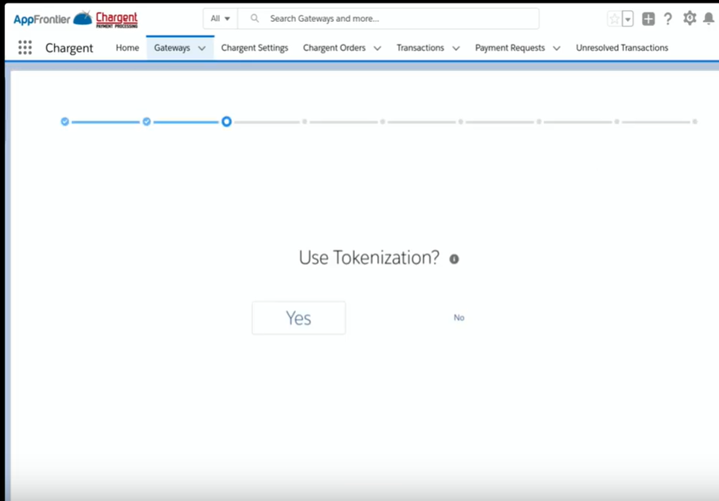
Next, the Chargent Setup Wizard asks if we should use tokenization. Chargent strongly recommends that all of our customers use tokenization. For more information on that, check out our explainer video right here.
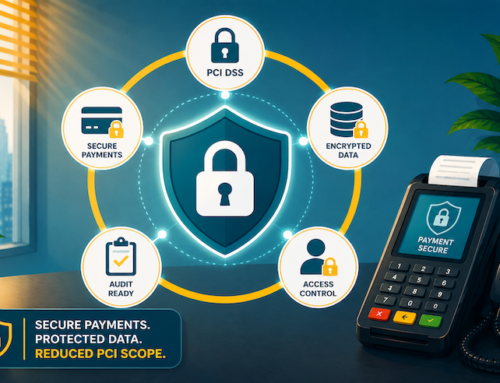
Do be sure to consult our PCI guide for information on complete details about configuring Chargent to best reduce your organization’s PCI scope.
Next up, we’ve got currency. What are you going to be using? On the screen, you can see the most popular ones with our Chargent customers. Do keep in mind, we support all government issued currencies from inside Salesforce that are supported by your payment gateway.
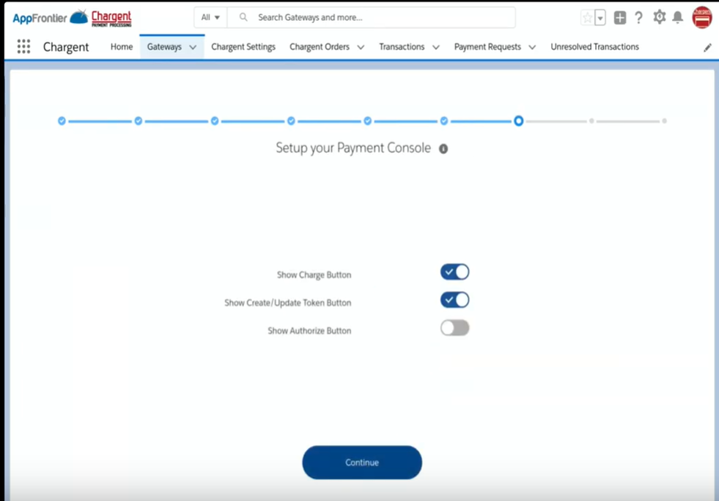
Next up, are you going to use Chargent’s Payment Console? We sure hope you will. We think it’s a very slick way to take payments.
This was letting us know that the system is going to send an email on your behalf requesting the key. When you do get that, please bring that in and put it into the system to make sure everything works.
All right. What payment methods will you be accepting? Credit card and bank account, sometimes known as ACH, eCheck, or direct debit. And then which cards? So, sometimes folks don’t want to accept American Express, so I could just toggle that off. I want to take all of these payment methods in my org, so I’m going to click “Continue.”
One of the nice features of Payment Console is that there’s a number of different ways that you could set up the buttons. You may want to do your charge button, you may want to just update a token, or possibly, you need to do an authorization and you don’t need to do a charge. Simply just toggle whichever ones you need for your process.
And that’s it. Congratulations. In just a quick five minutes, you’ve successfully configured your new Chargent gateway. Let’s take a look at testing next.
Testing in Salesforce
Now that you’ve got your gateway set up in Salesforce, it’s time to do some test transactions. And we want to do this to ensure that Chargent was set up correctly. Also, this is a good way to get to understand how Chargent is going to help you take payments inside of Salesforce.
Now, this is critical to your success as a Chargent user. You have to complete extensive testing. Remember that this is your payment system. No organization will survive if they cannot get paid. And if you fail the test, there’s a good chance you won’t get paid. So please, take this seriously.
At a minimum, you’re going to want to create a few test charges right now. So, you can see the gateway setup guide for some help with that, including test credit card numbers and expected results, and you can also take a look at some of the other videos on this channel.
Okay. Just a quick aside to talk about sending transactions in the Salesforce sandbox. So, when Chargent is installed in the Salesforce sandbox, transactions, they’re always sent to the payment gateway’s test account or their developer environment. We do this as a security precaution. We want to prevent real transactions being accidentally sent from your Salesforce sandbox environment.
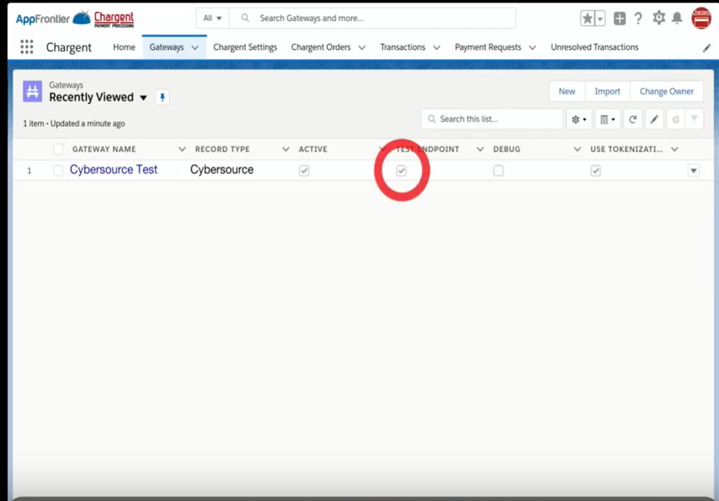
When Chargent is installed in a production Salesforce environment, the “Test Endpoint” checkbox on the gateway record will allow you to select between sending payments to the live or the test environment.
So, a quick tip here, there’s a few exceptions to this rule about having different endpoints for live, and then for test. So, just note that we documented them in the companion page that goes along with this video, which we did link below. In those exceptions, there will be a single endpoint to send the transactions to, and then there’ll be different credentials for live versus test. It’s just something we want you to be aware of.
Refer to your gateway setup guide for additional information that’s unique to your gateway. More information is also available in our documentation.
Well, that’s it. You just integrated CyberSource to Salesforce in minutes! It’s pretty impressive. I’d tell my boss if I was you.
If you’ve got any questions, just reach out to us here at Chargent. We’re always here to help.