How To Migrate Your Data Into Salesforce
All businesses experience growing pains, and they come in every variety. Many of them are good problems, like having to migrate existing customer data away from an outgrown customer relationship management (CRM) solution and into Salesforce. Salesforce is the standard for a reason—it’s a powerful CRM platform with robust and adaptable capabilities.
In order to minimize downtime and fully leverage Salesforce for your CRM needs, you’ll need to migrate your data as quickly as possible while still making sure that it’s comprehensive, accurate, and formatted correctly. Collecting data from diverse sources and legacy systems can be complicated, and any error in the process can lead to costly delays.
Keep reading for a complete walkthrough of the five key steps for successful data migration in Salesforce, as well as Salesforce data migration best practices, and a look at common problems and essential strategies you can use for a successful transition and a seamless migration process.
Step 1: Assess Your Data
The best—and only—place to start when migrating data to Salesforce is knowing what you’re working with. First on your Salesforce data migration checklist is a thorough data audit. By determining record structure and identifying critical data fields, you’ll have a full understanding of the current data environment.
Once you’ve got the big picture in place, identify duplicate records as well as unnecessary, redundant, or inaccurate information. All of this irrelevant data should be trimmed before migration so you can be sure you’re working with the full range of data and nothing extraneous.
If old or deprecated data can be archived, take this step now. By reducing the amount of data you have to migrate, you can make the actual migration process quicker and more efficient and Salesforce data verification easier post-migration.
Step 2: Choose the Right Migration Method
The kind of data you’re working with should dictate the best method to migrate Salesforce data. Using the best method not only makes the process faster but also safeguards accuracy and maximum efficiency after the data is migrated.
There are three options, each for different sizes and types of datasets.
Data Import Wizard
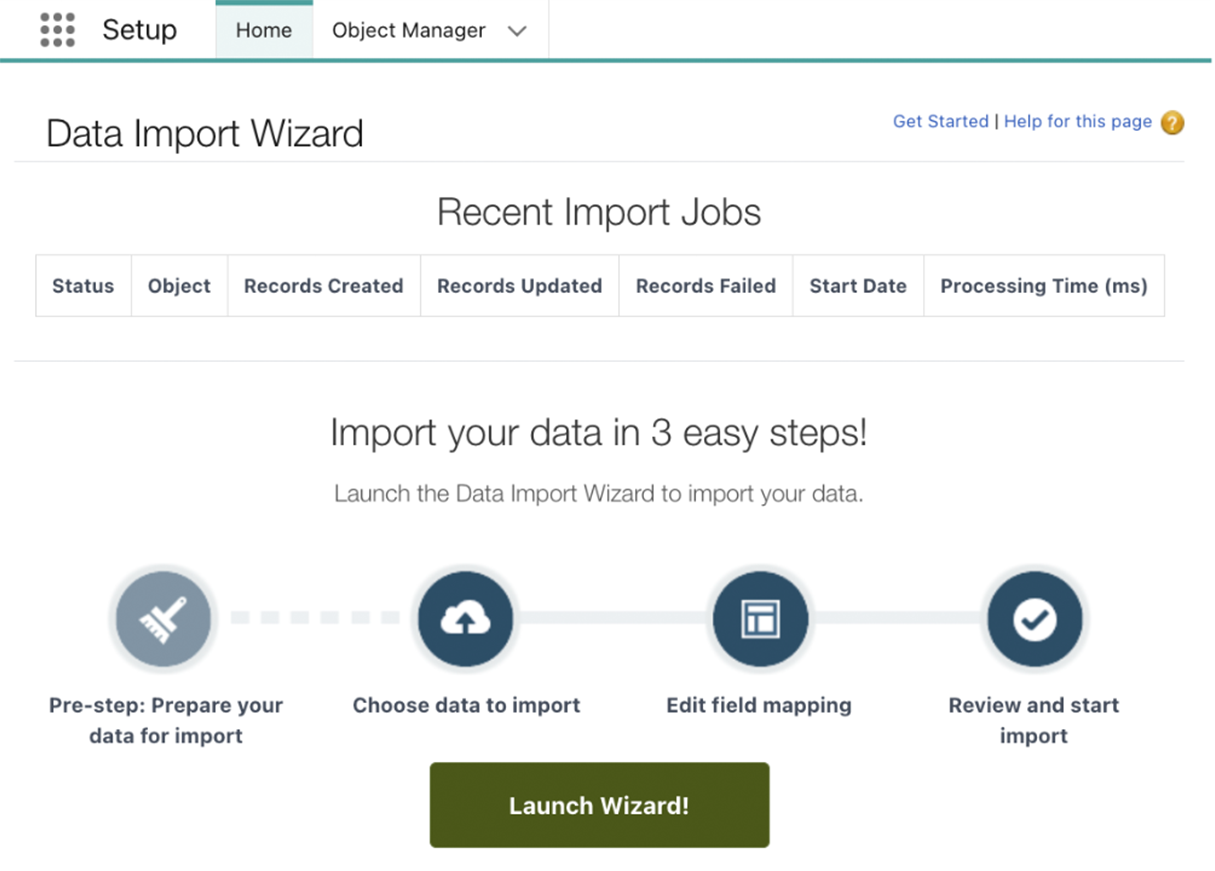
If you’re working with smaller, less complex datasets, you’ll want to use the Data Import Wizard. It’s ideal for this scenario, being both fast and simple to use with intuitive and user-friendly instructions. The Data Import Wizard has the added benefit of not requiring any additional applications or support data to be installed.
Data Loader
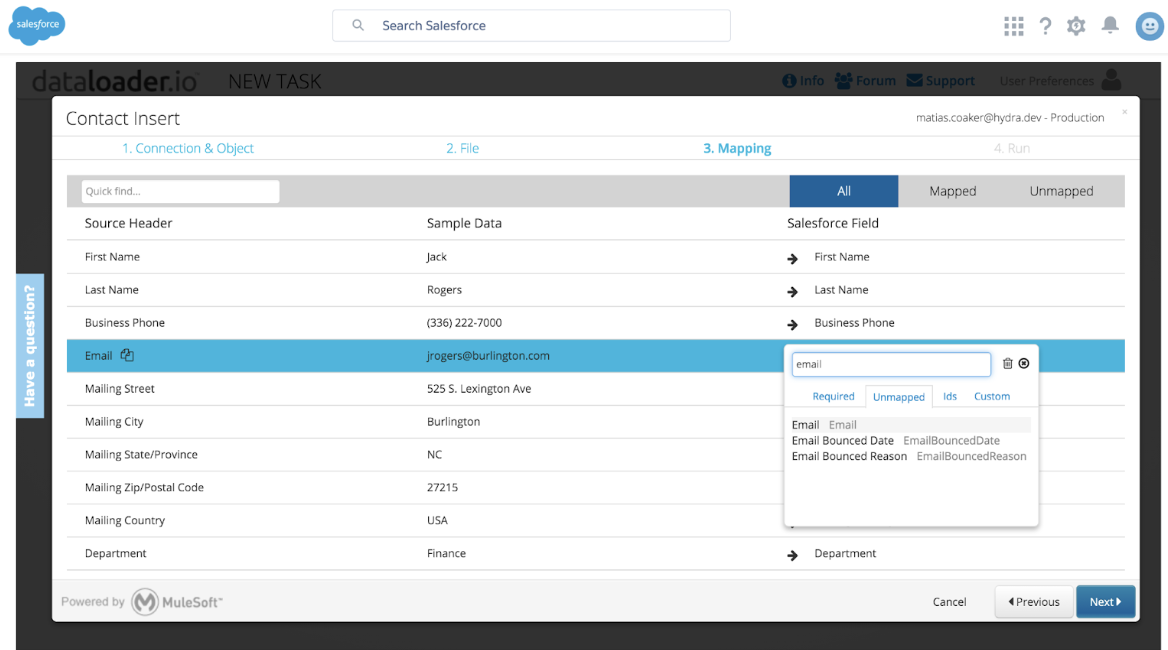
If your organization has a larger dataset or is working with more complex records that result in larger volume datasets, you’ll want to use the Data Loader. This option is best when it comes to migrating more complex datasets because it can handle multiple records simultaneously.
APIs and Third-Party Tools
If your datasets are intricately detailed, complex, or involve multiple external systems, you may wish to opt for third-party tools or application programming interface (API) solutions. These are typically more suited to handling custom configurations or highly specialized data.
The right approach depends on your data. There’s no one-size-fits-all solution—each method works well and ensures dependable data post-migration. The trick is knowing the pros and cons of each so you can choose the one that’s the best fit for your organization’s needs.
Step 3: Prepare Your Salesforce Environment
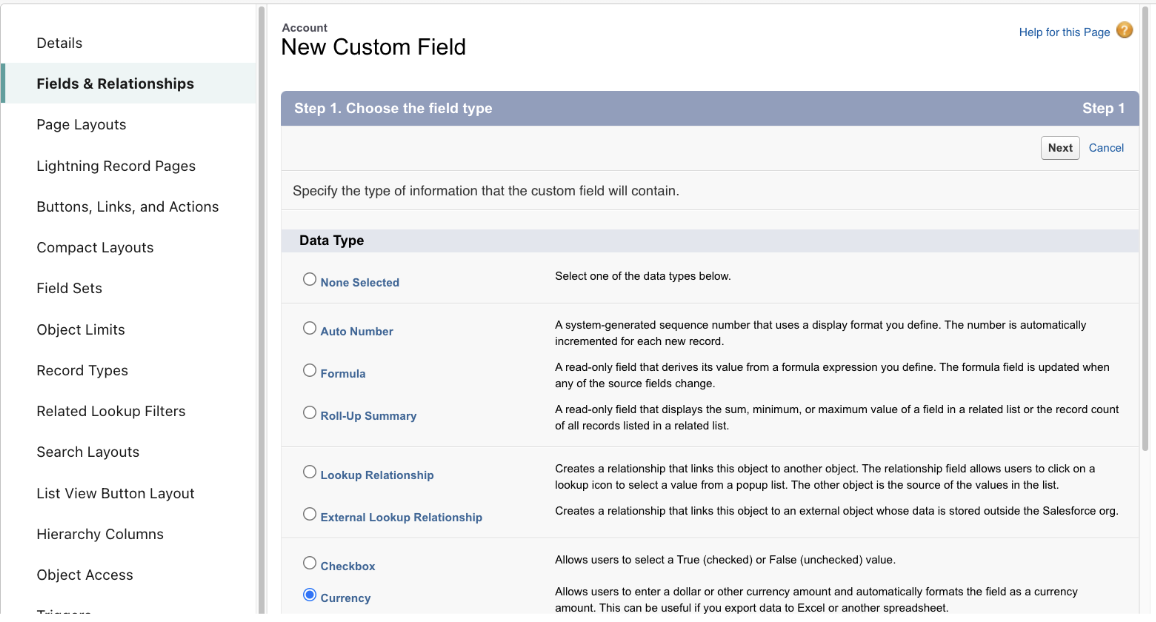
Once you’ve prepared your data and chosen the best migration method for your specific use case, it’s time to focus on your Salesforce environment. This step is where you set up any custom fields you’ll need for your datasets, as well as relationships that align correctly with your existing data structure.
A clear data map that’s aligned to work with the Salesforce framework will make it easier to maintain data integrity and reduce the likelihood of any problems after data is migrated.
With your custom fields and relationships in place, you’ll want to rigorously test your setup with sample data in a sandbox environment. This is a critical step for spotting and rectifying any problem areas prior to a full-scale dataset migration.
Step 4: Execute the Migration
This is where most errors occur, such as data mismatches, missing fields, or failed imports. To minimize risks, start with a test migration using only a small portion of your data. Validate the results of this test migration thoroughly to spot any errors or discrepancies you’ll need to go back and address. Once you’re confident everything is as it should be, you can begin migrating your live data into Salesforce.
Use a phased migration approach to minimize any problems, especially if you’re working with a larger dataset. During the data migration, keep a close eye on the process and make note of any errors. Any inconsistencies or misconfiguration needs to be corrected during this step to prevent data integrity issues from coming up post-migration.
For a step-by-step breakdown of how to migrate payment data into Chargent’s objects and fields, check out our Chargent Data Migration Guide.
Step 5: Validate and Clean Up Data
After you’ve completed your migration, you need to make sure your data is accurate. Validate your data efficiently using reports, dashboards, and Salesforce migration tools.
By using data migration tools, Salesforce makes it easy to test your data post-migration. Make corrections or adjustments needed to fix any errors or other discrepancies. Cleaning your data during this process guarantees a smooth transition in CRM activities, so it’s a vital step that shouldn’t be skipped.
Once your data is verified, clean, and ready to use, train your users on the best methods for accessing and managing the data from within Salesforce.
Common Challenges & How to Overcome Them
When it comes to CRM data migration, Salesforce is the obvious choice. Data migration to Salesforce isn’t without its challenges, but if you run into any problems, rest easy—there are solutions. However, before migrating existing payment data, it’s smart to get Chargent configured and tested in the production environment to ensure a smooth transition. Here are some of the most common issues encountered during Salesforce data migration, along with the fix for each.
Data Format Inconsistencies
Prevention is key here. Standardize data formats before migration with a clear and concrete format protocol for all necessary data mapping.
Missing or Incomplete Data
Some records may be missing required fields, causing them to be skipped. Run validation checks before and after migration.
Duplicate Records and Data Integrity Issues
This is one of the more common issues, but it’s easy to remedy. Salesforce provides a Duplicate Management feature that you can use to identify and delete duplicate records. Creating a rigorous deduplication protocol is a best practice when it comes to maintaining data integrity.
Incorrect Field Mapping
If fields are mapped incorrectly, data may end up in the wrong places. Always test with a sample dataset before full migration.
System Downtime and User Adoption Concerns
The time a dataset migration takes depends on your particulars. To minimize disruptions, execute the time-critical portions of your migration during slow or no activity periods at your organization.
Post-migration, comprehensive training is generally all that’s required to bring users up to speed with the many features and advantages of Salesforce.
Optimize Your Salesforce Process
Migrating your data into Salesforce isn’t trivial, but that doesn’t mean it has to be challenging. A structured, thoughtful approach and familiarity with best practices and appropriate methods are all you need.
For more help in optimizing your Salesforce experience, consider Chargent for Salesforce. With its ability to integrate seamlessly within your existing Salesforce environment, Chargent provides an efficient, tested, and trusted solution for handling payments.
To see what Chargent can do for you, try it for free for 30 days and discover how easy and powerful Salesforce can be.