Integrating Stripe and Salesforce using Chargent

If you do not already have a Stripe account, you can sign up for an account in just seconds.
This guide shows you how to connect Salesforce to Stripe using Chargent. Chargent will allow you to initiate Stripe card payments directly from Salesforce, as well as being able to manage Stripe refunds from Salesforce.
Note: Chargent’s integration to Stripe from Salesforce sends transactions to Stripe, and updates Salesforce with the Stripe responses (approved / declined with related information), but historical data or transactions that are not initiated from Salesforce will not be synced from Stripe to Salesforce.
- Install both Chargent Base and Chargent Transactions into your Salesforce org.
- Configure Chargent according to the step-by-step Installation and Setup Guide.
- Activate the Remote Site Settings in Salesforce if they aren’t already active for Stripe.
-
- Click the gear icon on the top right and select Settings
- Under Security select Remote Site Settings
- Locate Stripe and click edit
- Check the Active box
- Click Save
Connect Stripe and Salesforce with Chargent
See all Stripe transactions, manage refunds, send payment links and more, all inside Salesforce with Chargent, the top rated payments app on the Salesforce AppExchange.
Not yet a Chargent customer?
Contact us for a no-obligation 30 day trial, and see for yourself!
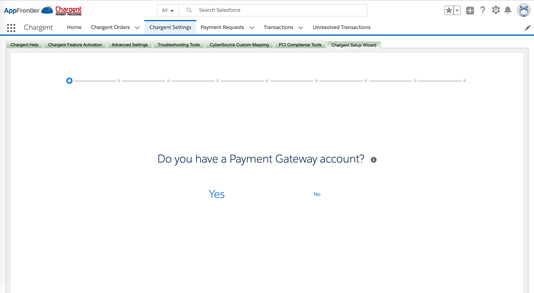
Connecting Stripe & Salesforce using the Chargent Setup Wizard
- Click on the App Launcher on the top left side in Salesforce.
- Select Chargent as the App
- Select the Chargent Settings Tab
- Choose Chargent Setup Wizard
- Follow the prompts to configure your gateway
Once you click Yes and select Stripe as your payment gateway, you will need the following information to configure the gateway setup:
- Secret Key from Stripe (either Live or Test)
-
- In your Stripe dashboard, go under Developers and select API keys (For testing, toggle the “View Test Data” button to get the Test Secret Key). Click Reveal test key token and copy the token into the Wizard.
- In your Stripe dashboard, go under Developers and select API keys (For testing, toggle the “View Test Data” button to get the Test Secret Key). Click Reveal test key token and copy the token into the Wizard.
- What currency you will be using
- What Payment Methods you will be accepting. Our Stripe gateway integration currently supports card transactions only.
All Stripe transactions use the same server endpoint (https://api.stripe.com), so test transactions should be sent using the “Test Secret Key”, and live transactions should be sent using the “Live Secret Key”. We recommend creating two different Gateway records in Chargent. One for testing and another for live production. You can easily deactivate the test gateway record in Salesforce when you are ready to process live credit card transactions, but you may wish to use it again for future testing at some point.
Stripe Settings Required for Chargent
In order to allow credit card transactions to be sent from Salesforce to Stripe, you must comply with Stripe’s policy for enabling access to raw card data APIs. For more information about this requirement, see our Knowledge Article about Stripe’s Raw Credit Card Transaction Policy.
If you have any questions about the requirement, please contact us.
Testing using Chargent Anywhere
Testing with Payment Console
To test using the Payment Console, you want to navigate to any record in your Sandbox that has the Chargent Anywhere Component enabled.
- Click the [PaymentConsole] button
- If you are using multiple gateways select your gateway from the dropdown otherwise continue to step 3
- Enter all the Billing Information and click [Next]
- Enter in a test credit card number, expiration date, and CVC code based on the Stripe test credit card numbers.
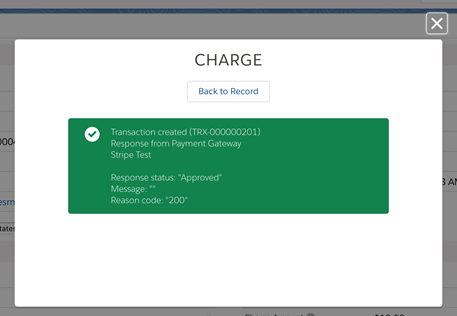
- Click the [Charge] button.
You should receive a green box showing Approved.
Testing using Payment Request
To test using a Payment Request you want to be sure you have the Chargent Payment Request feature set up as outlined in our documentation.
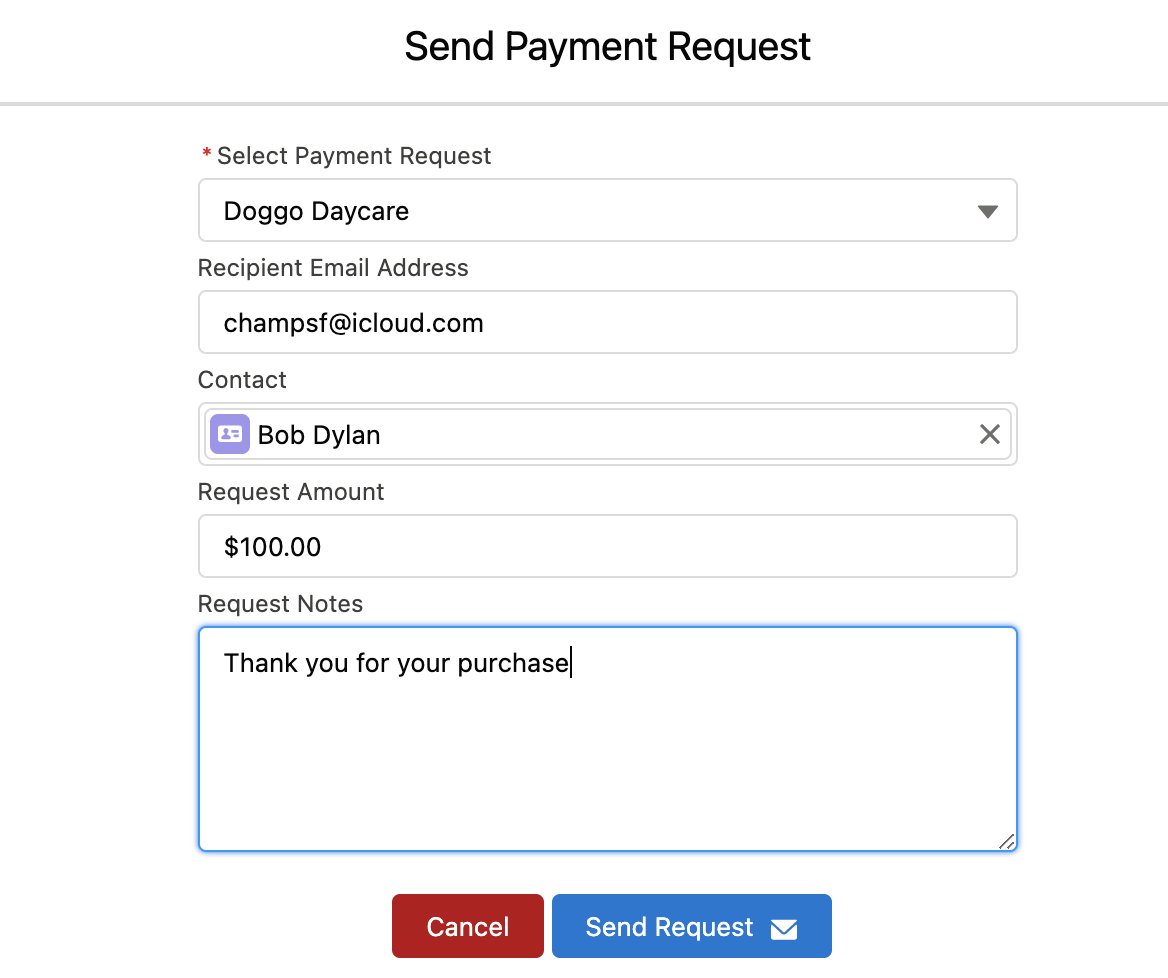
- Click the [Send Payment Request] button
- If you have multiple Payment Request templates set up you will first choose what template you want to use.
- Enter an email address where you want to send the test Payment Request along with any amount.
- Enter a Contact name (Optional)
- Click the [Send Request] button
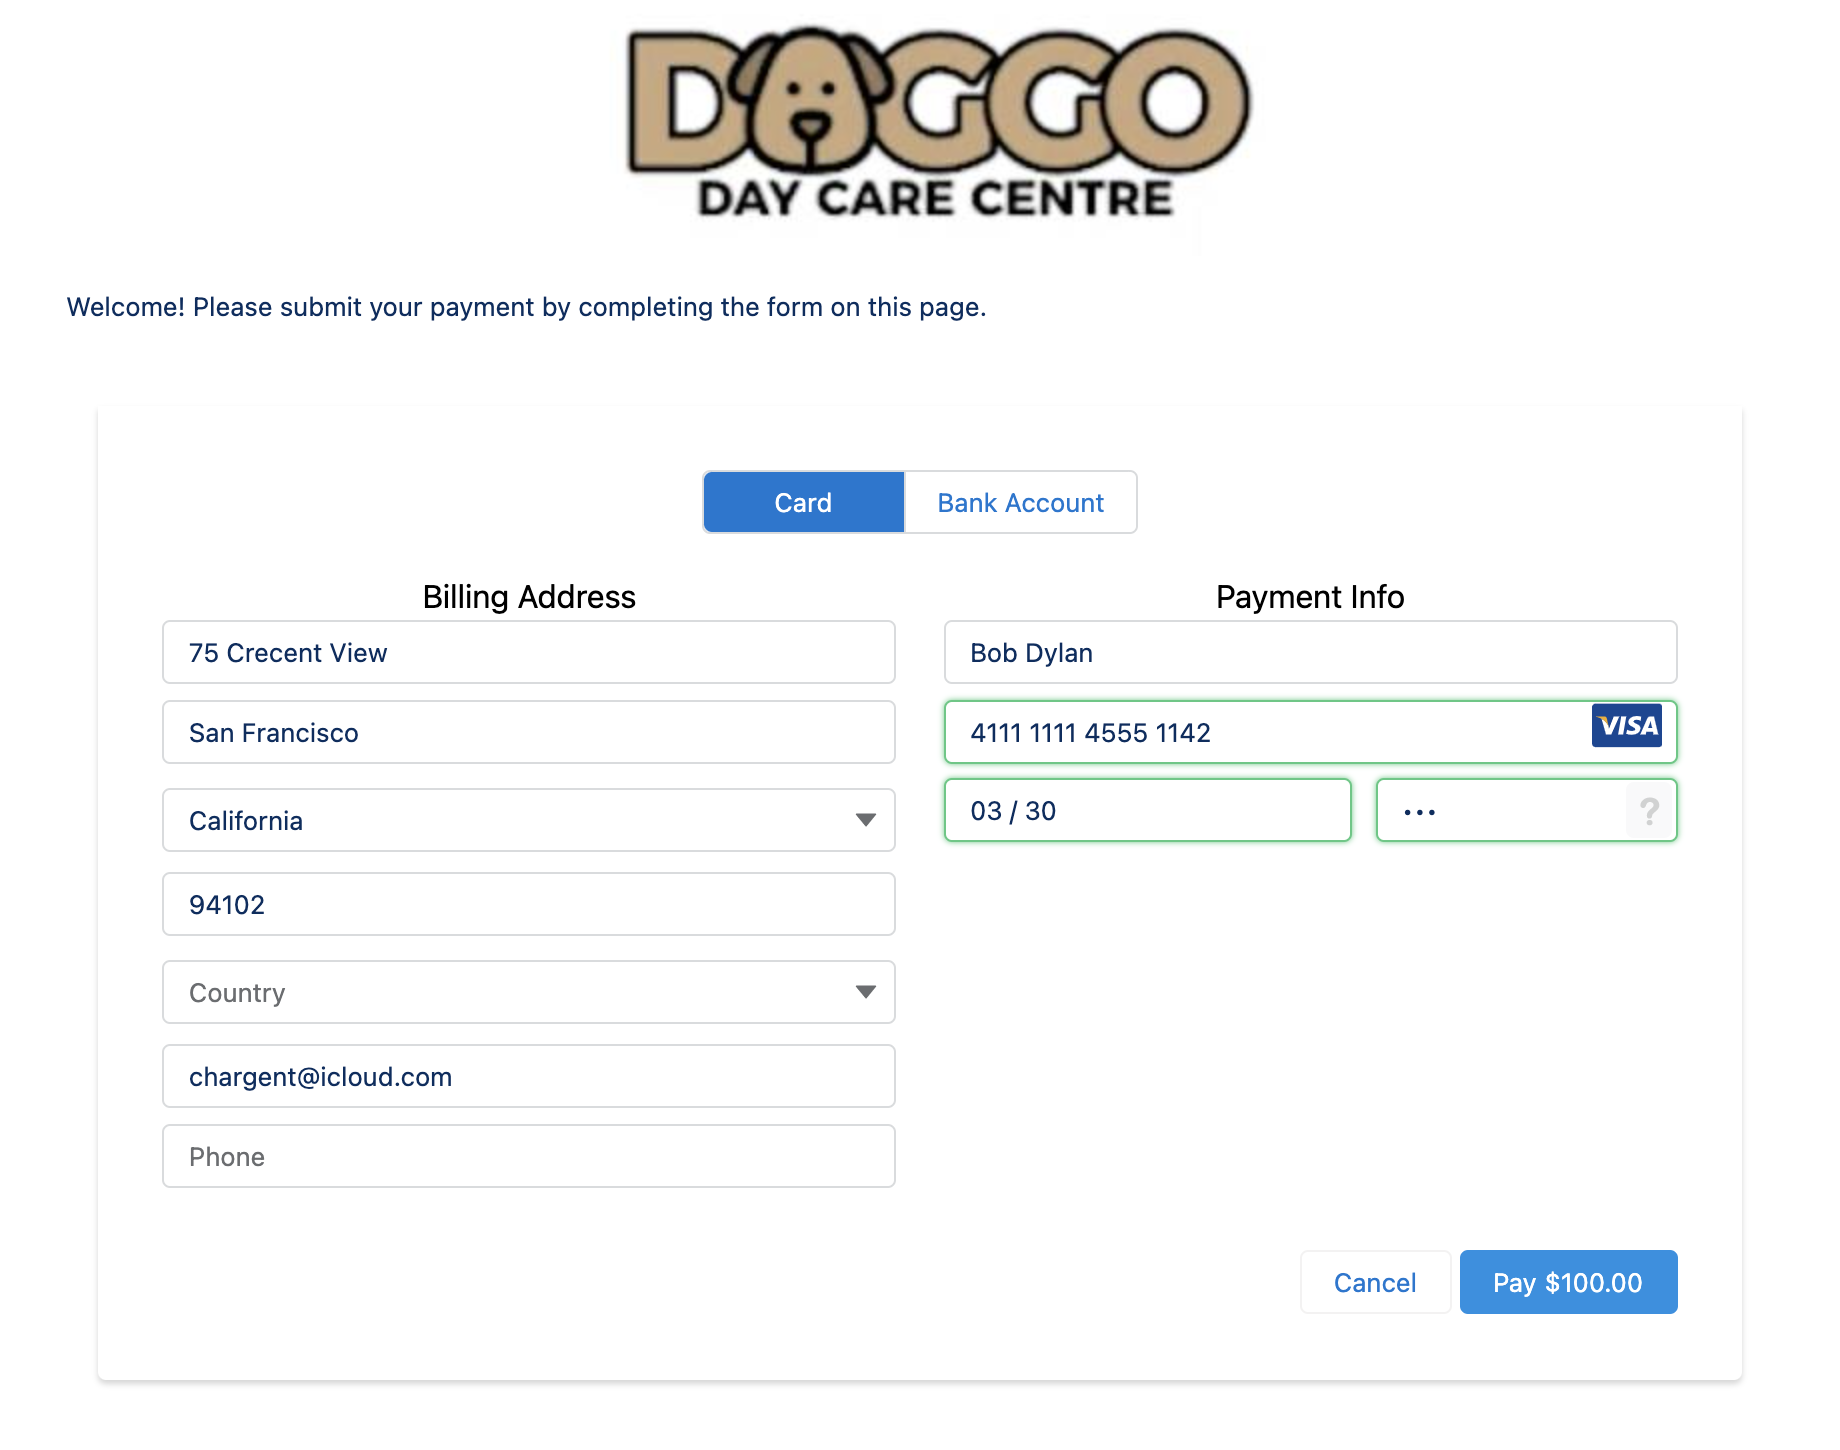
When you receive the email, click the secure link for the Payment Request. Use one of Stripe’s credit cards to complete the payform and submit the payment.
You should receive a green box showing Approved.
You should receive a green box confirmation
Go back to Stripe and confirm that you see the test transaction from Salesforce in your Stripe dashboard.
That’s it! You have now setup and tested your Stripe integration.
Tokenization
Chargent Payment Processing for Salesforce supports Stripe’s secure tokenization feature. Tokenization helps you decrease PCI compliance scope and improve security, by storing transaction data such as credit card numbers on Stripe’s servers, and associating it with a token Chargent stores in Salesforce for use in future transactions.
The token returned by Stripe is stored in the Token field on the Chargent Order record in Salesforce.
Customer Token Migration
You can also use the tokenization feature when migrating existing customers in Stripe to Chargent. This is useful because the customer tokens can easily be exported and imported into Salesforce, whereas credit card numbers cannot.
Stripe tokens are strings of letters and numbers that start with cus_. Click Customers on the left and export on the upper right to get the data you need to import your customers into Salesforce. Insert the id column in the export file to the Chargent Token field to complete the migration. We recommend setting a Stripe test gateway record in Salesforce using the test credentials from Stripe, per the instructions above, then running it in parallel to your current system for a full month to validate that all is correct.
If you didn’t enable tokenization when setting up Stripe using the Gateway Setup Wizard, you can enable tokenization by following these steps.
- Click on the App Launcher in the top left hand side of Salesforce.
- Search for Gateways.
- Edit the Stripe Gateway record.
- Check the box that says Use Tokenization.
You can then set the Credit Card Handling field to one of the following
- Never Clear: Chargent will not remove any card data automatically.
- Clear After Successful Charge: Chargent will clear the credit card number, expiration dates and card security code only after a successful charge is run.
- Clear After All Transactions: The credit card number, expiration date and card security code will be erased after any approved transaction (Charge, Void, Refund)
- Clear When Token Present: (Recommended) Only when a token is present in the token field, will the credit card number, expiration date and card security code be cleared.
- When your first successful charge goes through, the Credit Card Number field in Salesforce will be deleted, and a token will be stored for future transactions in the Chargent Token field.
-
- If you are using Chargent’s Payment Console or Payment Request feature, the card number will never be stored during the generation of the token.
Sending Live Transactions from a Salesforce Sandbox
Chargent is configured to always send transactions from a Salesforce Sandbox as test transactions, regardless of whether it is set to test or live. Since Stripe always sends transactions to the same endpoint, however, you only need to setup a Stripe Gateway using your Live Secret Key. Once you have your new gateway setup with your live credentials you will be able to send live transactions from your sandbox account.
Gateway Mapping
| Chargent Order Field | Stripe Field | |
| Amount | > | amount |
| Order Information | > | description |
| Billing First Name | > | card[name] |
| Billing Last Name | > | card[name] |
| Billing Country | > | card[address_country] |
| Billing Email | > | |
| Currency | < | currency |
| Token | < | customer |
For Stripe, the ID number is reflected for the Gateway ID, Customer ID, and Payment ID. This number is the same with a different prefix.
Example:
Gateway ID = ch_1H9vDaDI21N91uCjGNc6sWTK
Token = cus_1H9vDaDI21N91uCjGNc6sWTK
Payment ID = card_1H9vDaDI21N91uCjGNc6sWTK

