Our team created Chargent to make collecting payments simpler, quicker, and more secure. Congrats – if you’re reading this post, you’re on your way to experiencing the most capable payments app on Salesforce’s AppExchange.
Your payment success is vital to our team – and we know that how you start is how you will finish. Any admin can install and deploy our software in a matter of minutes, but if you want to get the most out of Chargent, there are a few things you should do beforehand.
In this post, we’ll explain five essential steps you should take before officially going live with Chargent Payments for Salesforce.
1. Install and Test in a Salesforce Sandbox
Before going live with the Chargent solution, we recommend that you first install and test the app in a Sandbox. A Salesforce Sandbox is a test environment that works as a “safe space” for testing new configurations, experimenting with new apps, or evaluating the impact of significant changes to your setup.
Test any customizations your company has within your Org, such as workflow rules, processes, triggers, and validation rules. Since you are working outside of your actual production environment, these changes won’t affect your production configuration or data.
Once you are sure that everything is working correctly, you can install the application into your Production Org and then push your changes there.
Sandbox testing is a critical step when making any significant changes in your Salesforce organization. Learn more about Salesforce Sandboxes in our article – “How to Test in a Salesforce Sandbox.”
2. Examine Using Test Credit Cards
Before accepting actual customer payments, you should test your system using test credit card numbers.
After you’ve installed Chargent and assigned all necessary licenses, this step is simple. Set up your payment gateway using the credentials from your gateway’s test account. Then, go through Chargent’s Setup Wizard to add a gateway.
You can now simulate transactions using test credit card numbers and ensure that your gateway is installed and working correctly before processing real payment data.
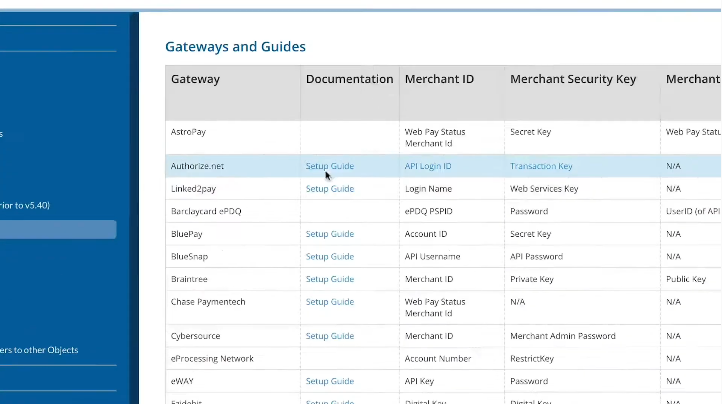
Keep in mind some gateways require you to enter specific information to receive approval and decline responses. Refer to our guides and documentation to find more information about testing Chargent with your particular gateway.
3. Assign Licenses and Test as a User
You don’t need to assign licenses if you are installing and setting up Chargent in a Salesforce Sandbox. However, you do need to assign them within a production environment. A license is necessary for anyone who needs to view the Chargent pages and fields, or process payments within the account. Assign licenses for each of the Chargent packages except for the Base package.
If you are the account Administrator, try logging in as one of your users. Doing so will allow you to test Chargent’s functionality, ensure the correct settings of all permissions, and view its operation from a regular user’s perspective. As a system administrator, you will likely have access to data that your users are not set up for yet, so it is vital for you to evaluate it the way they will view it.
4. Process Live Transactions Before Going Live
After you have finalized your Sandbox tests, and installed and configured Chargent in your production environment, test a few live payment transactions.
Process several small charges (a $1.00 transaction, for example) using your own credit card. As long as you void the transaction immediately afterward, you won’t be charged for these transactions. Make sure to test both address verification and CVC (card verification code) for approvals and declines – especially if you plan to use those features for fraud screening.
This step is critical since your live gateway account may not be the same as your test account. Or, it may require additional set up from your payment processor.
During this step, finalize all configurations on your live payment account, which will minimize or eliminate errors when you begin collecting actual customer payments.
5. Test Recurring Payments
During configuration of the product, Chargent will prompt you to set up Recurring Billing. If you are migrating your recurring payments from another system, only run a small group of records (around 10) initially to make sure you’ve set up your configurations correctly. After confirming that everything is working to your preference, you can set up all of your records to run in the batch.
See our documentation for the most up-to-date instructions on installing Chargent.
Ready, Set, Go!
If you have followed each of these steps, you are now ready to accept live payments from your customers. Chargent streamlines and automates the payment process – and you should be pleased to know that thousands of organizations are using our products to manage their payment operations successfully. From Recurring Billing to Automated Collections, Chargent provides all the features you need to collect and record payments effortlessly.
Do you have more questions about installing and setting up Chargent in your Salesforce Org? Contact us today – we’re always here to help.


