Integrating Merchant Warrior and Salesforce using Chargent

This guide contains instructions for integrating your Salesforce.com environment with the Merchant Warrior payment gateway—using the Chargent payment processing plug-in.
Click a link to go directly to one of these sections:
Connect Merchant Warrior and Salesforce with Chargent
See all Merchant Warrior transactions, manage refunds, send payment links and more, all inside Salesforce with Chargent, the top rated payments app on the Salesforce AppExchange.
Not yet a Chargent customer?
Contact us for a no-obligation 30 day trial, and see for yourself!
Overview
Merchant Warrior is an Australia based payment provider that offers a range of online payment solutions to merchants worldwide. Merchant Warrior prides itself in establishing and maintaining a healthy relationship with each of its clients, achieving this by working in synergy with its clients to gain insight into their individual requirements and by providing them with a solution that caters wholly to those requirements.
Using the step by step instructions in this guide, it’s easy to connect Salesforce to the Merchant Warrior gateway with Chargent Payment Processing. Chargent has many features to offer, including automating and streamlining Salesforce payment processes, easy Recurring Billing, Click-to-Charge buttons, Payment Request emails, Automated Collections, and more.
Integrating Merchant Warrior with Chargent gives you the ability to easily build a seamless process for completing payment for orders that you manage in Salesforce. The integration connects the Merchant Warrior gateway directly to Salesforce. Chargent also supports Merchant Warrior gateway tokenization for processing credit card payments. See Configuring Salesforce for Merchant Warrior Integration for additional information on the gateways.
Your Merchant Warrior Sandbox Account
The first task is to get a sandbox / test account from Merchant Warrior so that you can run test transactions from Salesforce.
To request a sandbox account, complete the form on the Test Account Application page.
Username and temporary password
Upon approval, you’ll receive an email that contains these testing credentials:
- User ID
- Temporary password
You will go to the Merchant Warrior login for either Sandbox or Live.
Sandbox: https://camp.merchantwarrior.com/login.
Live: https://barracks.merchantwarrior.com/login
Login with your username and temporary password, and then continue to the next section.
Login with your username and temporary password, and then continue to the next section.
Need help? Contact Merchant Warrior through the options given on their Support page.
Permanent password
On your first successful login, you’ll get a prompt to enter a permanent password of your own choosing. The password must be:
- Alphanumeric (contain at least a number and a letter).
- Different from your last four passwords.
- At least 6 characters long.
Get your Merchant ID, API Key, and Passphrase
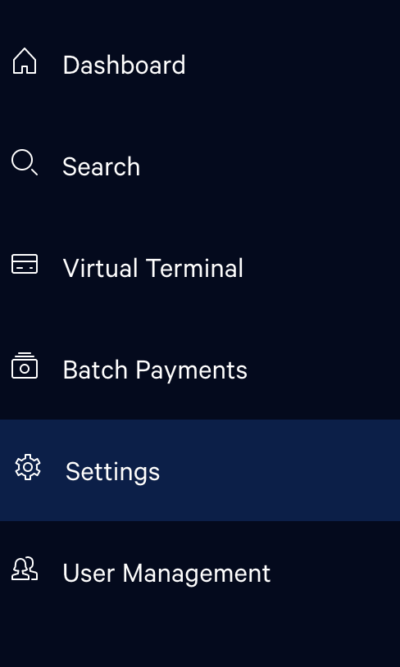
When you log in with your permanent password, you’ll see the Merchant Warrior dashboard. Click the Settings option in the menu to get to the Merchant Settings page.
Take note of the three identifying elements on the Direct API page. You will need each of these to configure the gateway connection in Salesforce:
- Merchant UUID
- API Key
- API Passphrase
Production account: You’ll also need to register for a production account. When you’re ready, use the contact information in the enrollment email messages to work with Merchant Warrior Support and obtain the same set of credentials for your production account.
NOTE: You must get each of these gateway credentials from Merchant Warrior before moving on to the steps in the next section, Configuring Salesforce for Merchant Warrior Integration.
Installation and Configuration of Chargent
Connecting Merchant Warrior & Salesforce using the Chargent Setup Wizard
- Click on the App Launcher on the top left side in Salesforce.
- Select Chargent as the App
- Select the Chargent Settings Tab
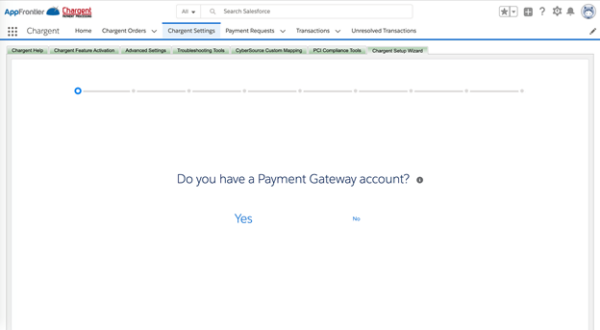
- Choose Chargent Setup Wizard
- Do you have a Payment Gateway, select Yes
- Select Merchant Warrior as your Gateway
- Select Test Transactions if processing in Sandbox and Live if you are setting up Production.
- Follow the prompts to configure the gateway
You will need the following information from Merchant Warrior to configure the gateway:
- Merchant UUID
- API Key
- API Passphrase
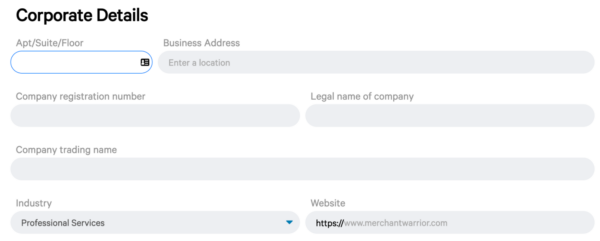
Other information that will be asked:
- Will you be using tokenization? (recommended)
- Select your Gateway Currency (USD, CAD, etc..)
- Do you want to enable Payment Console? (Platform Edition and higher)
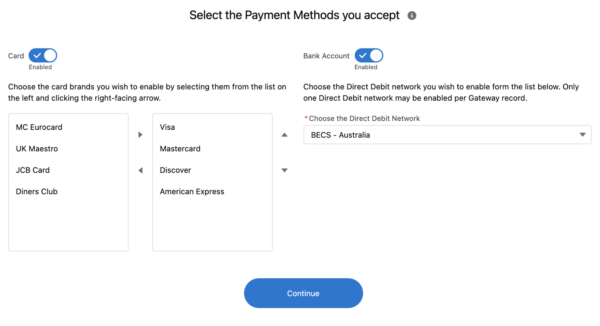
- Select the payment methods you accept? (Visa, MasterCard, American Express)
- Enable Bank Account and select the Direct Debit Network (BECS Australia)
- Setup your Payment Console (What buttons can be viewed)
- Will you be using recurring, scheduled, or installment payments (if you select yes, Chargent recommends scheduling it for 3am).
Direct Debit Network (version 6.15 and higher)
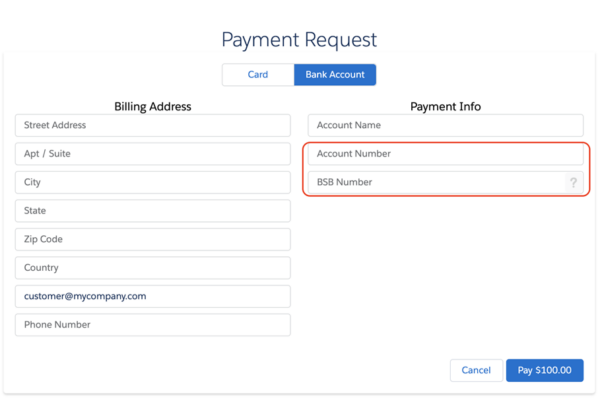
Starting with Chargent version 6.15, you can now select the Bank Account network for your region during the gateway setup process. This will allow for the correct Direct Debit Network fields to be displayed on Payment Requests and Payment Console based on your region.
Merchant Warrior uses BECS for Australia Bank Accounts.
Once you have your Direct Debit Network set, you will see the appropriate field names on your Payment Request that are sent as well as your internal Payment Console.
Testing the Integration in Sandbox
This section contains the procedure for testing the integration that you set up according to the procedure given in Configuring Salesforce for Merchant Warrior Integration, using your Merchant Warrior sandbox credentials.
- Click the App Launcher and select the Chargent App
- Click on the Chargent Orders tab and click the New button
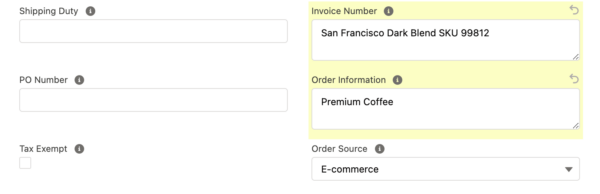
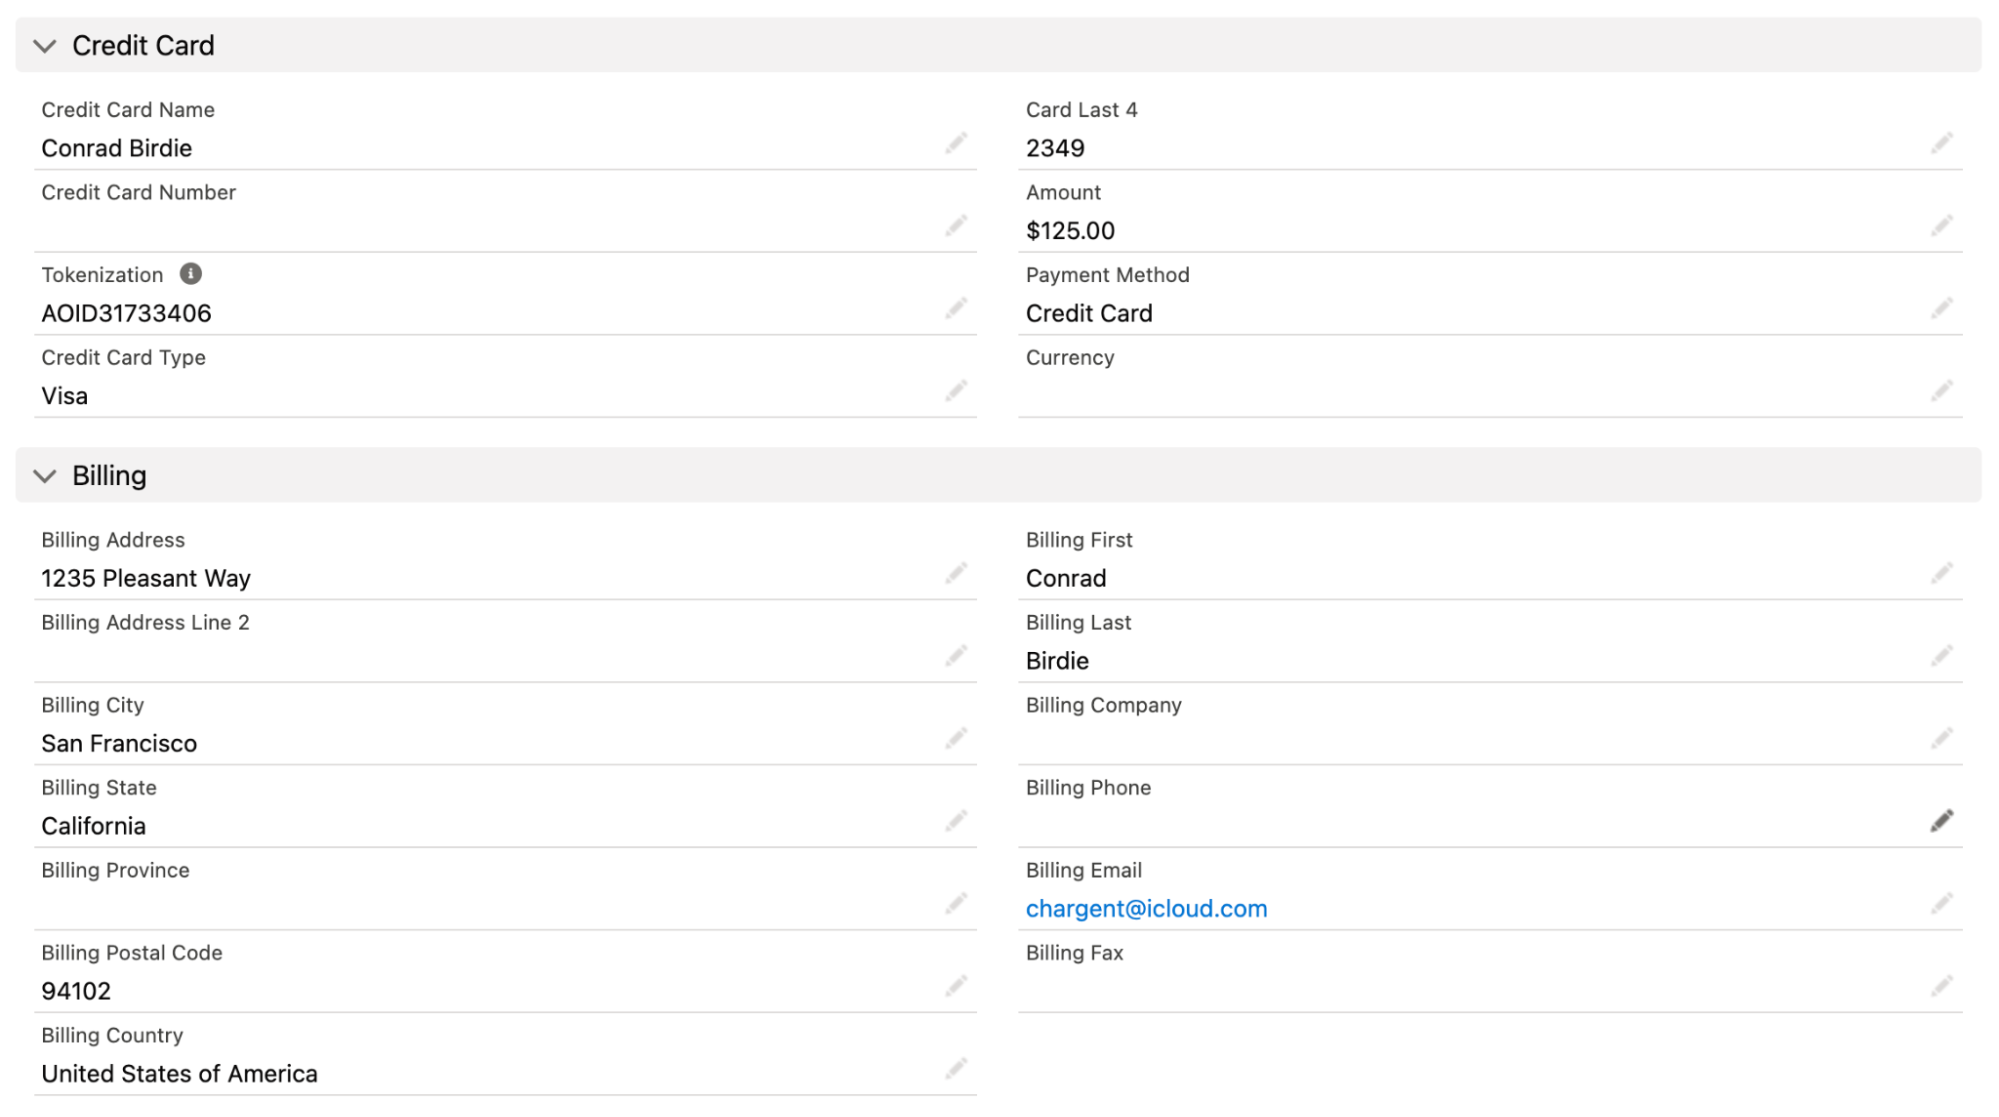
- You need to have all of the following fields populated to process as successful charge. (a description in the Invoice field is required)
- Gateway = Merchant Warrior (only if you have multiple Gateways set up)
- Payment Method = Credit Card
- Charge Amount
- Manual Charge checkbox
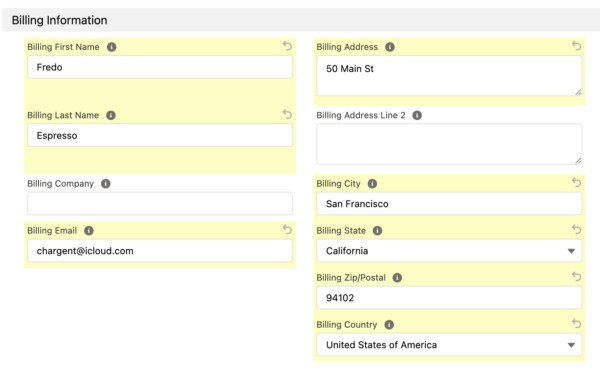
- Billing First Name / Last Name
- Billing Address
- Billing City
- Billing State
- Billing Zip Code
- Billing Country
- Invoice Number
- Billing Email Address (to text the receipts)
- Credit Card Number – (See Test Credit Card Numbers below)
- Credit Card Expiration Month / Year (See Test Expiration Dates below for different responses)
You will see a message notifying you of the successful charge.
Merchant Warrior Test Credit Card Numbers
| Card Type | Card Number | Expiry Date | CVN |
| MasterCard | 5456789012345670 | Any Date | 123 |
| Visa | 4123456789012349 | Any Date | 123 |
| Amex | 371449635311038 | Any Date | 123 |
| Diners Club | 30123400000000 | Any Date | 123 |
Test Responses
By using the following Expiration Dates, you can also test the following responses.
| Expiry Dates | Response |
| 10/24 | Transaction approved |
| 01/24 | Refer Card Issuer |
| 04/24 | Pick Up Card |
| 05/24 | Do Not Honour |
| 02/25 | Invalid Transaction |
| 04/25 | Invalid Card Number |
| 05/25 | No Such Issuer |
| 05/27 | Card Acceptor Contact Acquirer |
| 01/28 | Lost Card |
| 02/28 | No Universal Account/Closed Account |
| 03/28 | Stolen Card |
| 01/29` | Insufficient Funds |
| 04/29 | Invalid Expiry Date |
| 02/30 | Restricted Card |
| 08/30 | Transaction Timed Out/Response Received Too Late |
| 01/33 | Card Issuer Unavailable |
| 02/33 | Transaction Cannot Be Completed |
Note that Merchant Warrior does not currently support Void transactions via Chargent’s void button in Salesforce. The Refund button should be used if needed to reverse transactions.
- Click Save
- Click the Charge button
Sending Live Transactions from a Salesforce Sandbox
When Chargent is installed in a Salesforce Sandbox, transactions are typically sent to the payment gateway’s test / sandbox / development environment, regardless of whether Chargent’s Test Endpoint checkbox is checked. This is done as a security precaution, to prevent real transactions from being accidentally sent from a Salesforce Sandbox.
When Chargent is installed in a production or developer Salesforce org, checking the Test Endpoint checkbox on the Gateway record will route transactions to the test environments provided by the gateway.
Note: Some gateways use the same endpoint for live and test environments. For these gateways, the Chargent application does not prevent live transaction processing. As such, it is best practice to deactivate your live gateway records in orgs used for testing.
If you wish to send live transactions from a Salesforce Sandbox, as a final step in testing, simply use Chargent’s Endpoint Override field on the Gateway record, and enter the production endpoint of your chosen gateway there.
Here is the production endpoint URL for Chargent’s integration with Merchant Warrior:
https://api.merchantwarrior.com/
Note that the full endpoint URL must be entered in the Endpoint Override field, and the domain must be present in the Remote Site Settings (for standard Chargent integrations it should be already present).
Understanding Transactions
When a transaction occurs between Chargent and the Merchant Warrior gateway, a new transaction record is created in Salesforce. The listing of transactions can be found in the Transaction section in the Related section of the Chargent Order page.
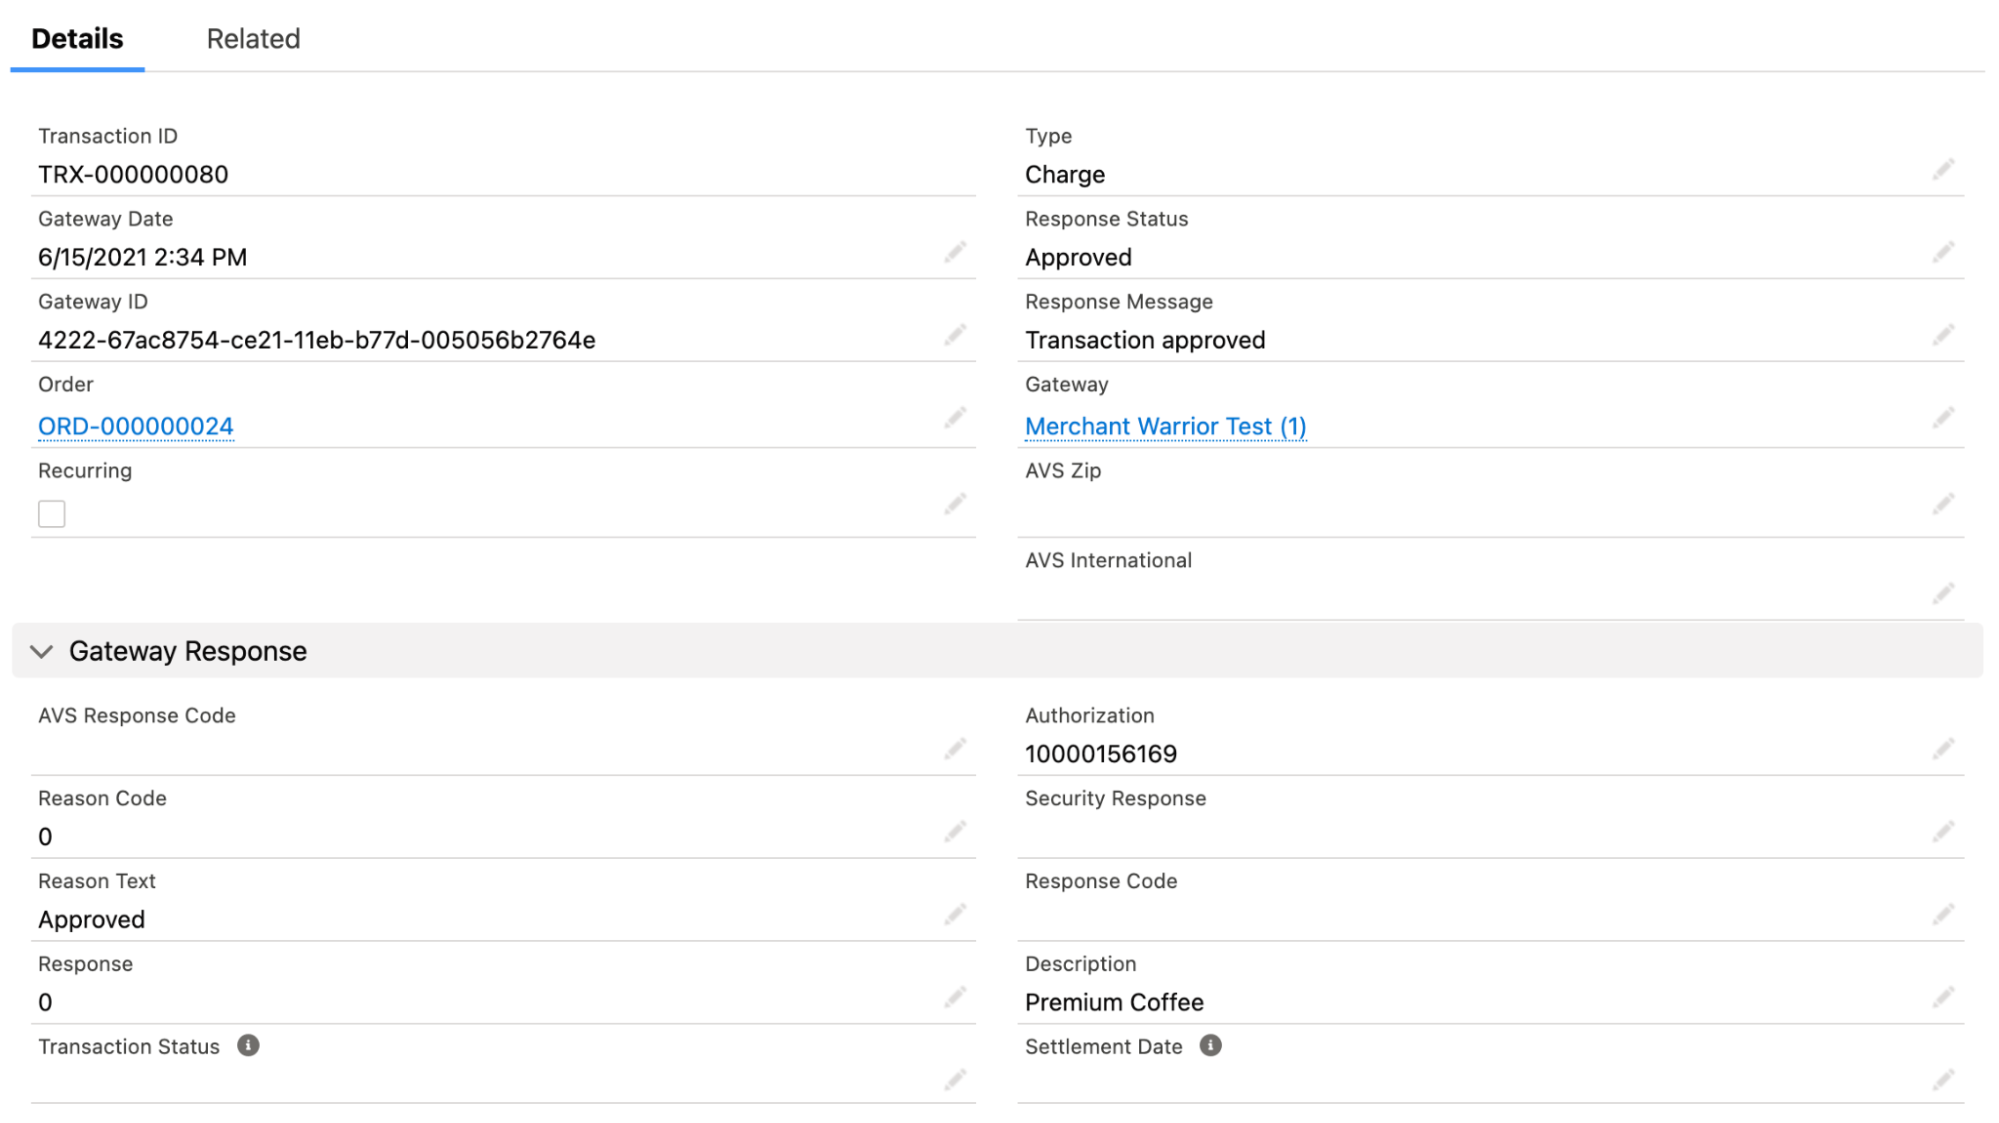
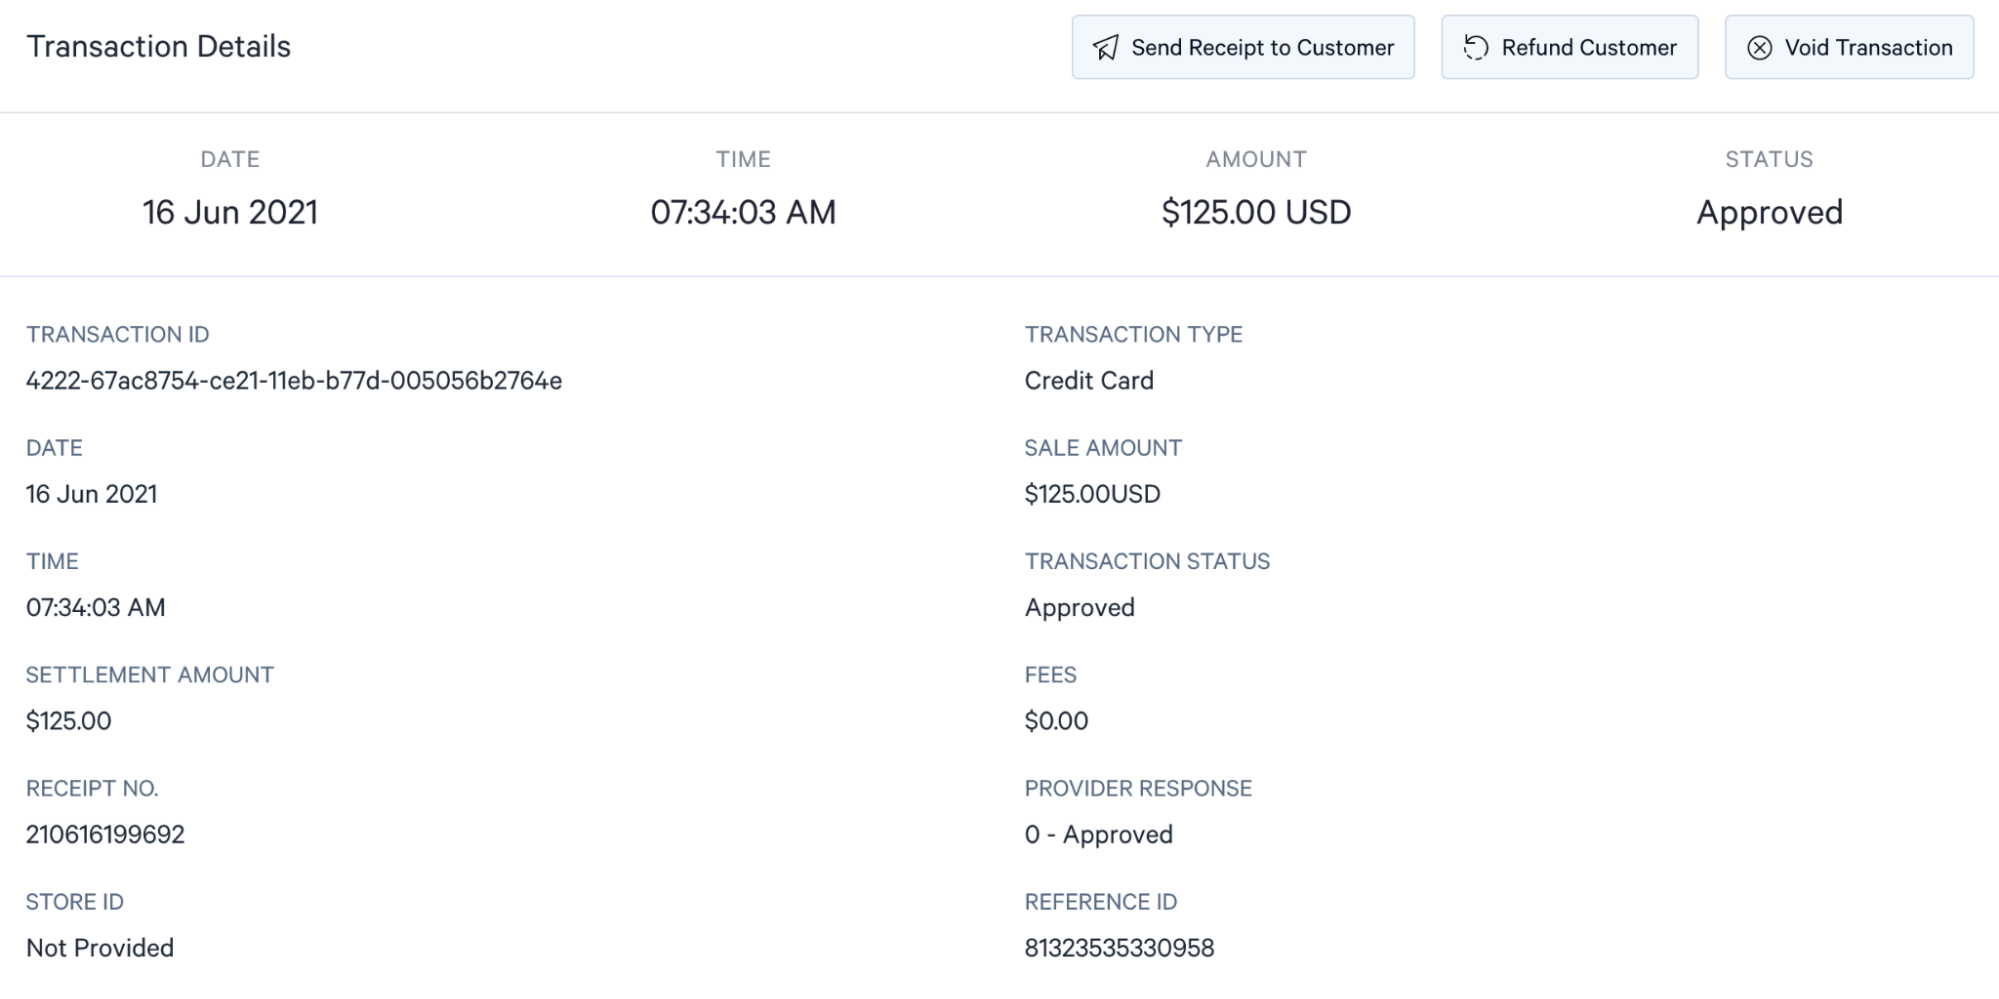
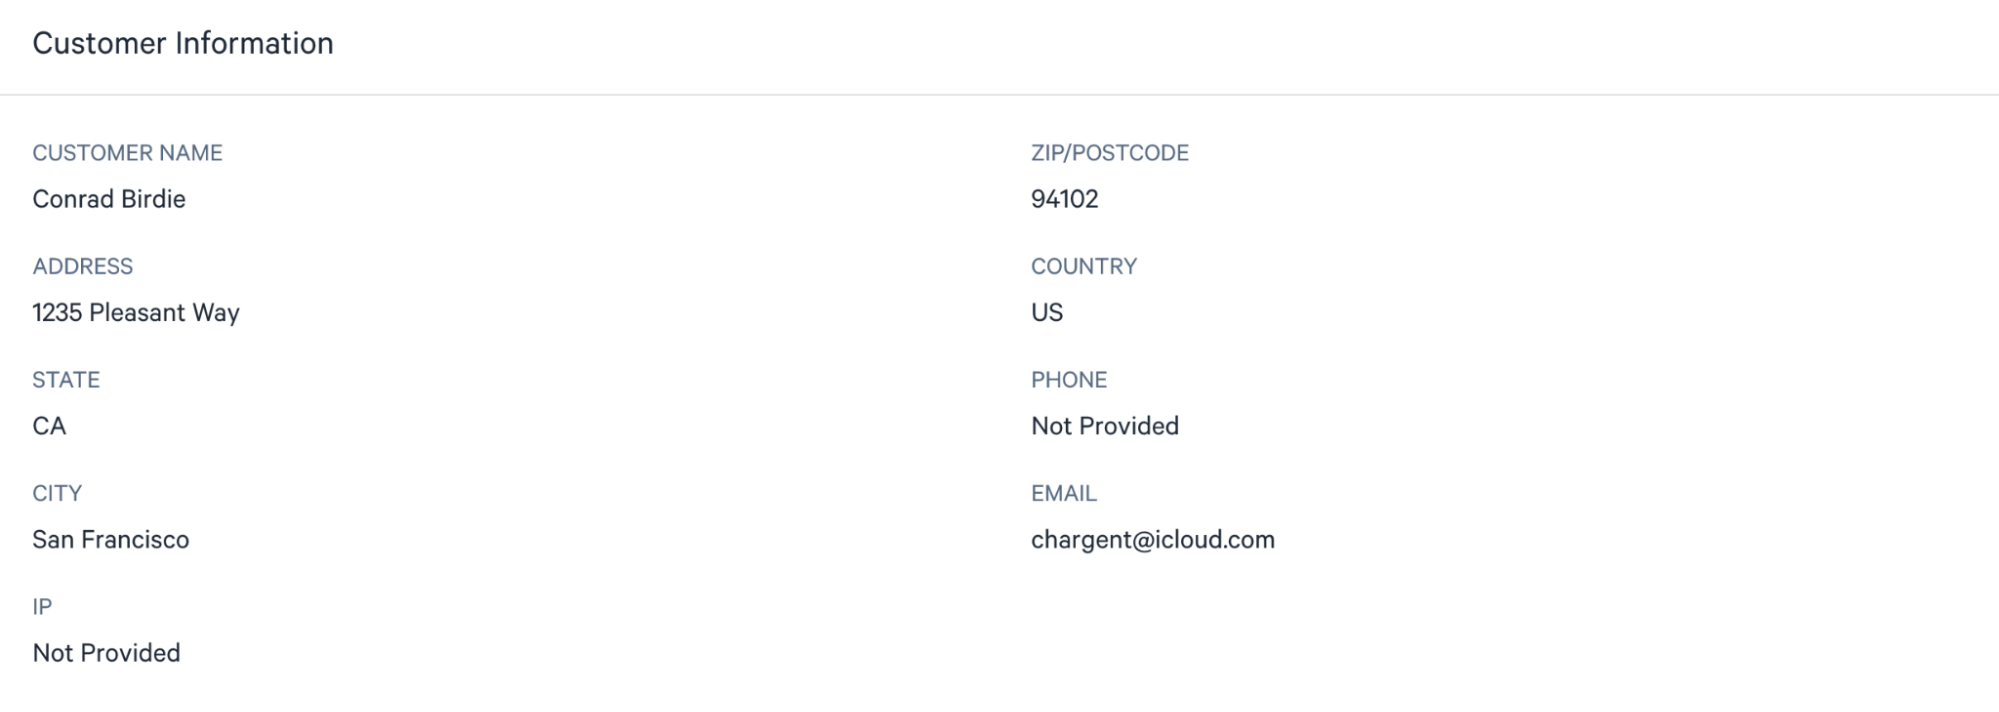
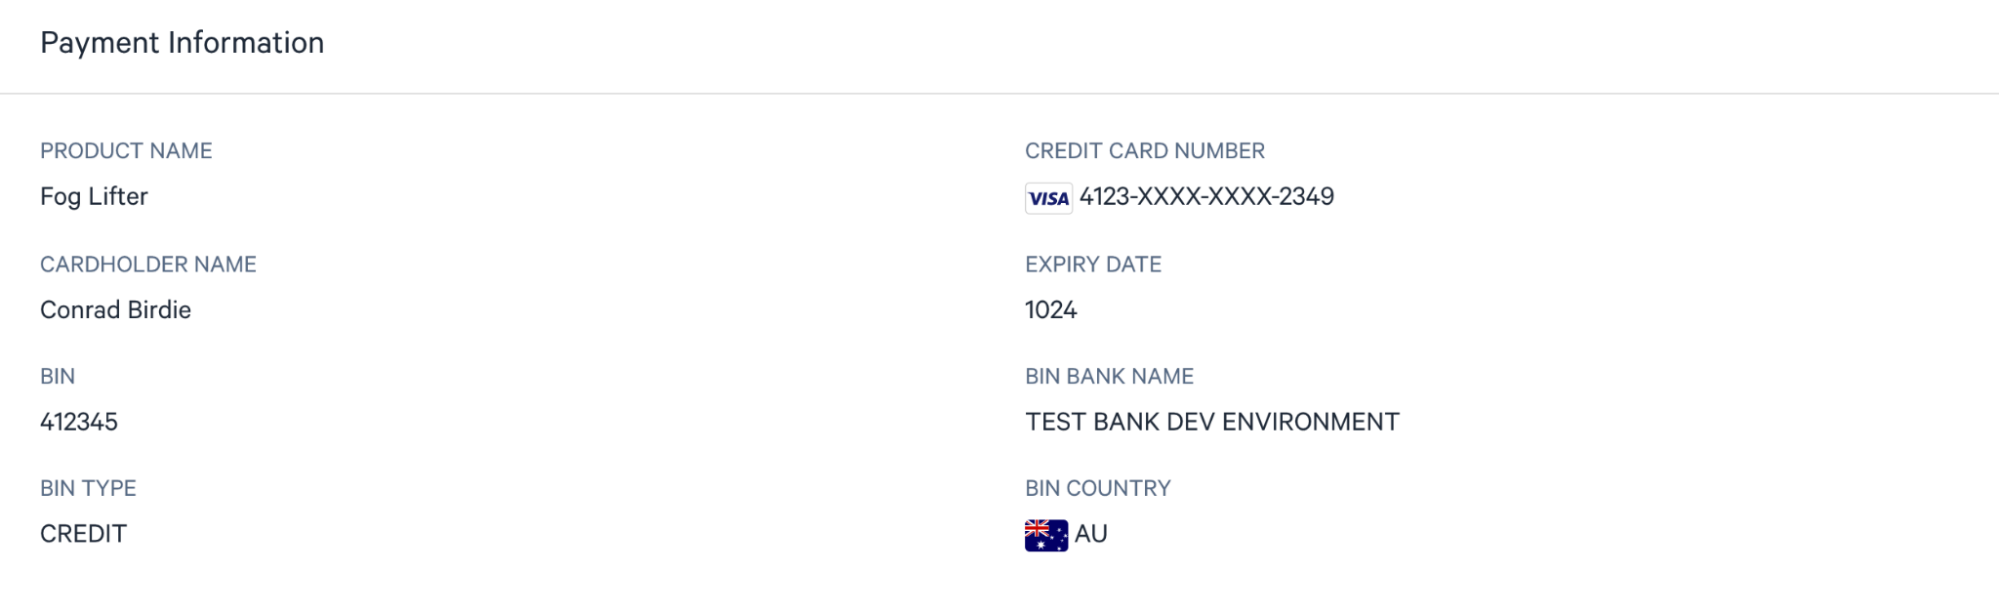
On the Chargent Order page click a Transaction ID link to see the details, as shown in the figure below. This transaction record contains the entire set of data that Merchant Warrior sends in its response, including transaction Type (Charge, Authorize, Refund or Void), the Response Status (Approved, Declined, Error), and any related approval or error messages.
Verifying Transactions in the Merchant Warrior Dashboard
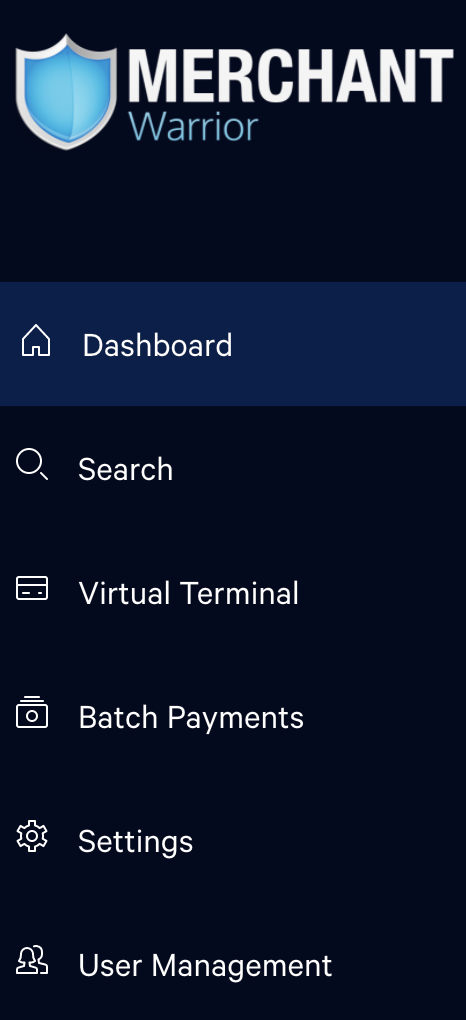
You can compare the transaction records in Salesforce with the records in your Merchant Warrior dashboard. Login to Merchant Warrior, and then click Dashboard. Scroll down to see the Recent Transactions.
Click anywhere on the transaction row to see all details for that transaction.
Correspondence in the Transaction Fields
The Gateway Date is the timestamp for the submission to Merchant Warrior, and the Gateway ID field corresponds to the Merchant Warrior Transaction ID for use in reconciliation between two systems.
This table contains the mapping information between Merchant Warrior and Salesforce fields.
| Salesforce field | Direction | Gateway field |
| Gateway ID | < | Transaction ID |
| Invoice Number | > | Transaction Product |
Moving to Production
NOTE: It’s important that you do not proceed here until the testing procedure described in Testing the Integration in Sandbox.
First, obtain the production credentials for the Merchant Warrior production gateway account (similar to the method given for sandbox credentials in Obtain a Merchant Warrior Sandbox Account.
Get these production credentials from your enrollment email message:
- User ID
- Password
Repeat the steps in the Configuring Salesforce for Merchant Warrior Integration section above, but substitute the production credentials.
Repeat the steps in the Testing the Merchant Warrior Integration section above with respect to the Salesforce production environment, using the production credentials. Remember to uncheck the “Test Endpoint” checkbox in the Gateway record to send transactions to production.
Be sure to successfully transmit at least one real credit card transaction using company or personal accounts. We recommend that you submit a transaction with a very small amount and then void that transaction afterwards. This ensures that the system works with your production credentials.
Tokenization
Chargent supports Merchant Warrior tokenization for credit card transactions (though not for direct debit, which is the Australian version of ACH/eCheck). This section contains the procedure for configuring the use of tokens that pass between Chargent and Merchant Warrior. Tokens are used to improve security by replacing account numbers in Salesforce, and referencing the data securely stored at Merchant Warrior.
By default, the Gateway record is set to clear the credit card data when a token is present. This is to help your company be PCI Compliant. You can change this (although it’s not recommended).
- Click the App Launcher and select the Chargent App
- Click the Gateways tab
- Click the Merchant Warrior Gateway Name
- Click Edit
- Click Advanced Settings
- Under Credit Card and Bank Account Handling select from the following.
Clear When Token Present – Chargent will erase the credit card number, expiration date, and card security code after any transaction (Charge, Void, Refund) for a card only if there is a value in the token field.
- Never Clear – Chargent will not automatically remove card data.
- Clear After Successful Charge – Chargent will clear the credit card number, expiration dates, and card security code only after a successful charge occurs for a card.
- Clear After All Transactions – Chargent will erase the credit card number, expiration date, and card security code after any transaction (Charge, Void, Refund) occurs for a card.
- Click [Save]
![]()
NOTE: After your first successful transaction, the token is stored in the Chargent Token field in Salesforce and the credit card fields are handled according to the choice in the Credit Card Data Handling field.

